MonTeas Website Tutorials for David... Enjoy!
Meta-Title should be around 60 characters long, be highly relevant to the article and contain the SEO Keyword from further up the page if possible. Meta-Keywords are actually key phrases and you should use 5-8 for best effect, Meta-Description should be around 160 characters long, it should be readable and enticing.
A Very Brief Primer on SEO Guidlines
SEO Keyword
Slightly misleading, the SEO Keyword is actually a phrase. Think of a good 2-5 word phrase that sums up what the article is about. Think what someone would type into Google if they wanted to find the product or blog post that you're offering up.
When creating a new blog-post there is a specific field for the SEO Keyword, be sure to use it.
Meta Title
Meta-Title should be around 60 characters long, be highly relevant to the article and contain the SEO Keyword if possible. Capitalise the words for best effect. If you can get "MonTeas of Monmouth" in there put it at the end separated by a -. eg A Really Ripping Blog Post - MonTeas of Monmouth
Meta Description
Meta-Description should be around 160 characters long, it should be readable and enticing. Don't capitalise the words and never-ever use all caps.
Meta Keywords
Meta-Keywords are actually key phrases and you should use 5-8 for best effect. Be relevant and don't repeat words too often. Think of different ways to say the same thing eg. decaffeinated tea - caffeine free tea. Don't use any capitals, even for names, places etc. Don't use punctuation or special characters at all. Lower case letters and commas to separate the phrases.
The aim is to think of phrases that people might type in to Google to find your product or blog post.
Here's what I did for the Decaffeinated Teas product category SEO keywords: decaffeinated loose leaf tea, caffeine free tea, loose leaf decaf tea, loose leaf tea, premium decaffeinated tea, quality tea decaffeinated, quality tea caffeine free
Google Listings
In the Google listings here how the Title and Description appear

Back to the Menu
Adding and Amending the Information Pages - About Monteas, Brewing Guide etc.
1. Click on Catalog in the side menu
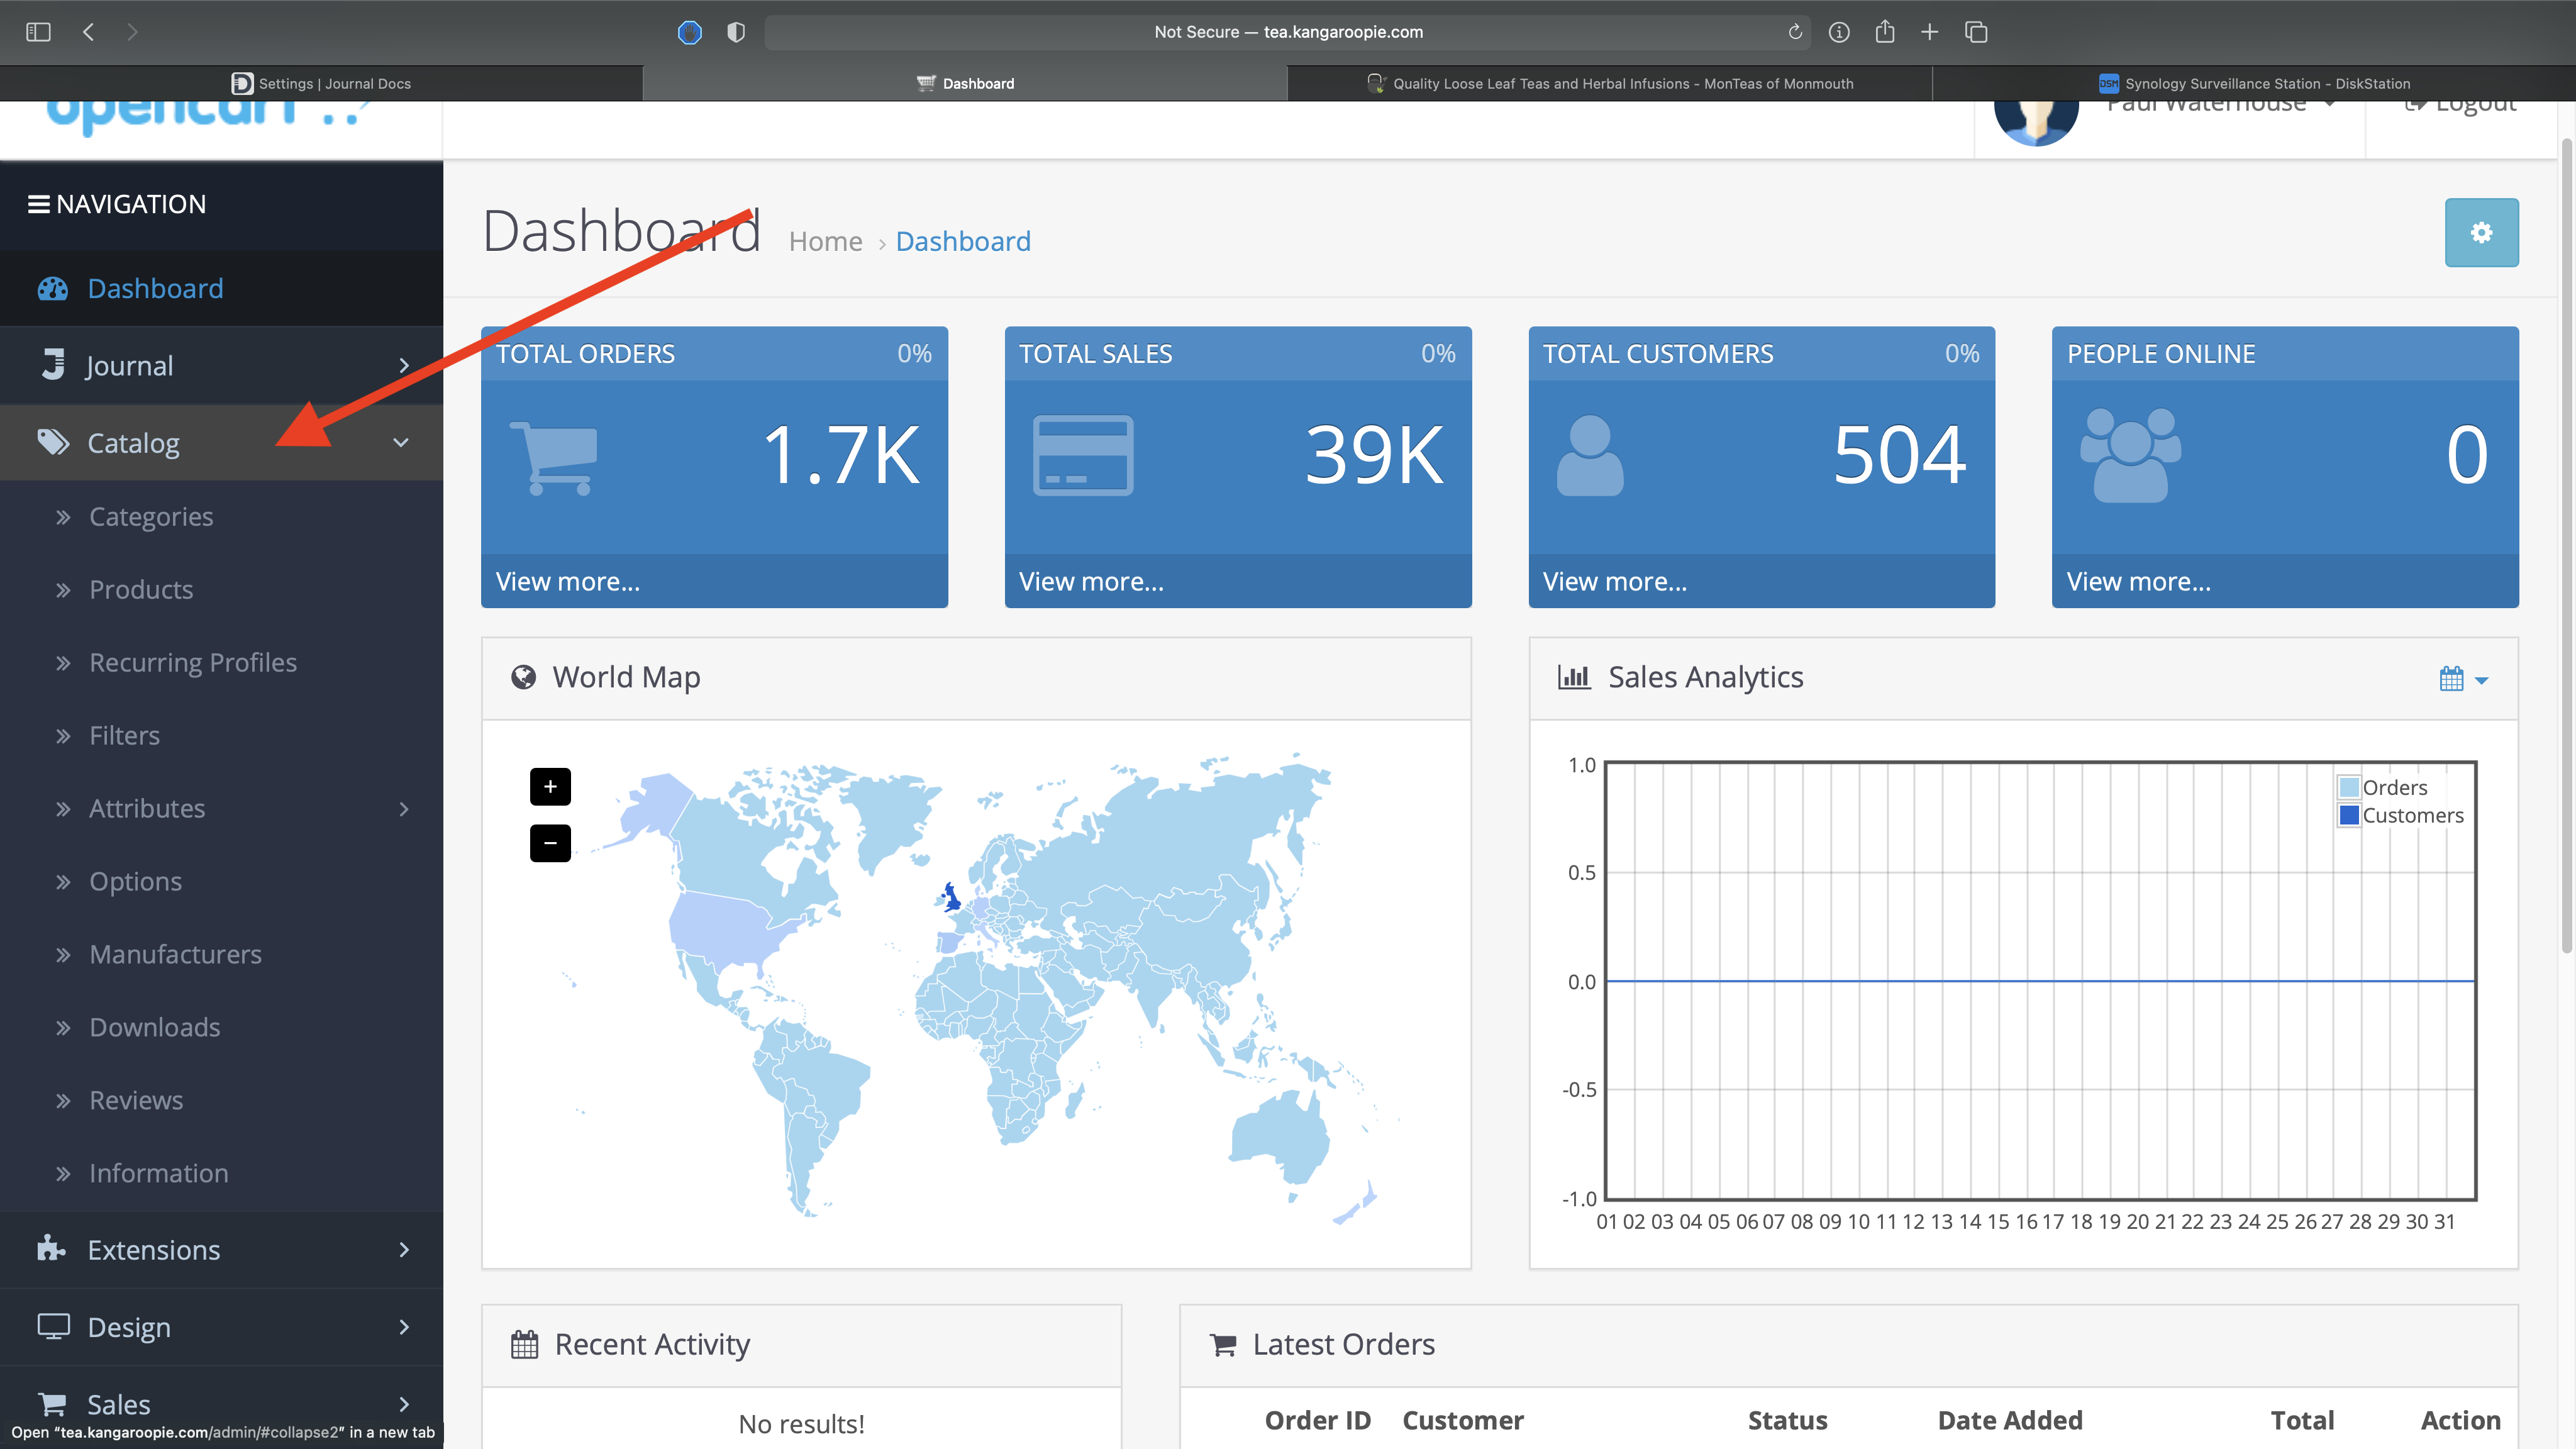
2. Then click on Information

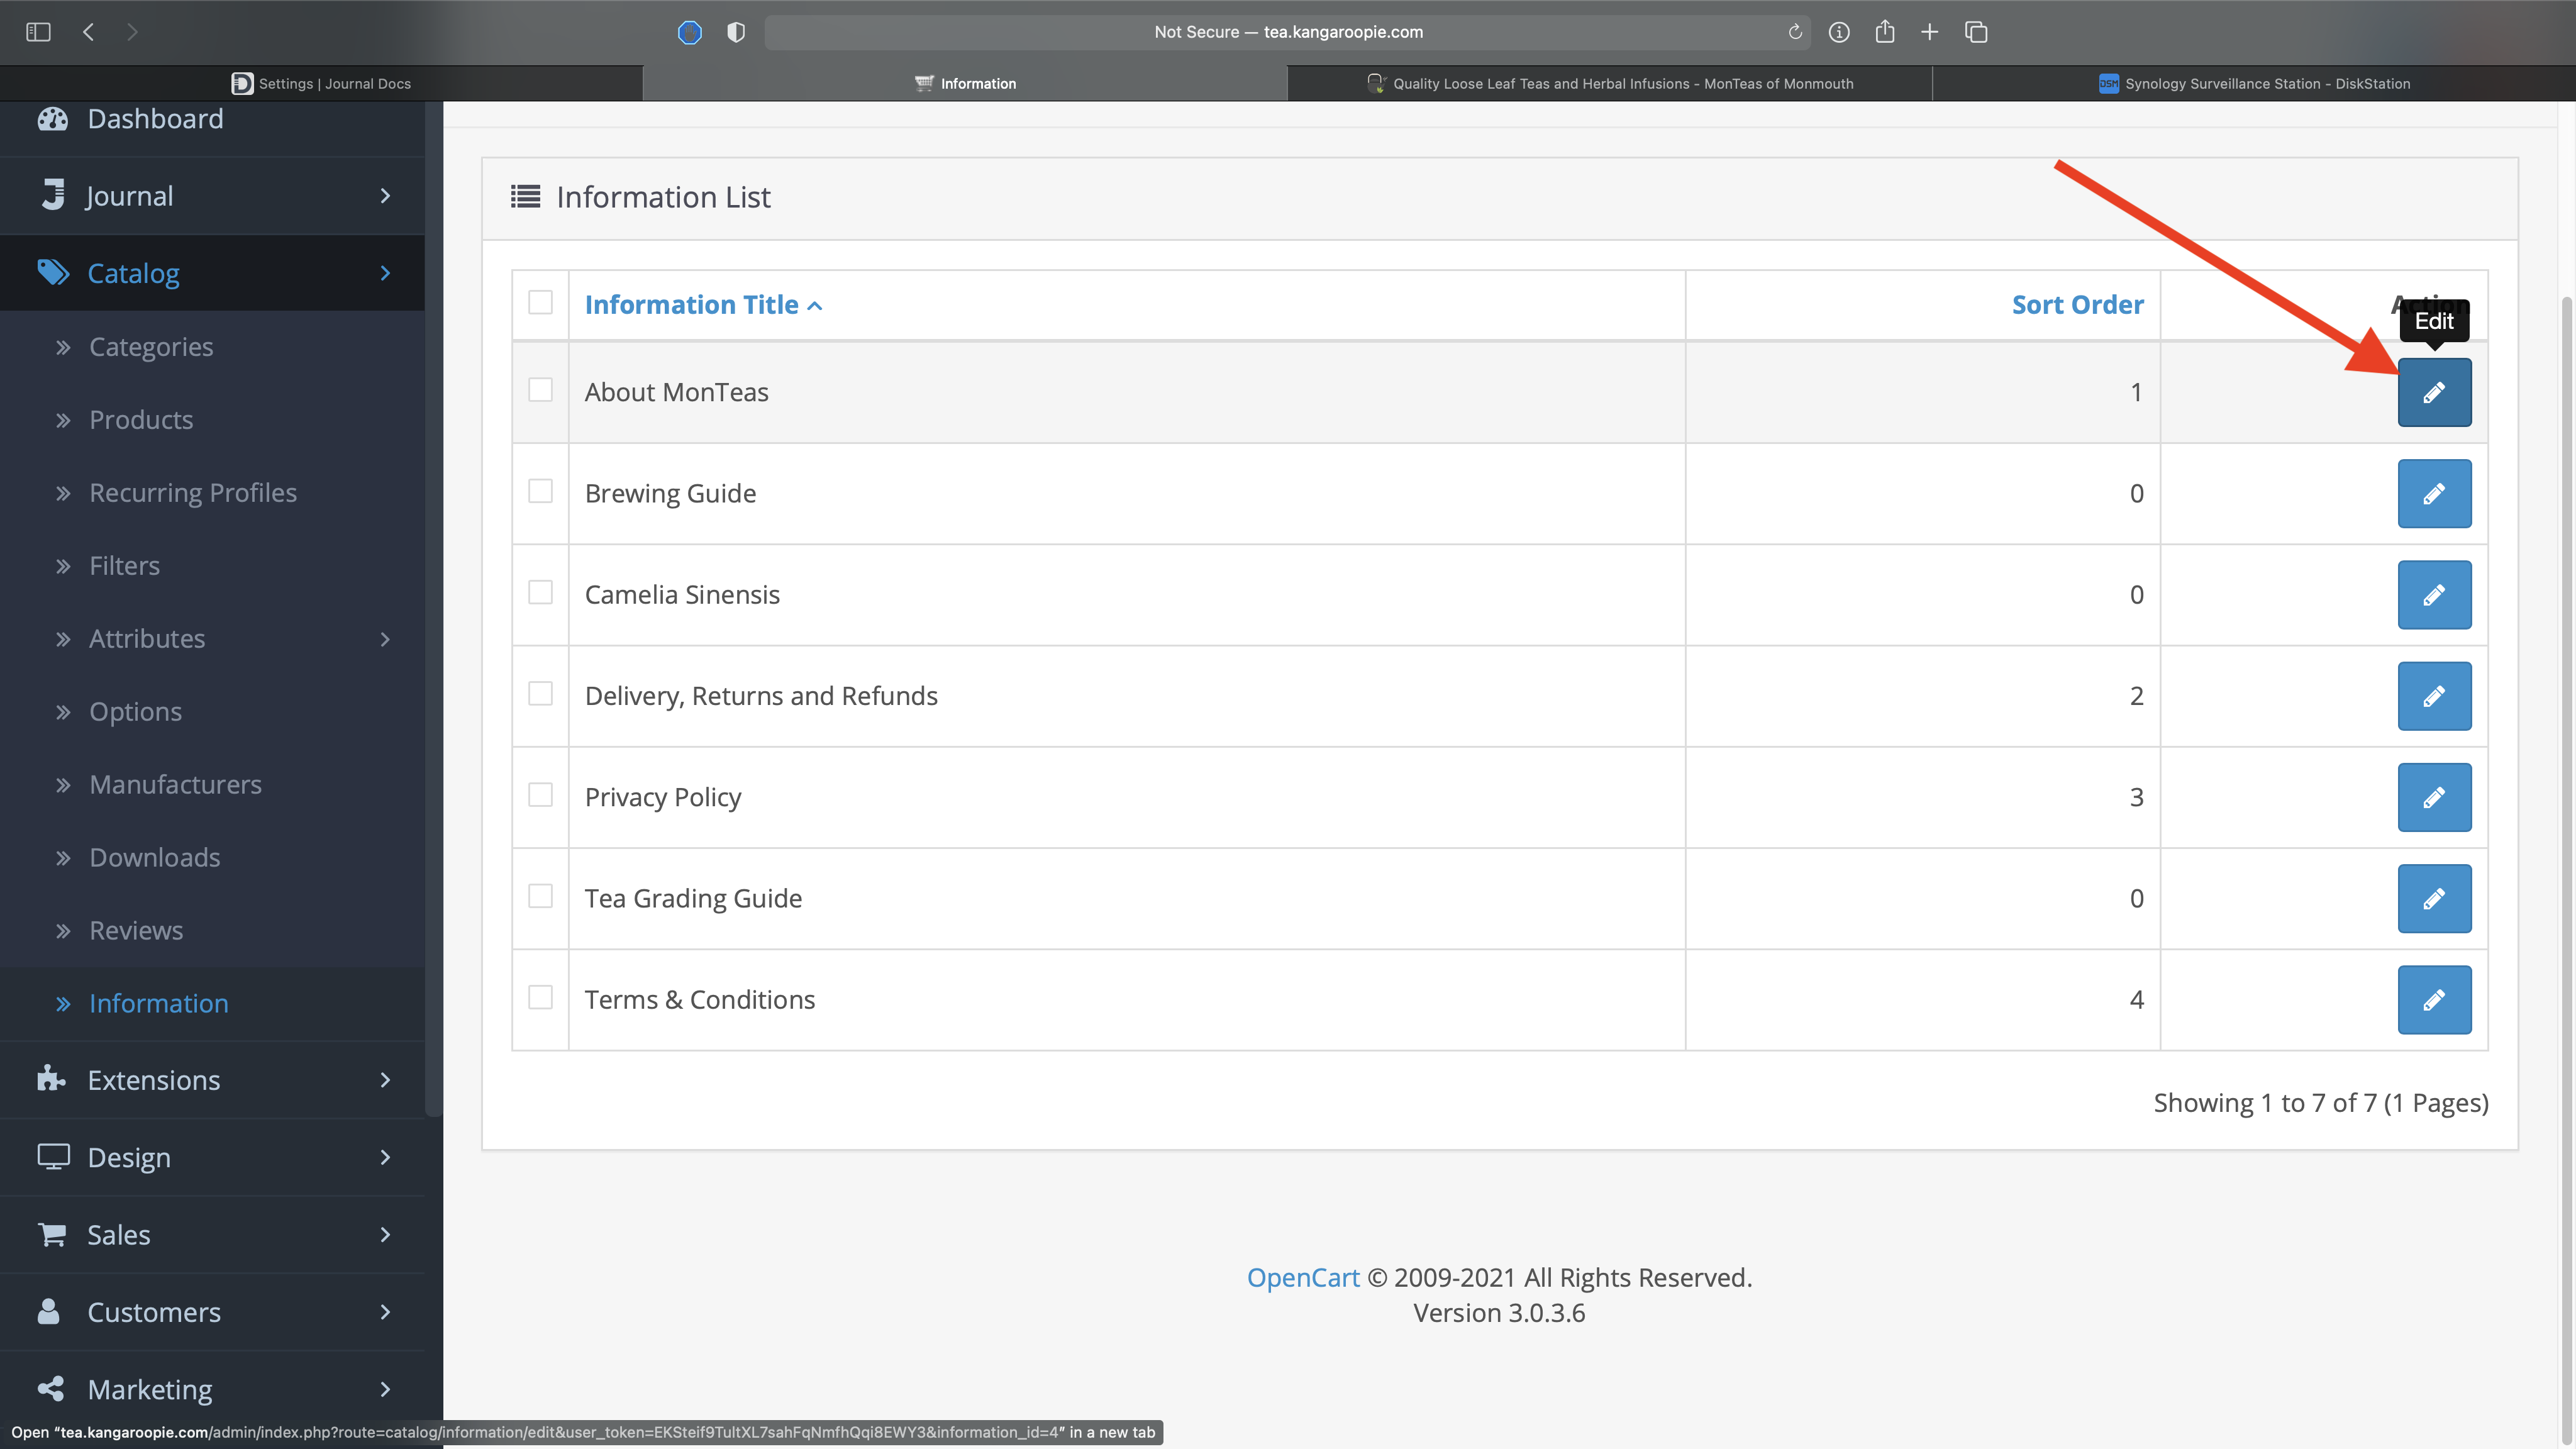
3. A list of the information pages will appear. Click the blue 'edit' button next to the page you want to edit
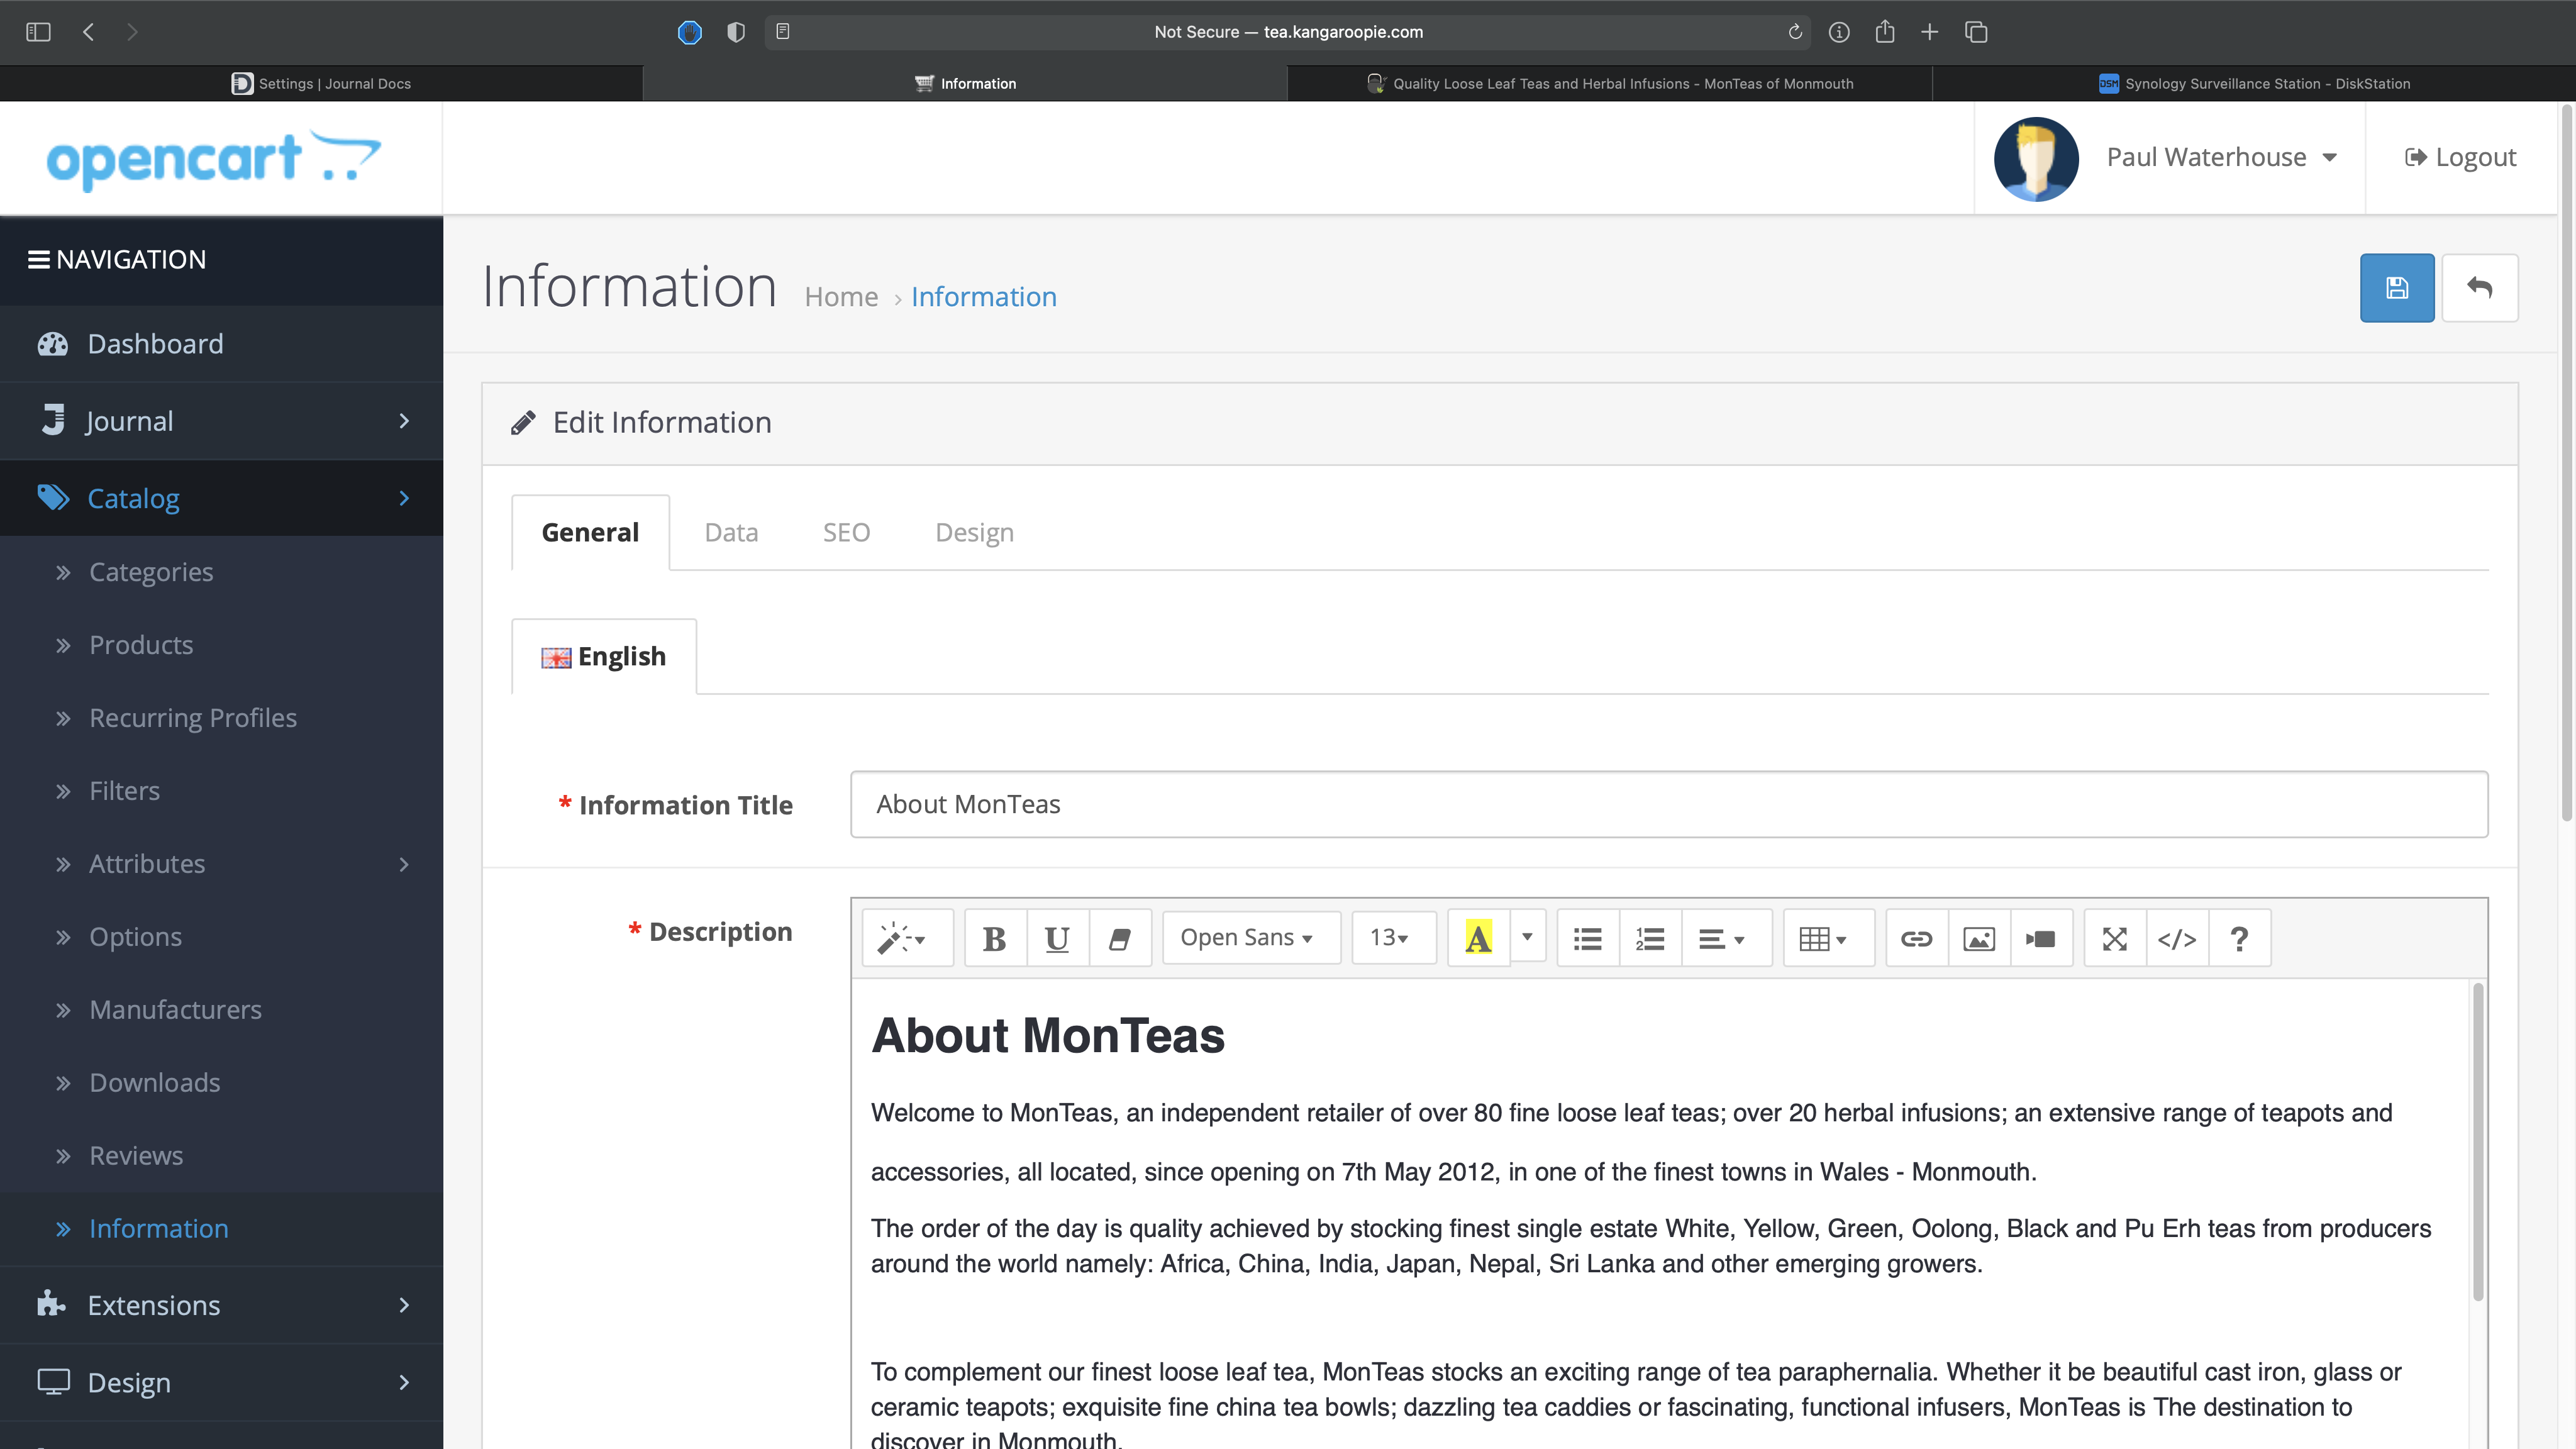
4. Edit away! Use the main window of the edit page just like a word processor. Try to avoid changing fonts and applying too much formatting to the text as the Journal theme applies some of it's own styles to keep everything looking consistent. If copying and pasting text from Pages or MS Word etc try to make sure it is clean text and not marked up with lots of formatting information.
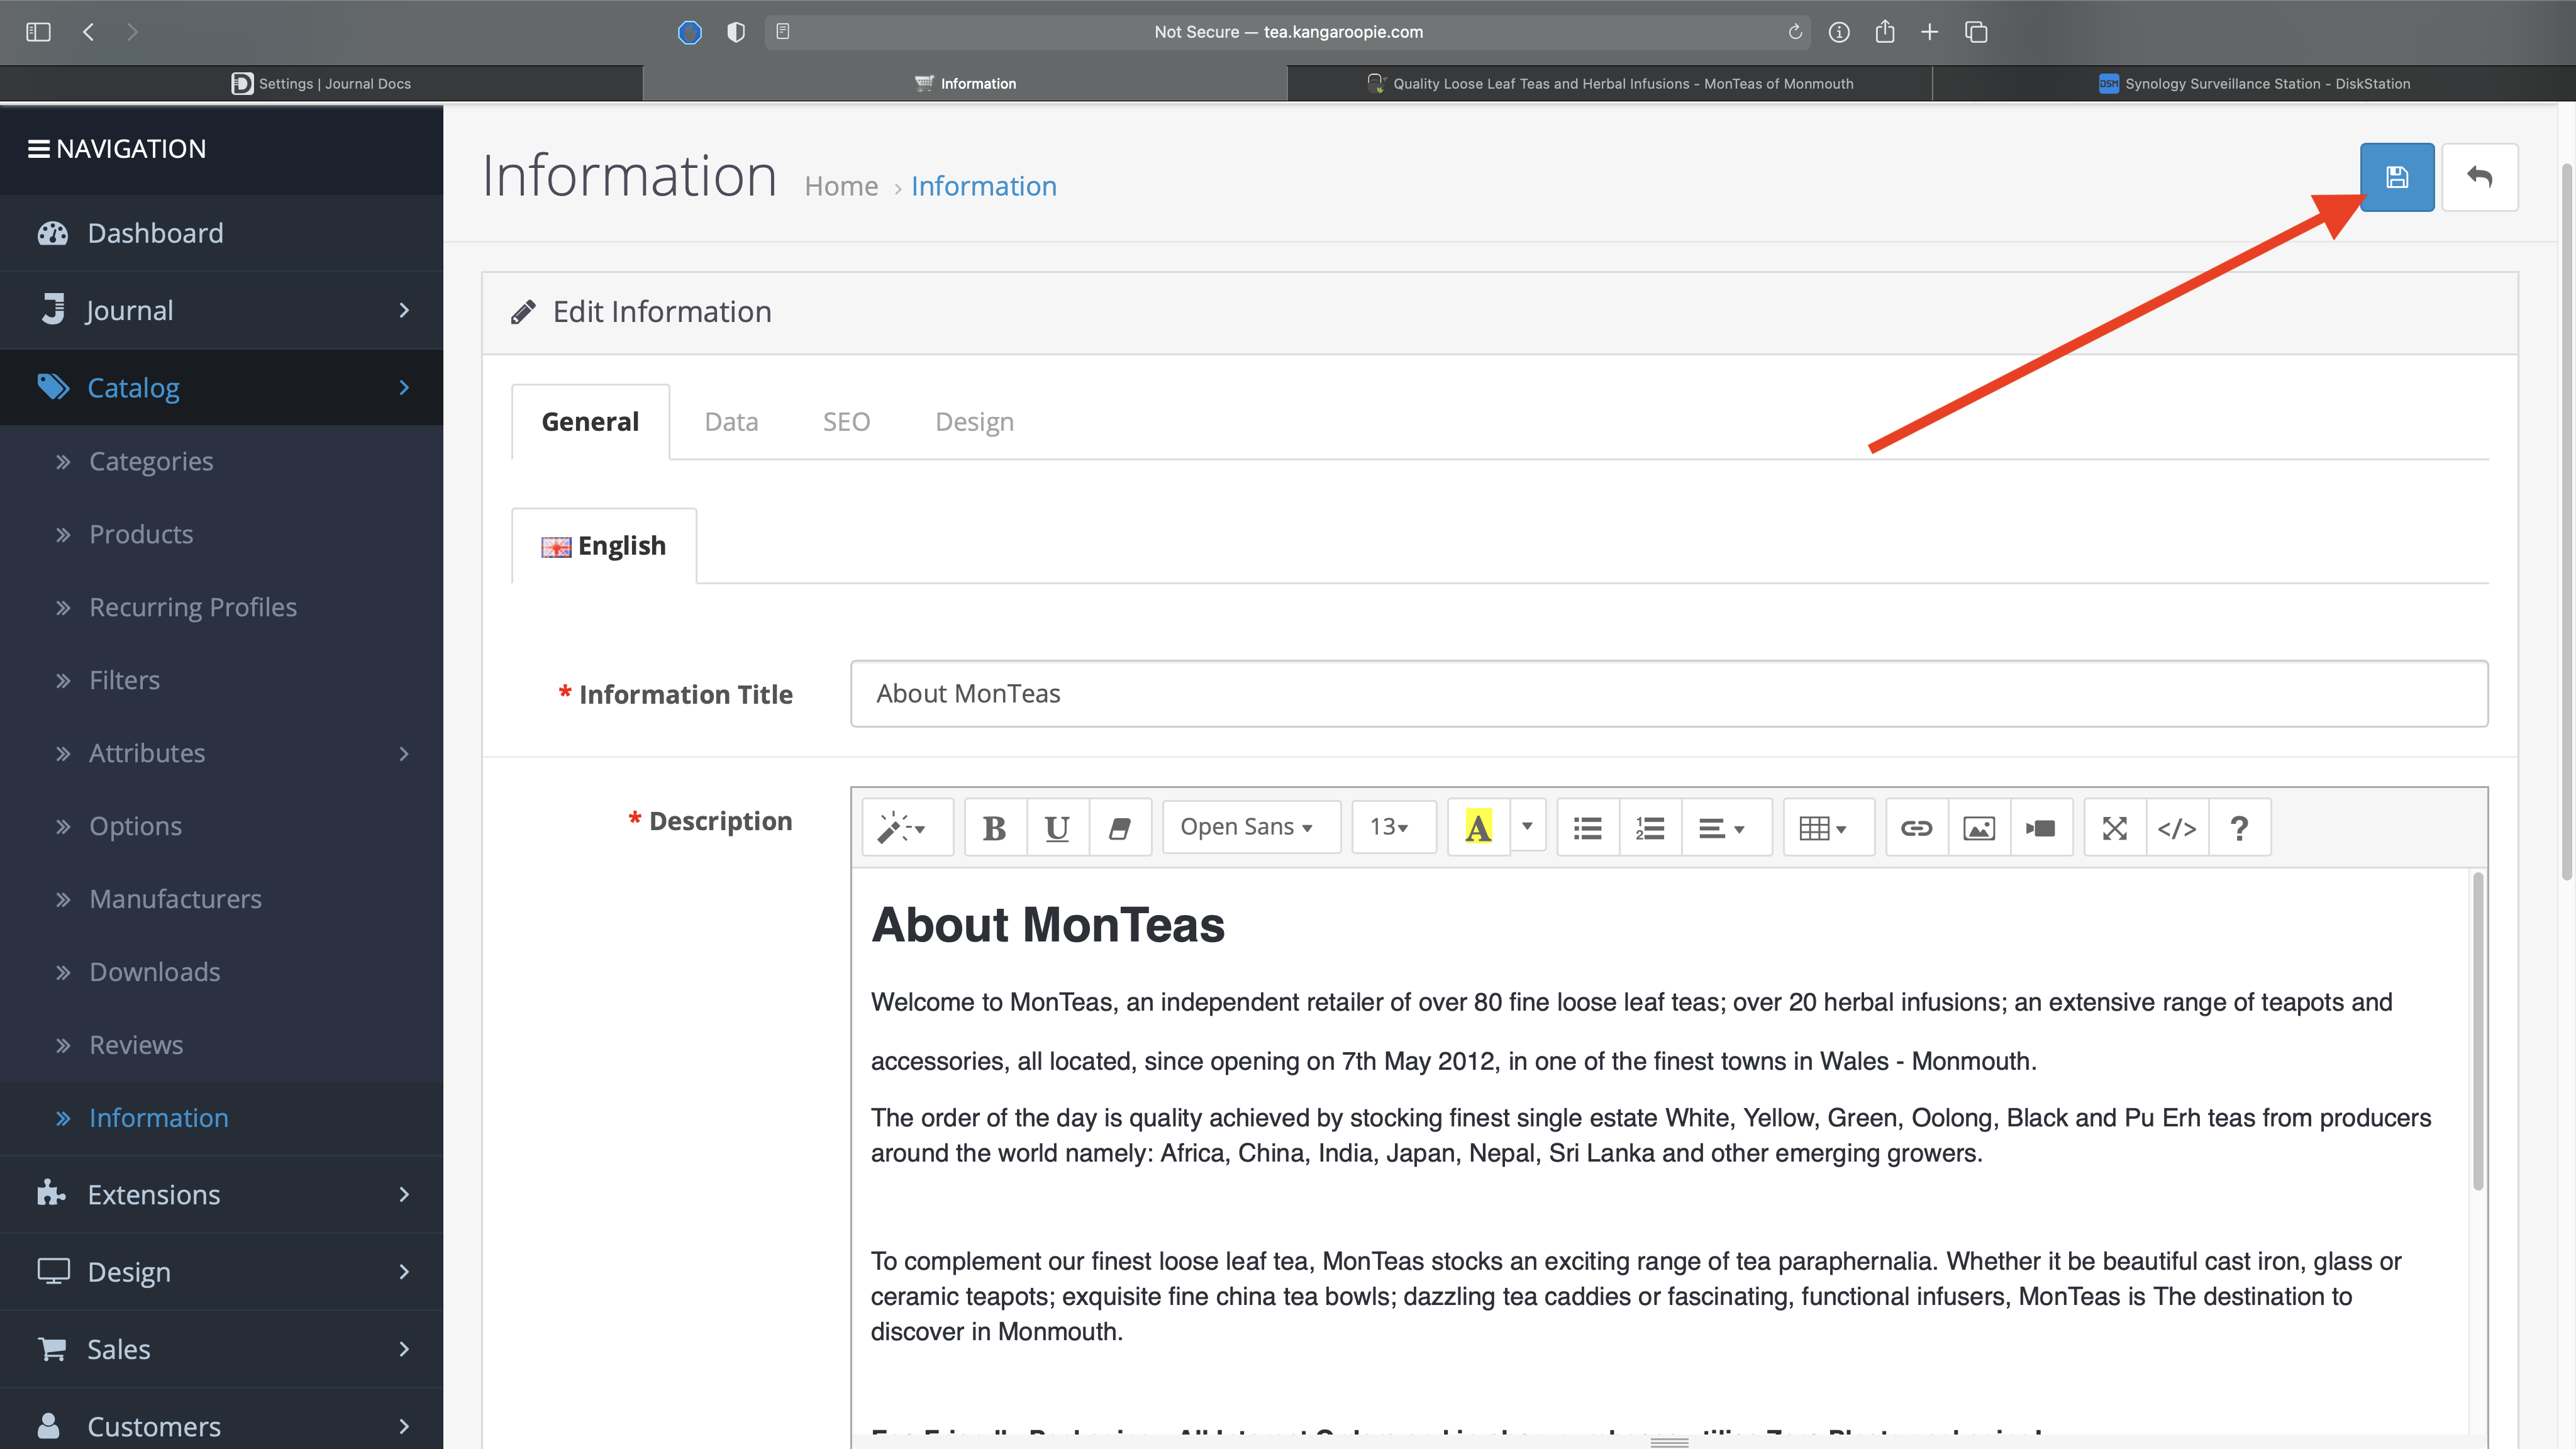
5. When you're done, click the blue 'Save' button in the top-right corner
Back to the Menu
Amending the Tea Garden of the World Section
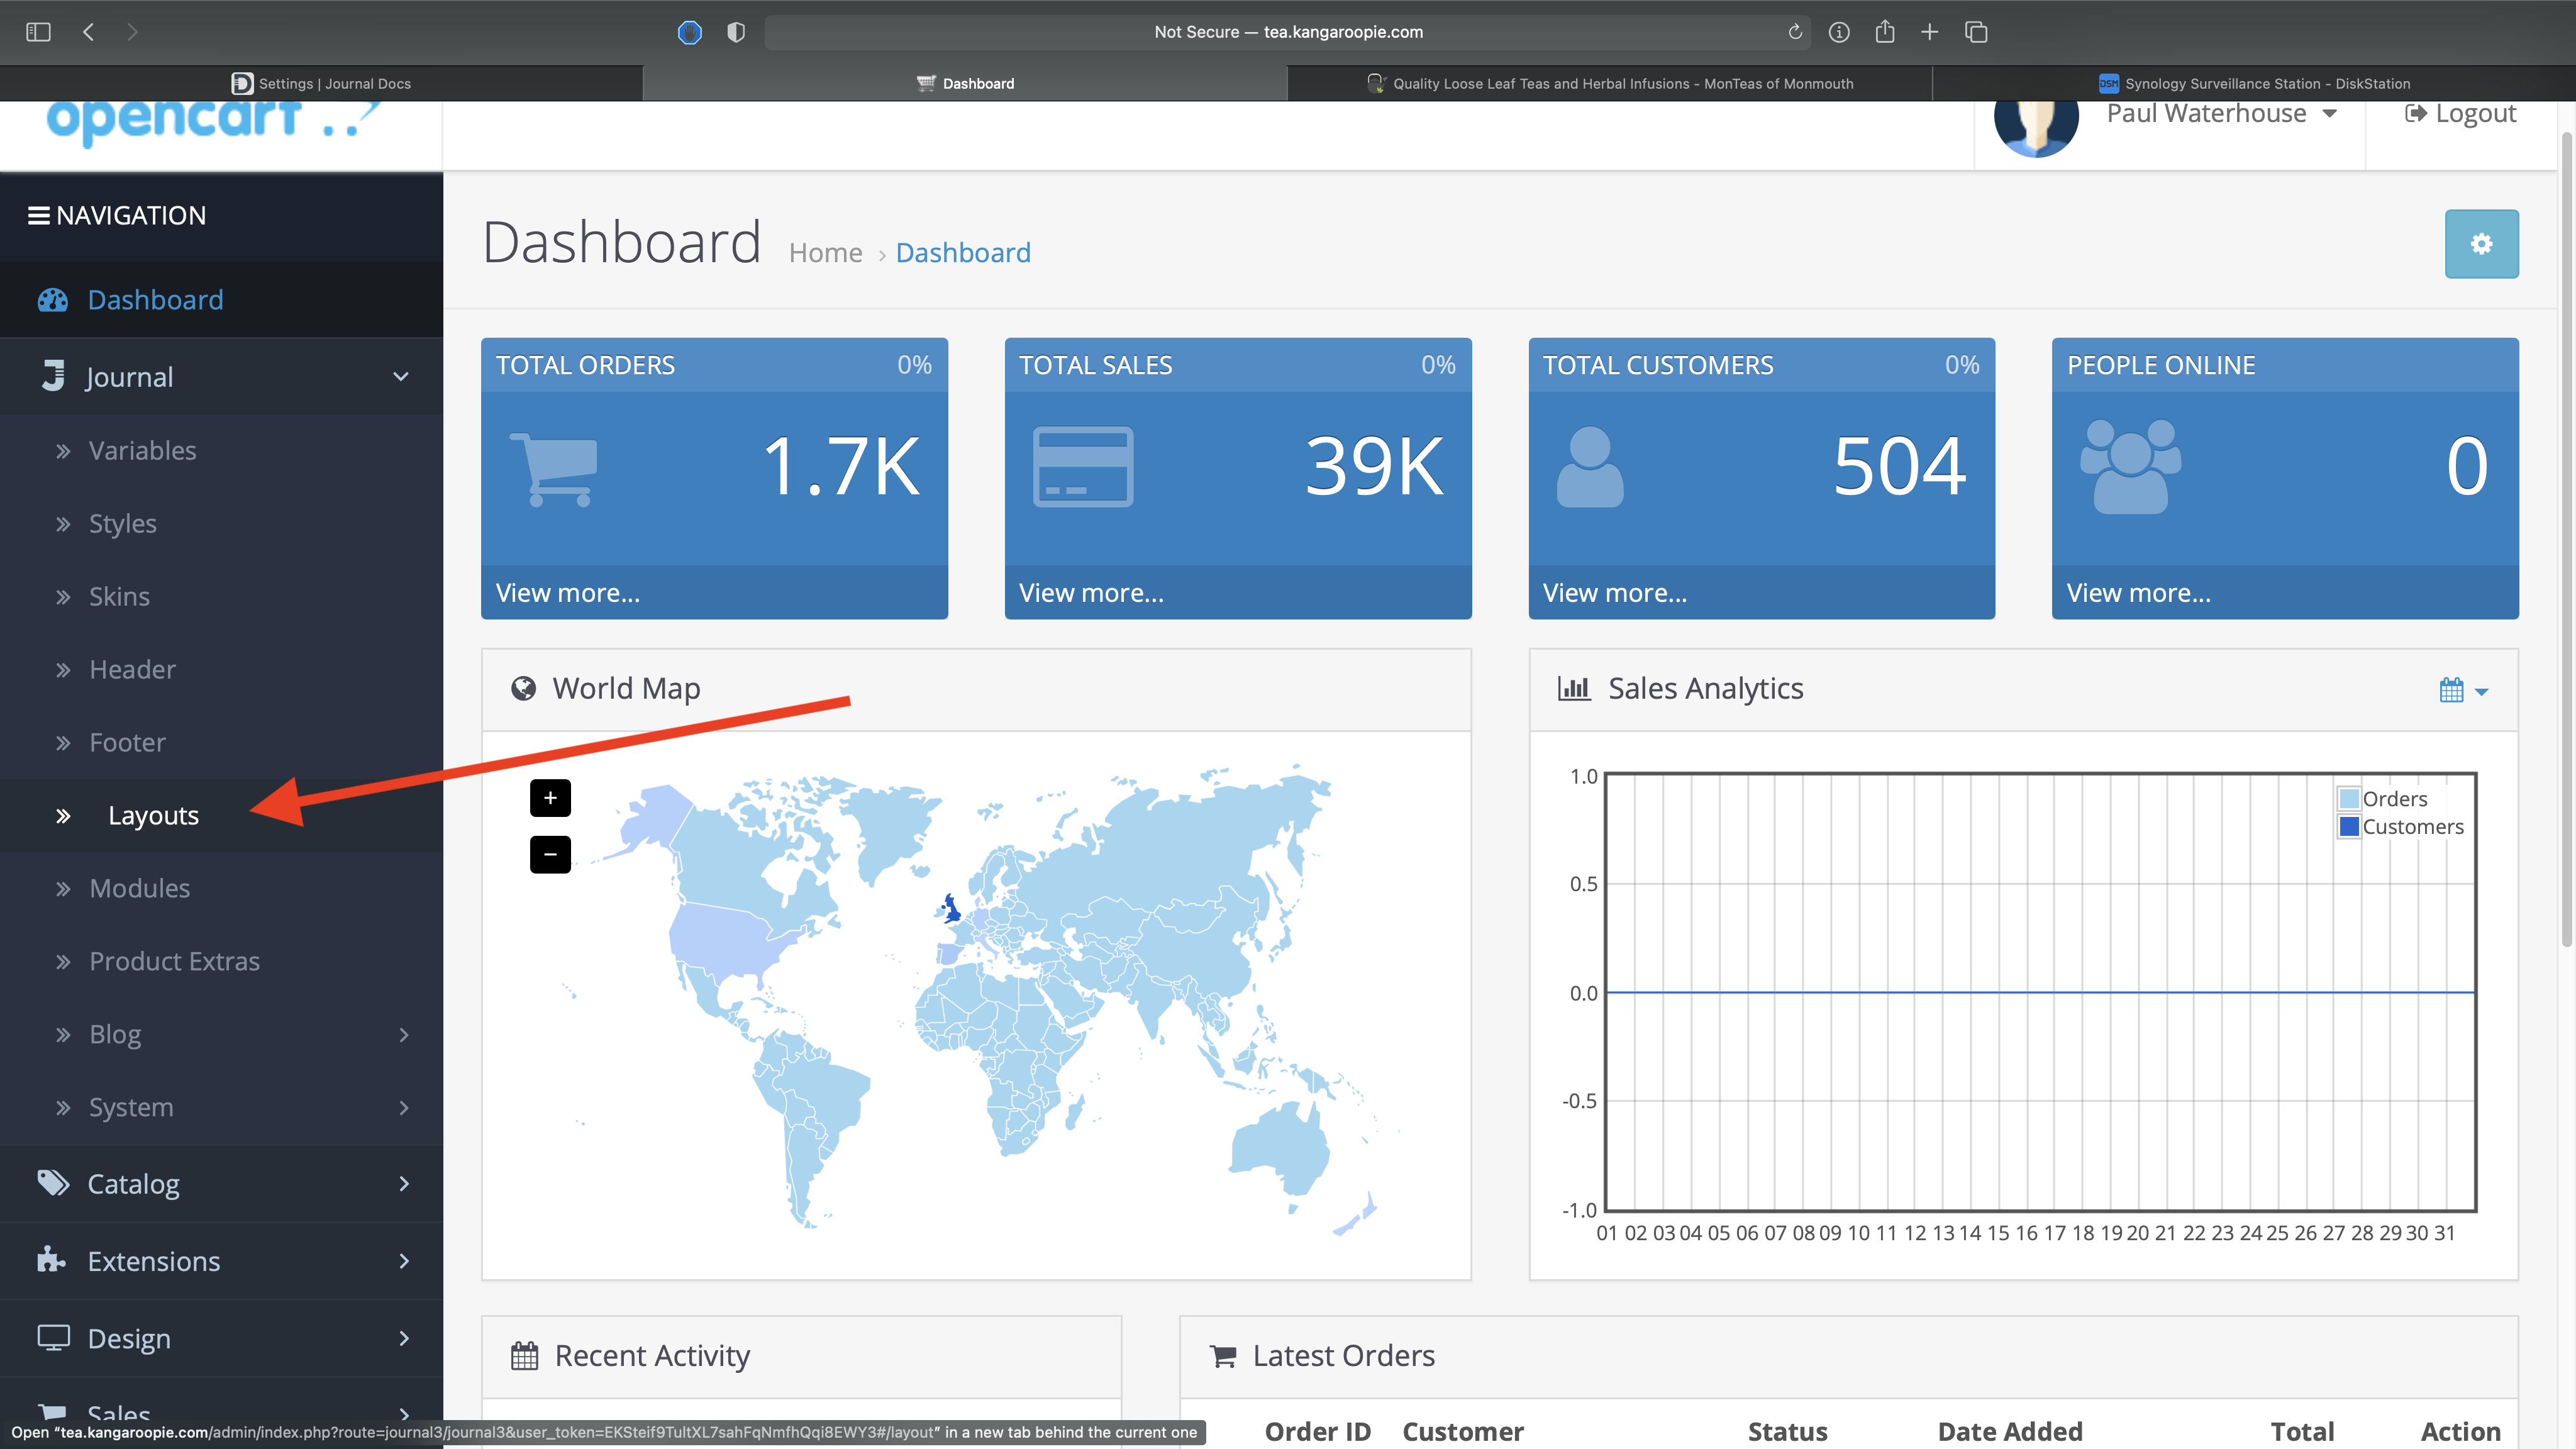
1. Click on Journal in the side menu, then click on Layouts
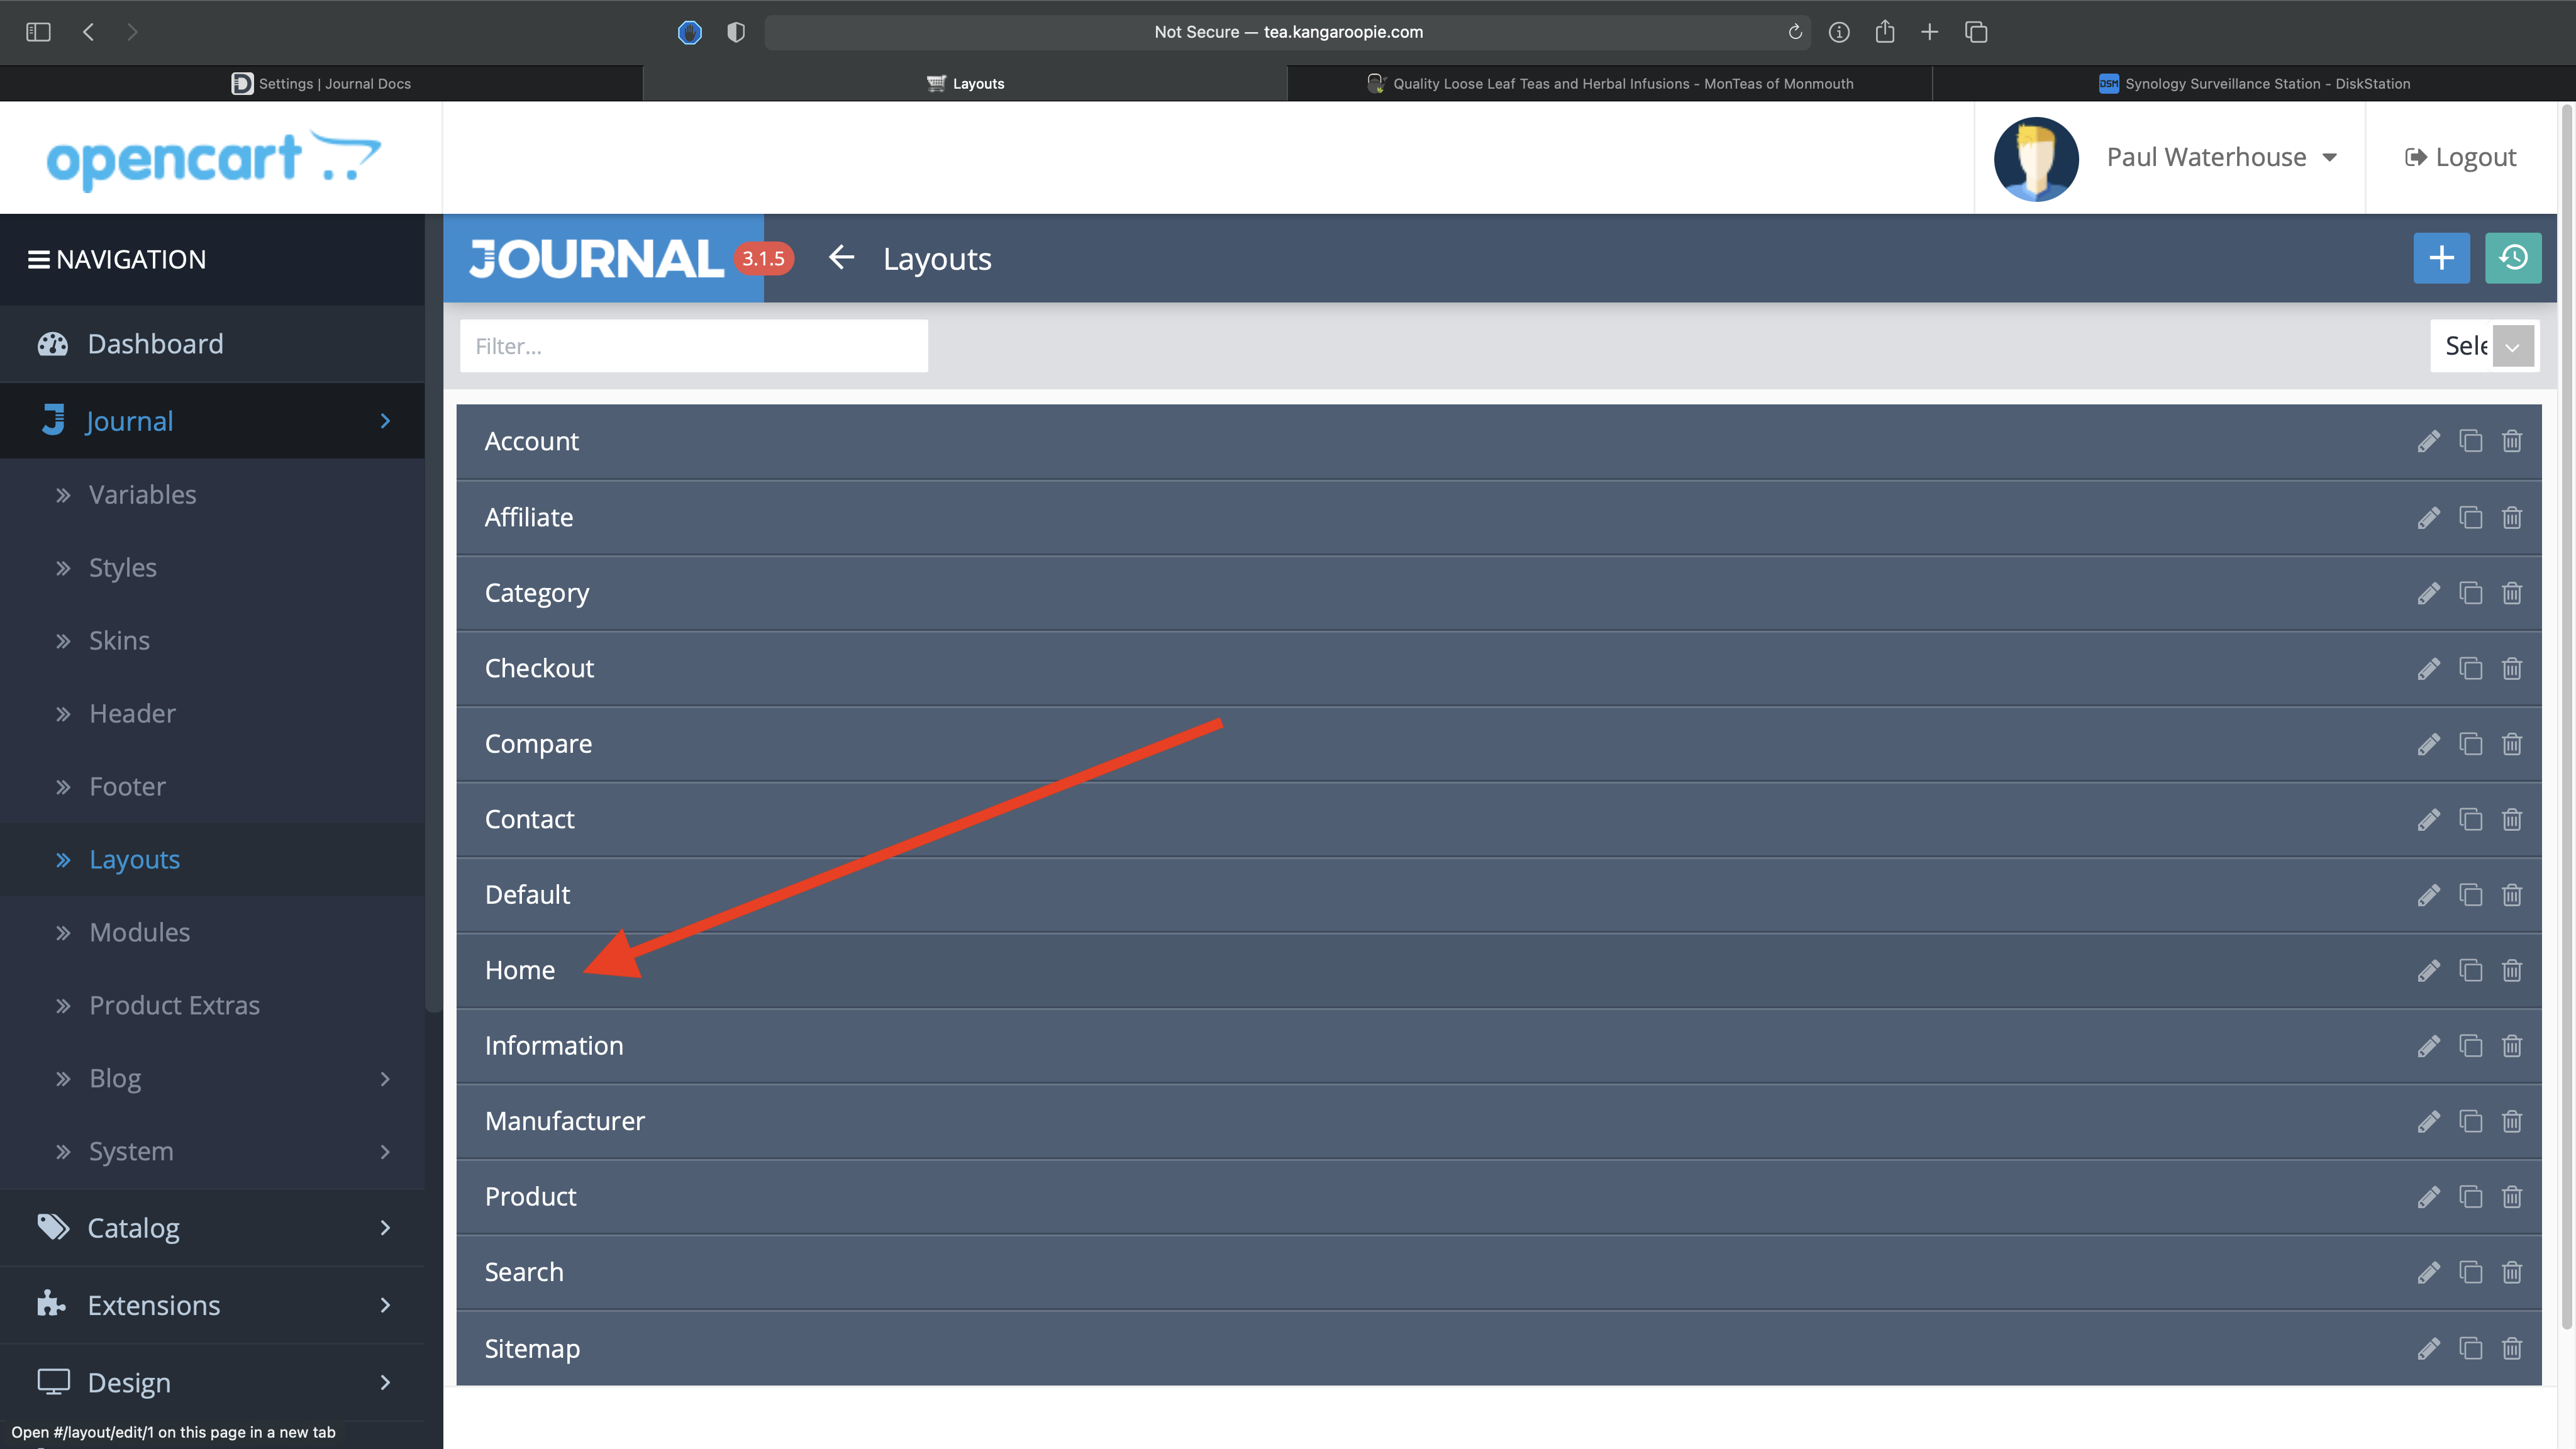
2. From the list click on Home
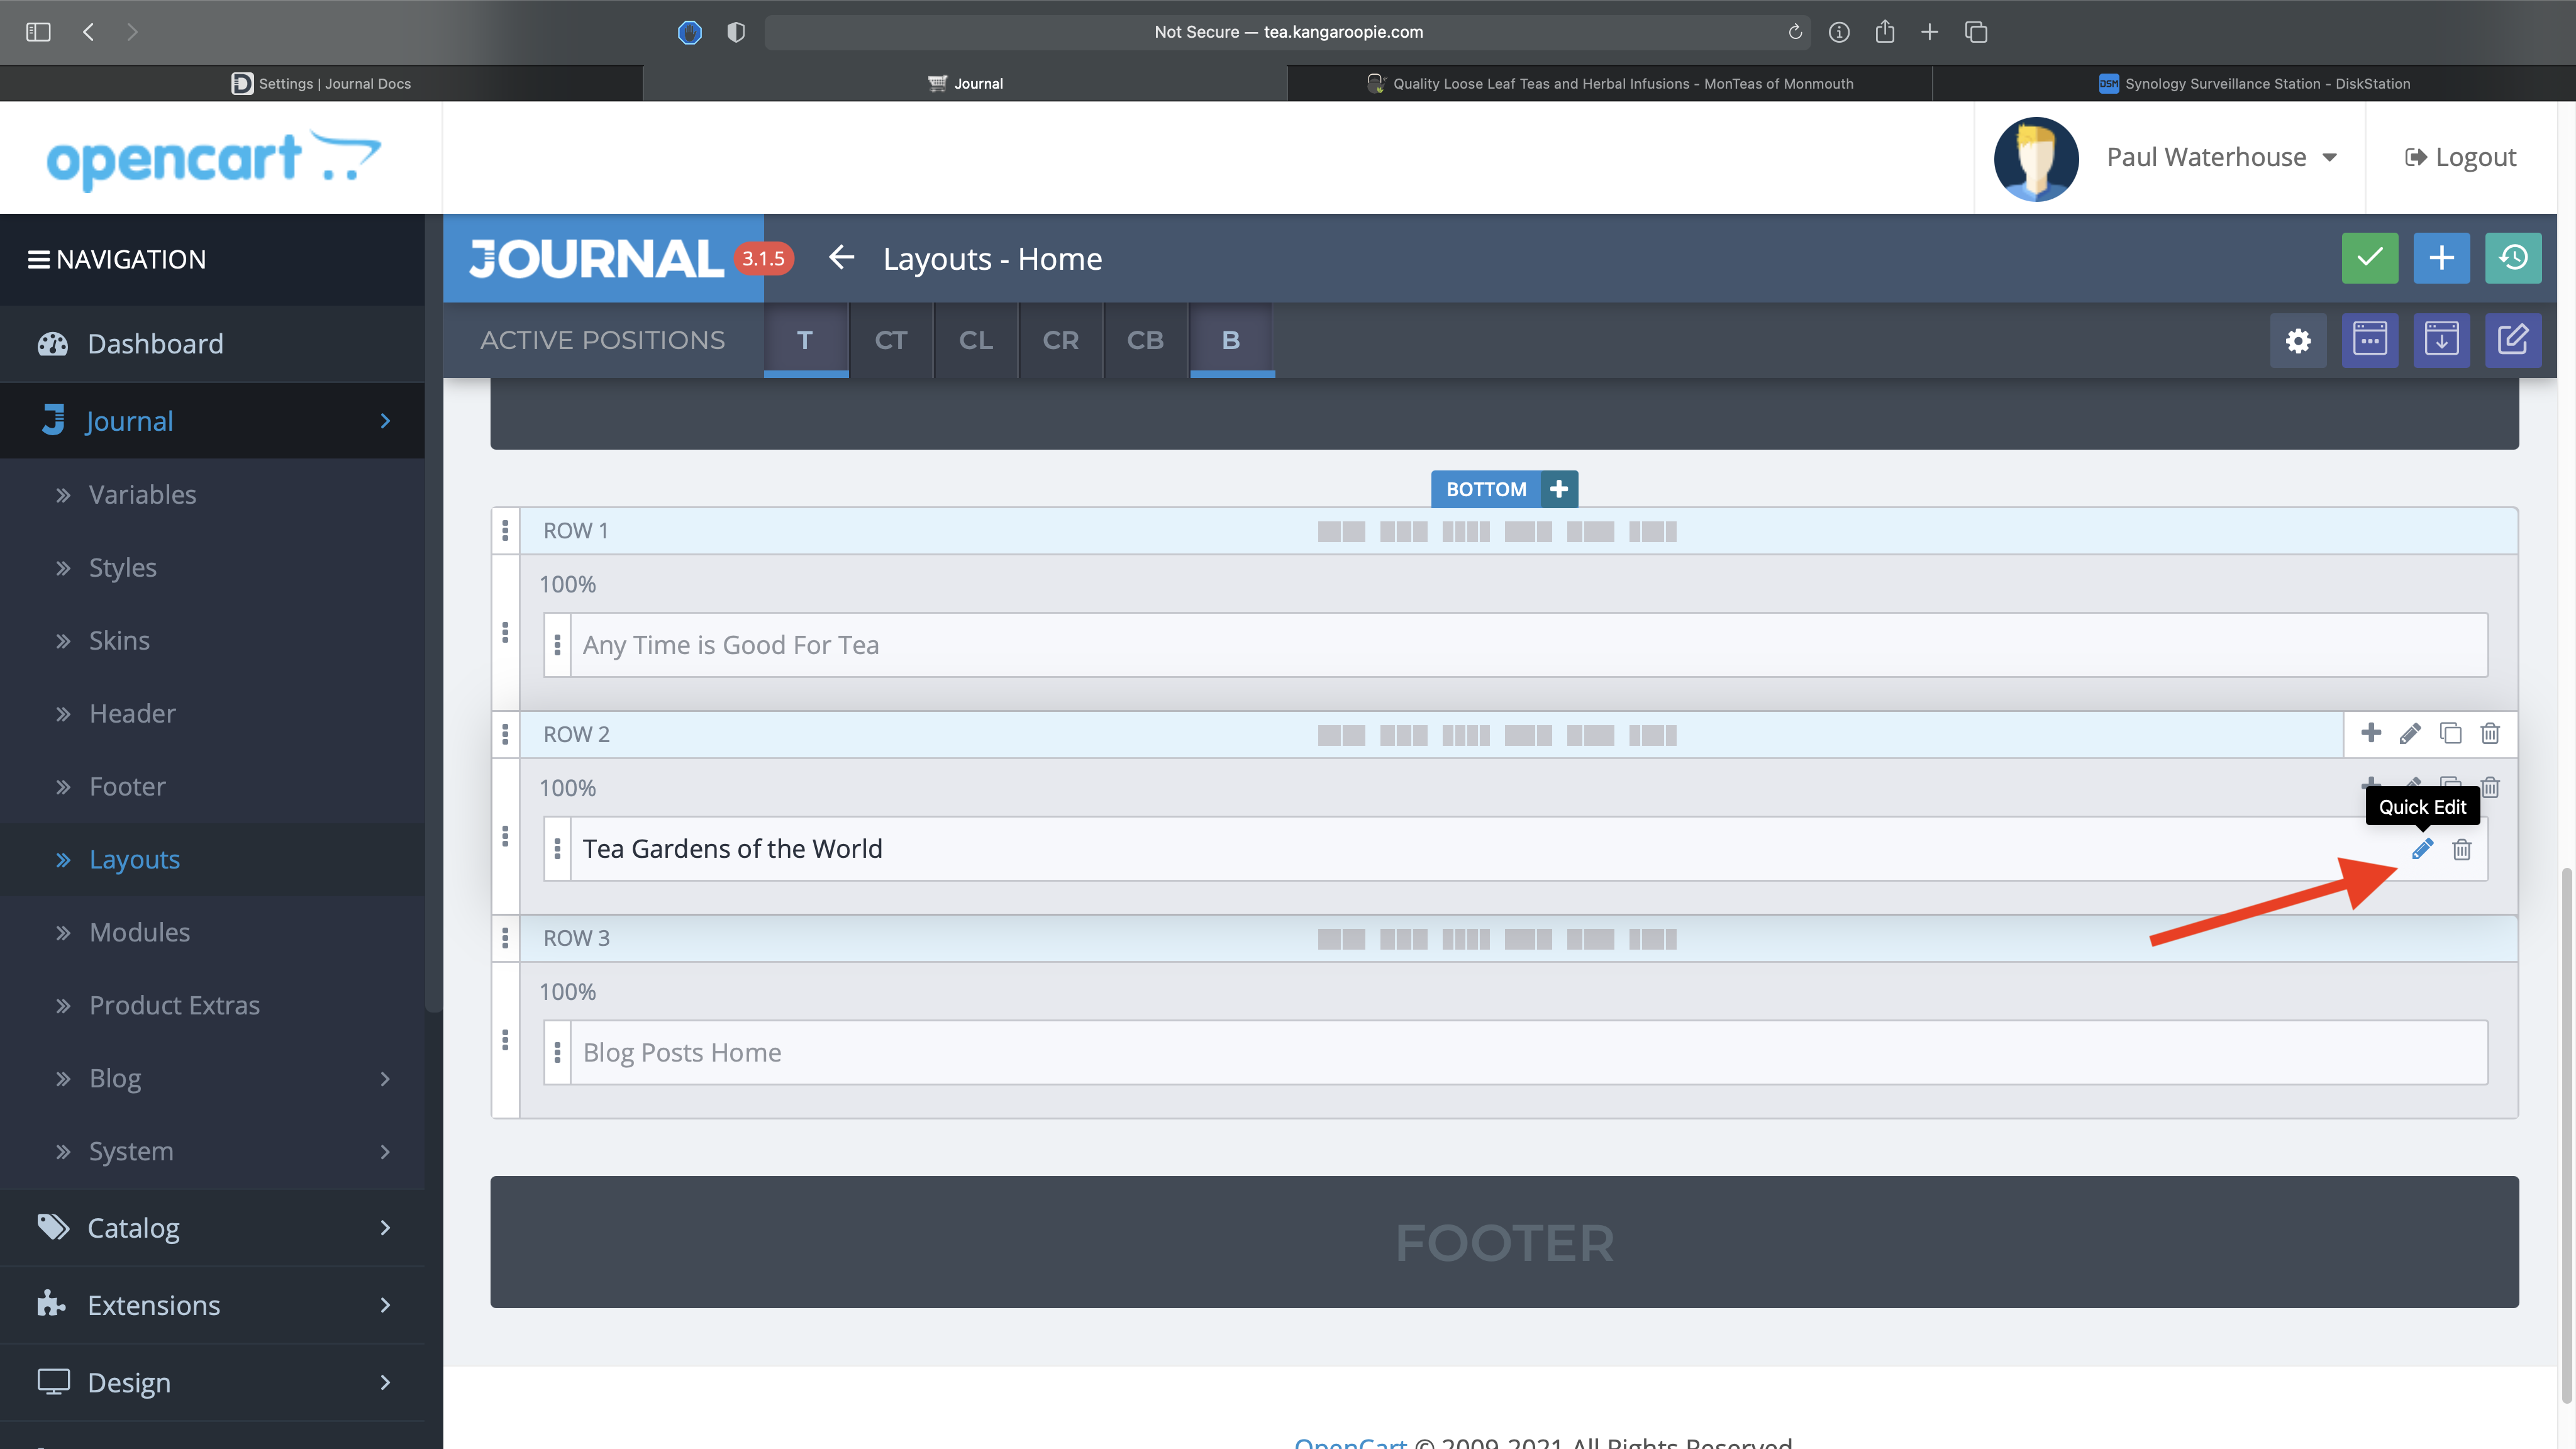
3. Scroll down the page and you'll see the Tea Gardens... module. Click on the pencil icon on the right-hand side to open the editing window
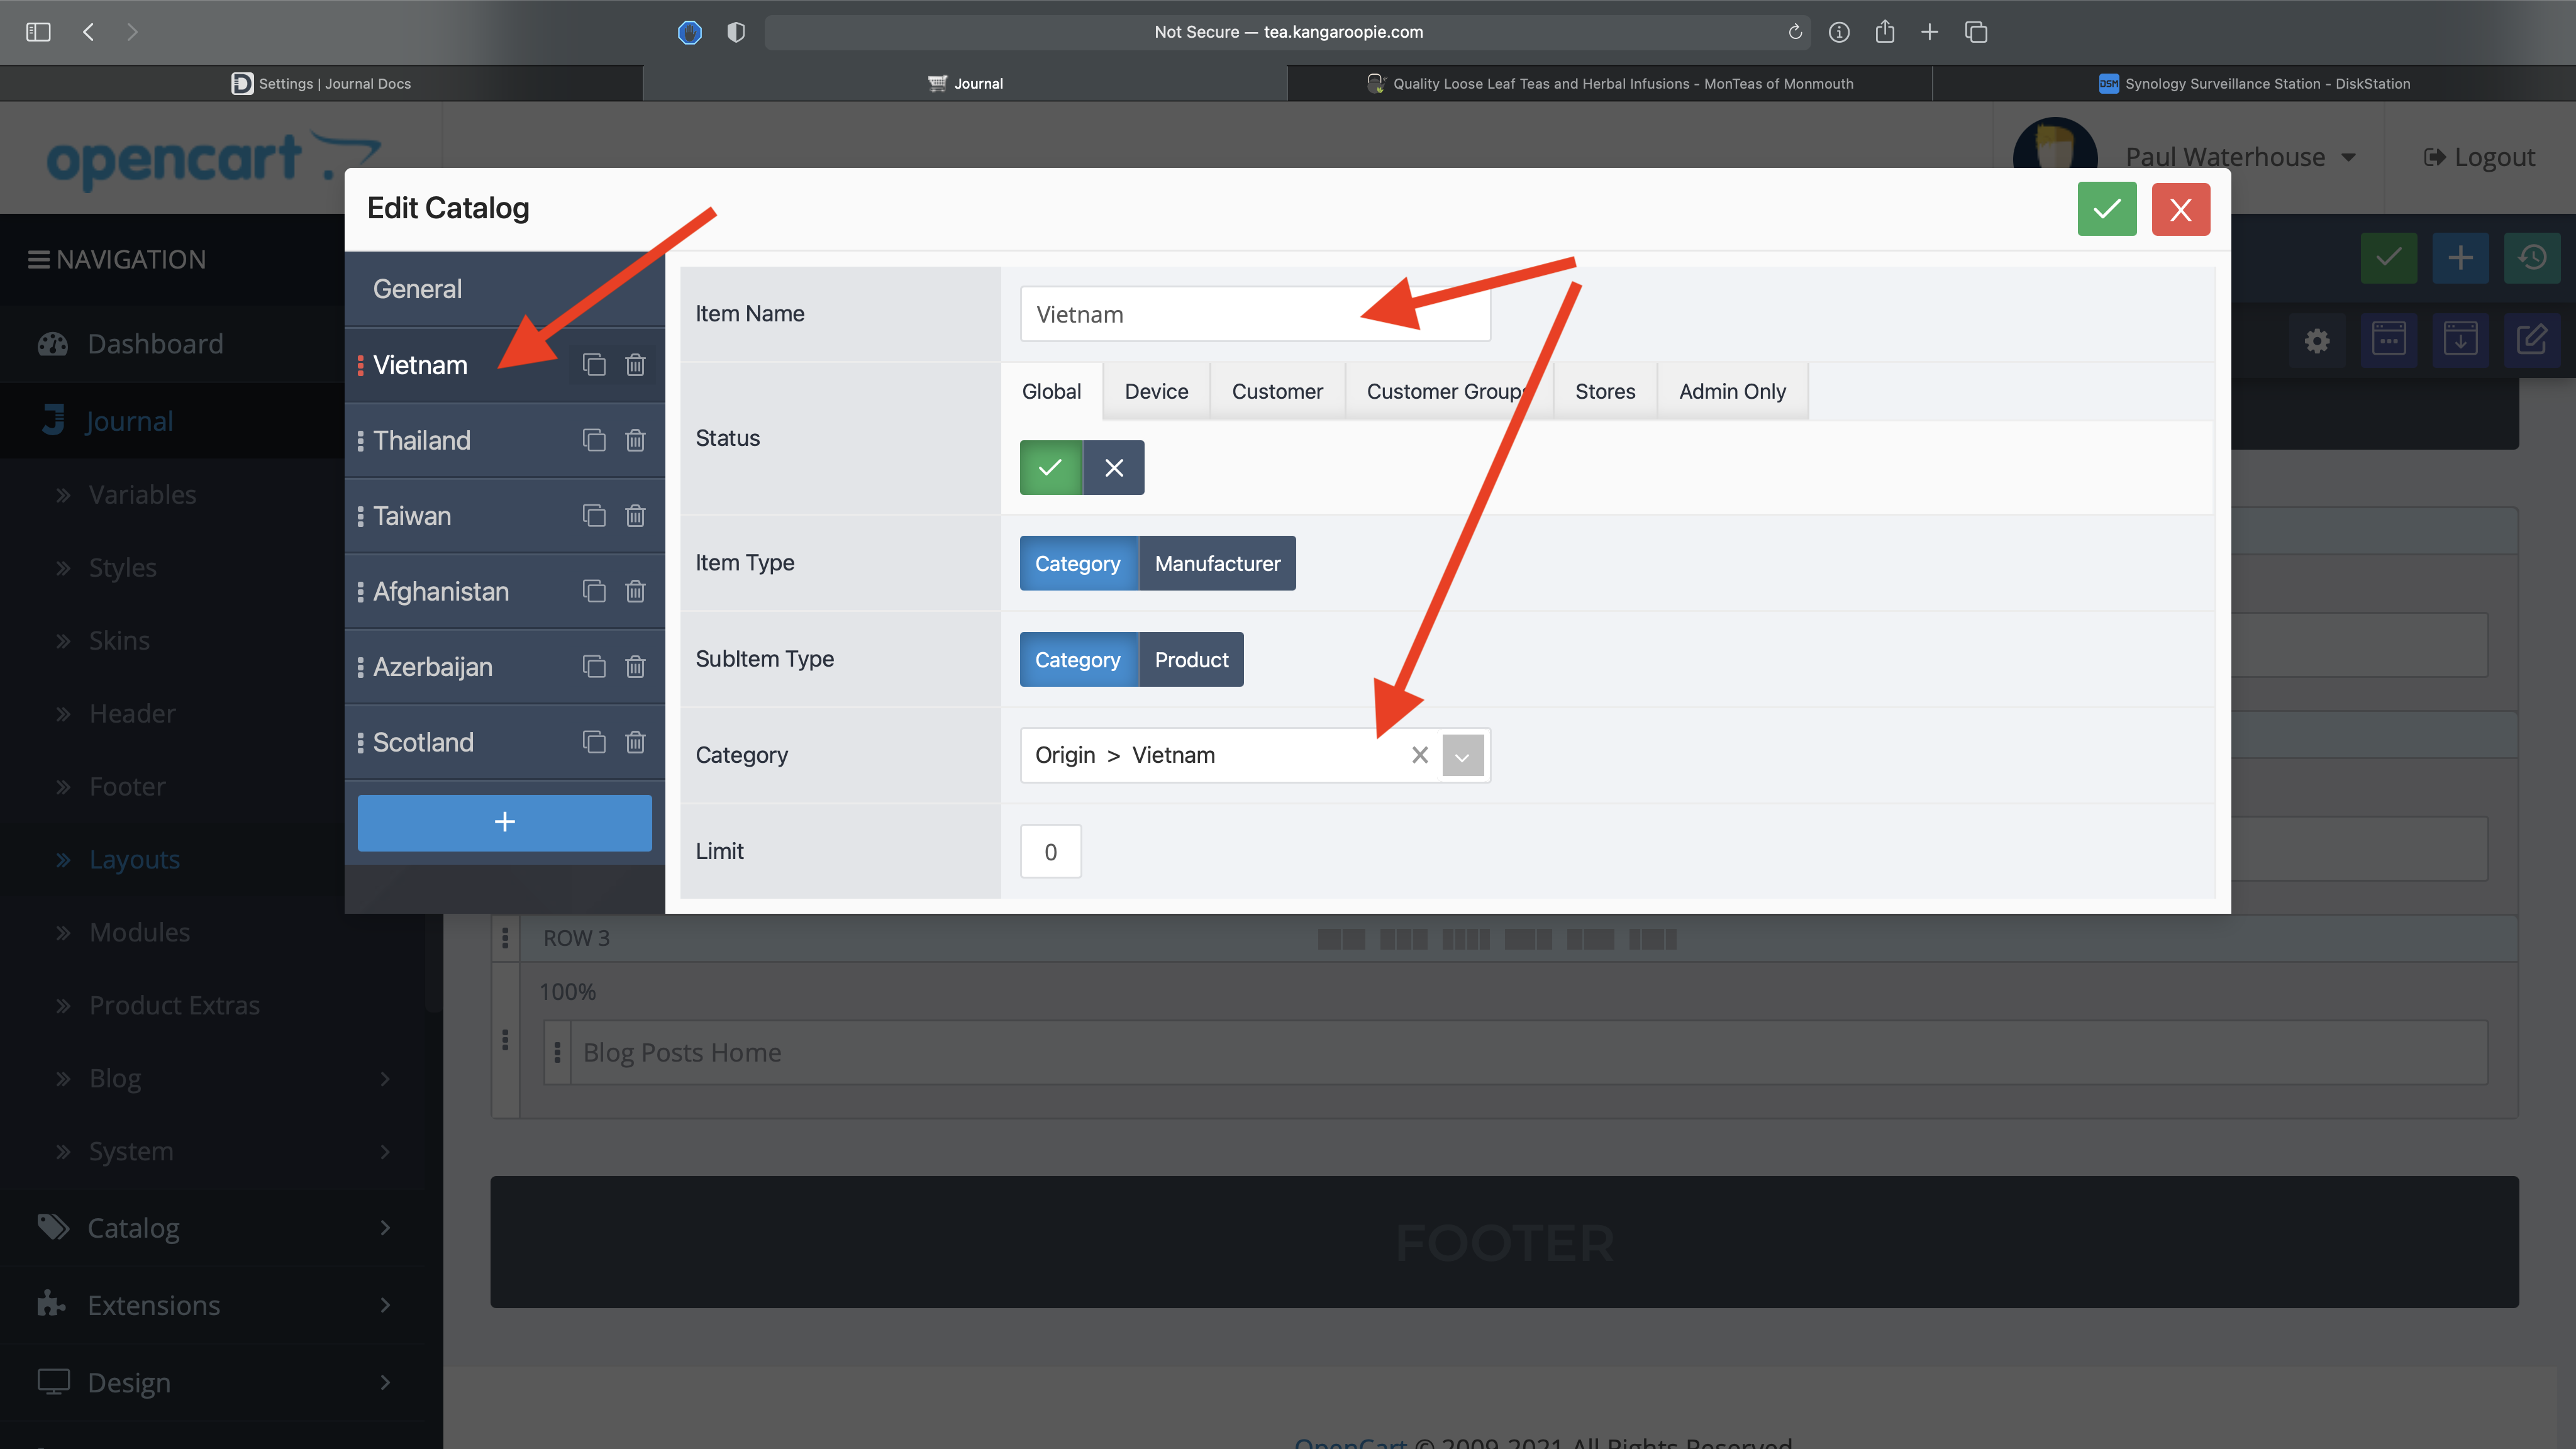
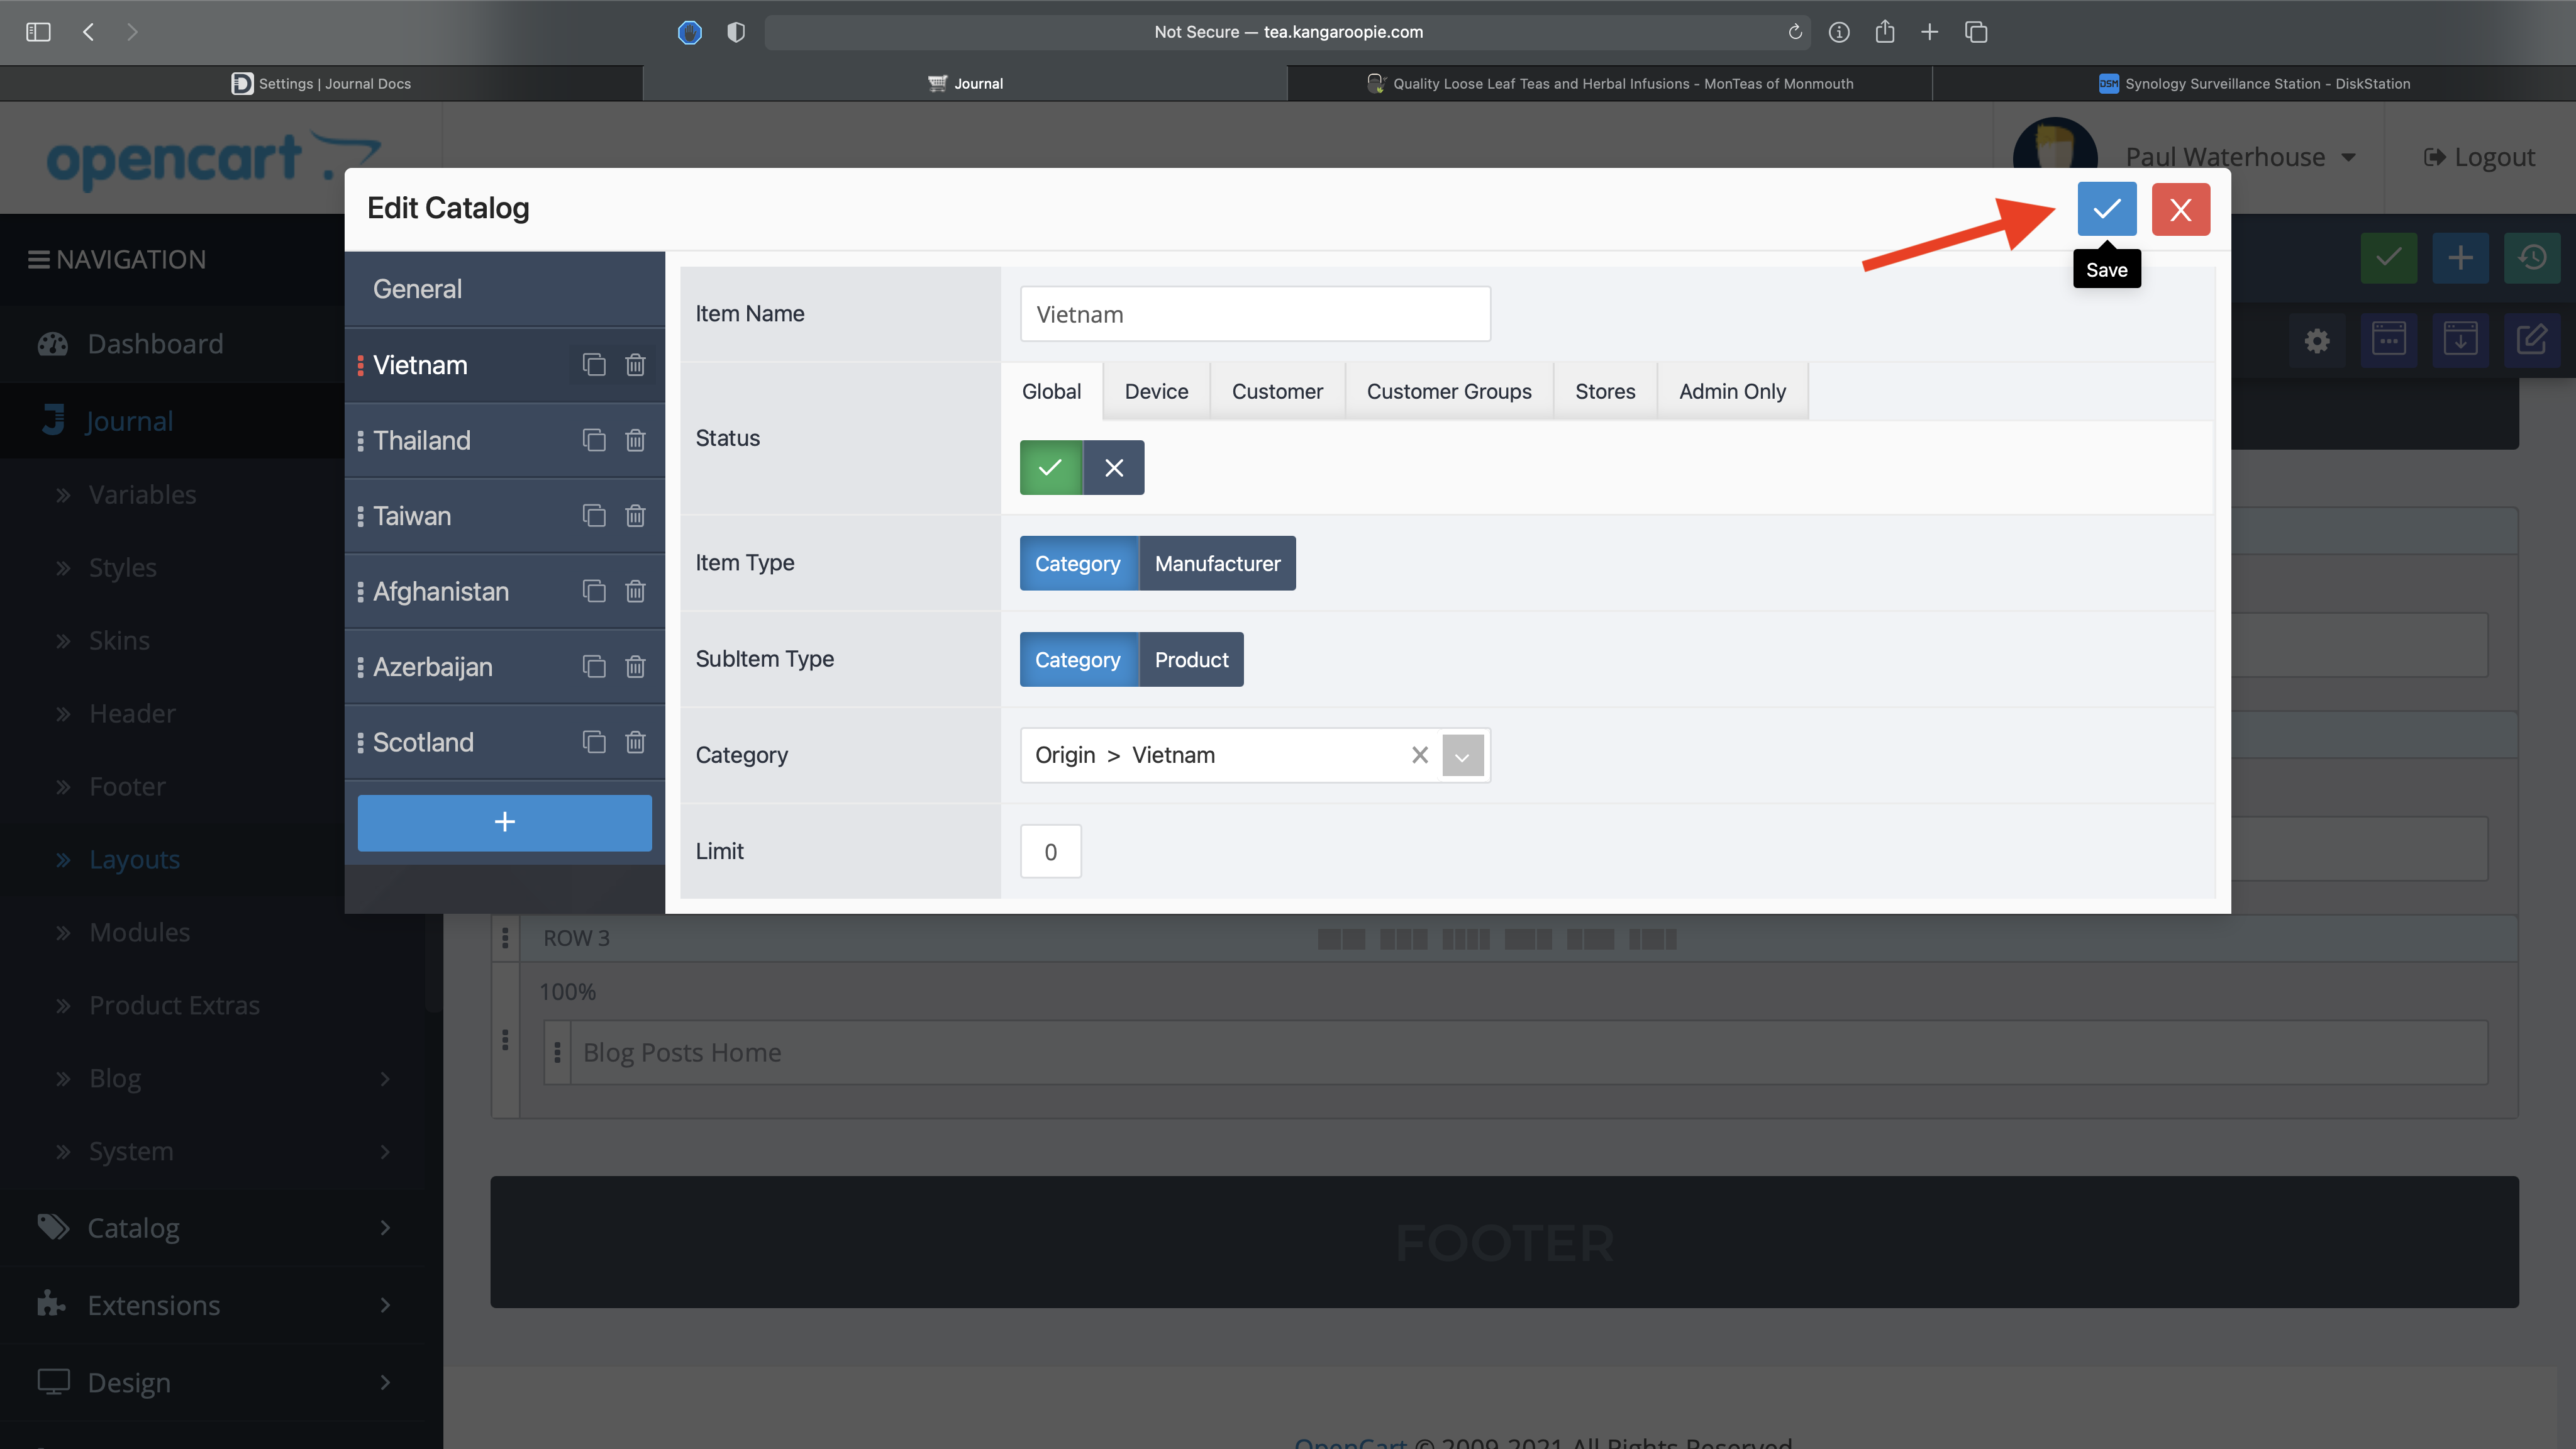
4. On the left side of the editing window you'll see the countries listed. Click on the one you want to edit. The only things you need to achange are the Item Name (which appears as the title of that country in the module) and the Category. To change the country to a different one just change the Item Name to the new country and then in the category box start typing the name of the country and it will (if it's in the database) appear in a drop-down list, then just click on it to select it. You can limit the number of products listed under each country by inserting a number in the Limit field, or leave it at 0 to display them all.
5. Click the Save button in the top-right corner
Back to the Menu
Adding and Amending the Quick Links Bar
1. Click on Journal in the side menu, then click on Layouts
2. From the list click on Home
3. Find the Quick Links module and click the pencil icon on the right side
4. On the left side of the editing window you'll see the title "Quick Links" and below it the links themselves. If you want to change the wording from say Quick Links to Handy Links, click the Quick Links button and you can change the name there. To edit the product category links just click on whichever link you want to change - Breakfast Teas in this example. To change it to another category just change the Item Name and Menu Title fields, then select the appropriate category by choosing it from the Link drop-down list. Just start typing in the box to see the category that you're looking for.
To add a new link click the + button at the bottom of the list on the left side, then just fill in the details as above.
5. Click the Save button in the top-right corner
Back to the Menu
Adding a Blog Post
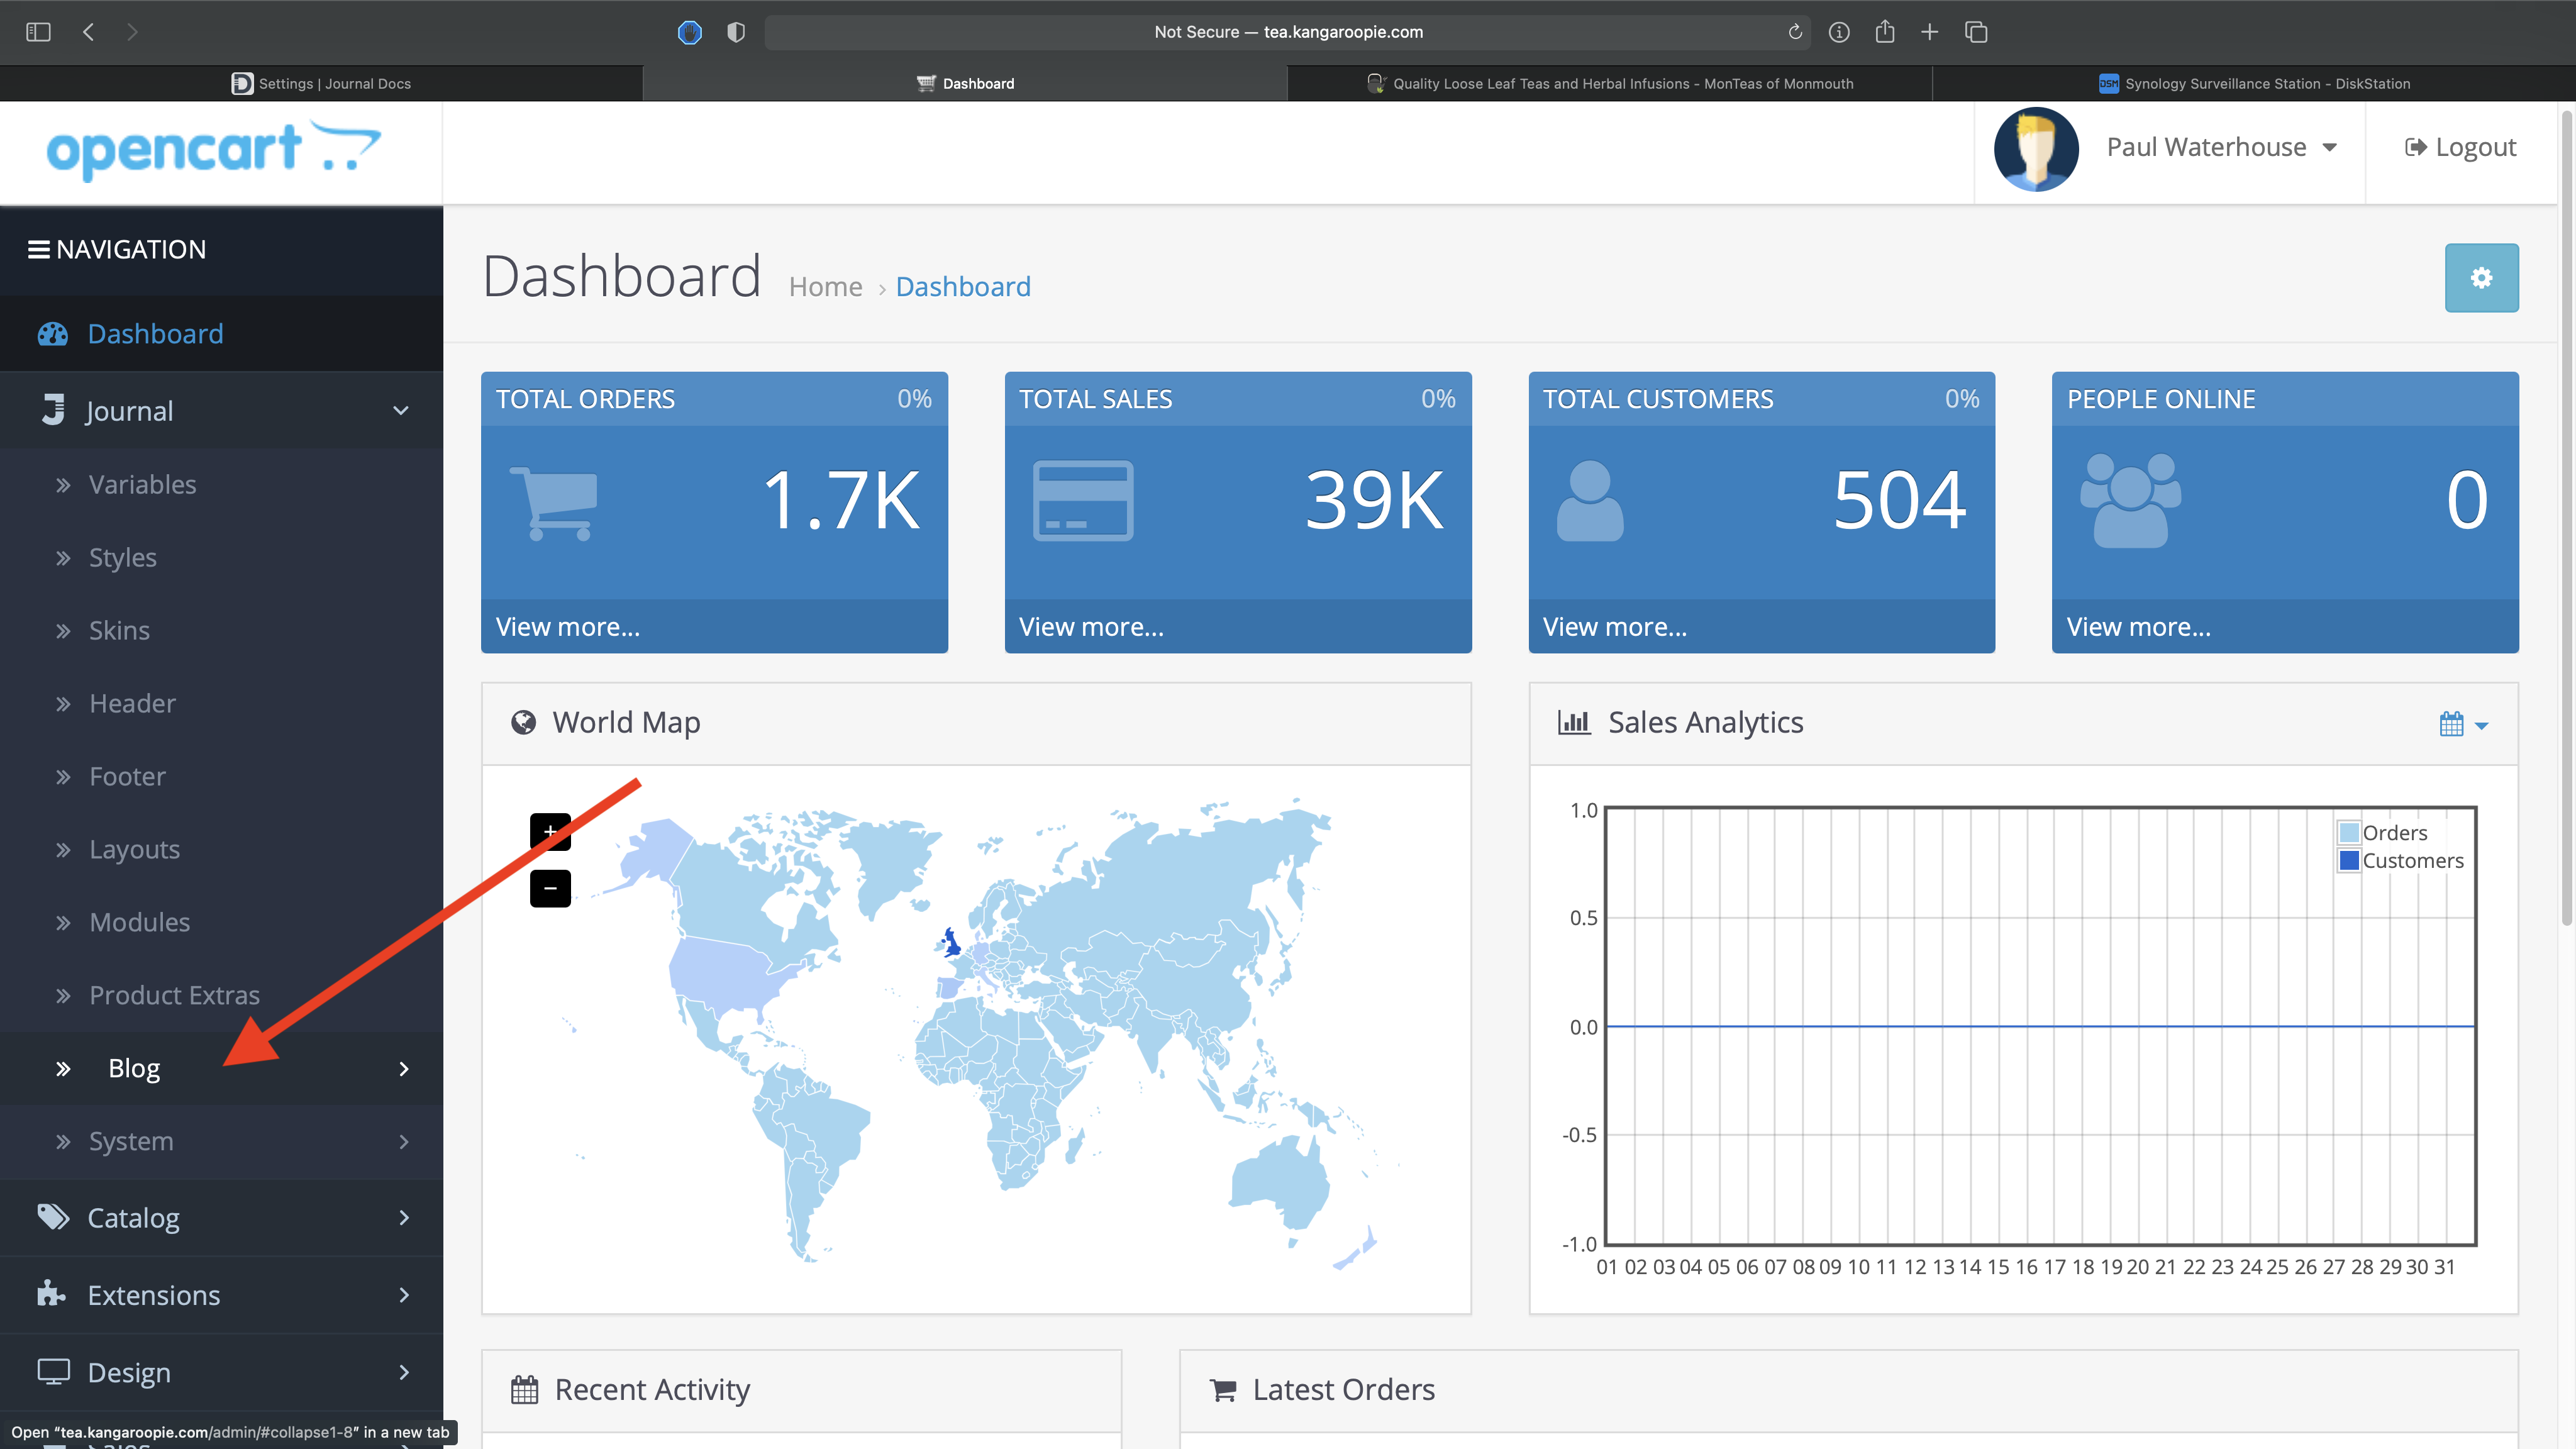
1. Click on Journal in the side menu, then click on Blog
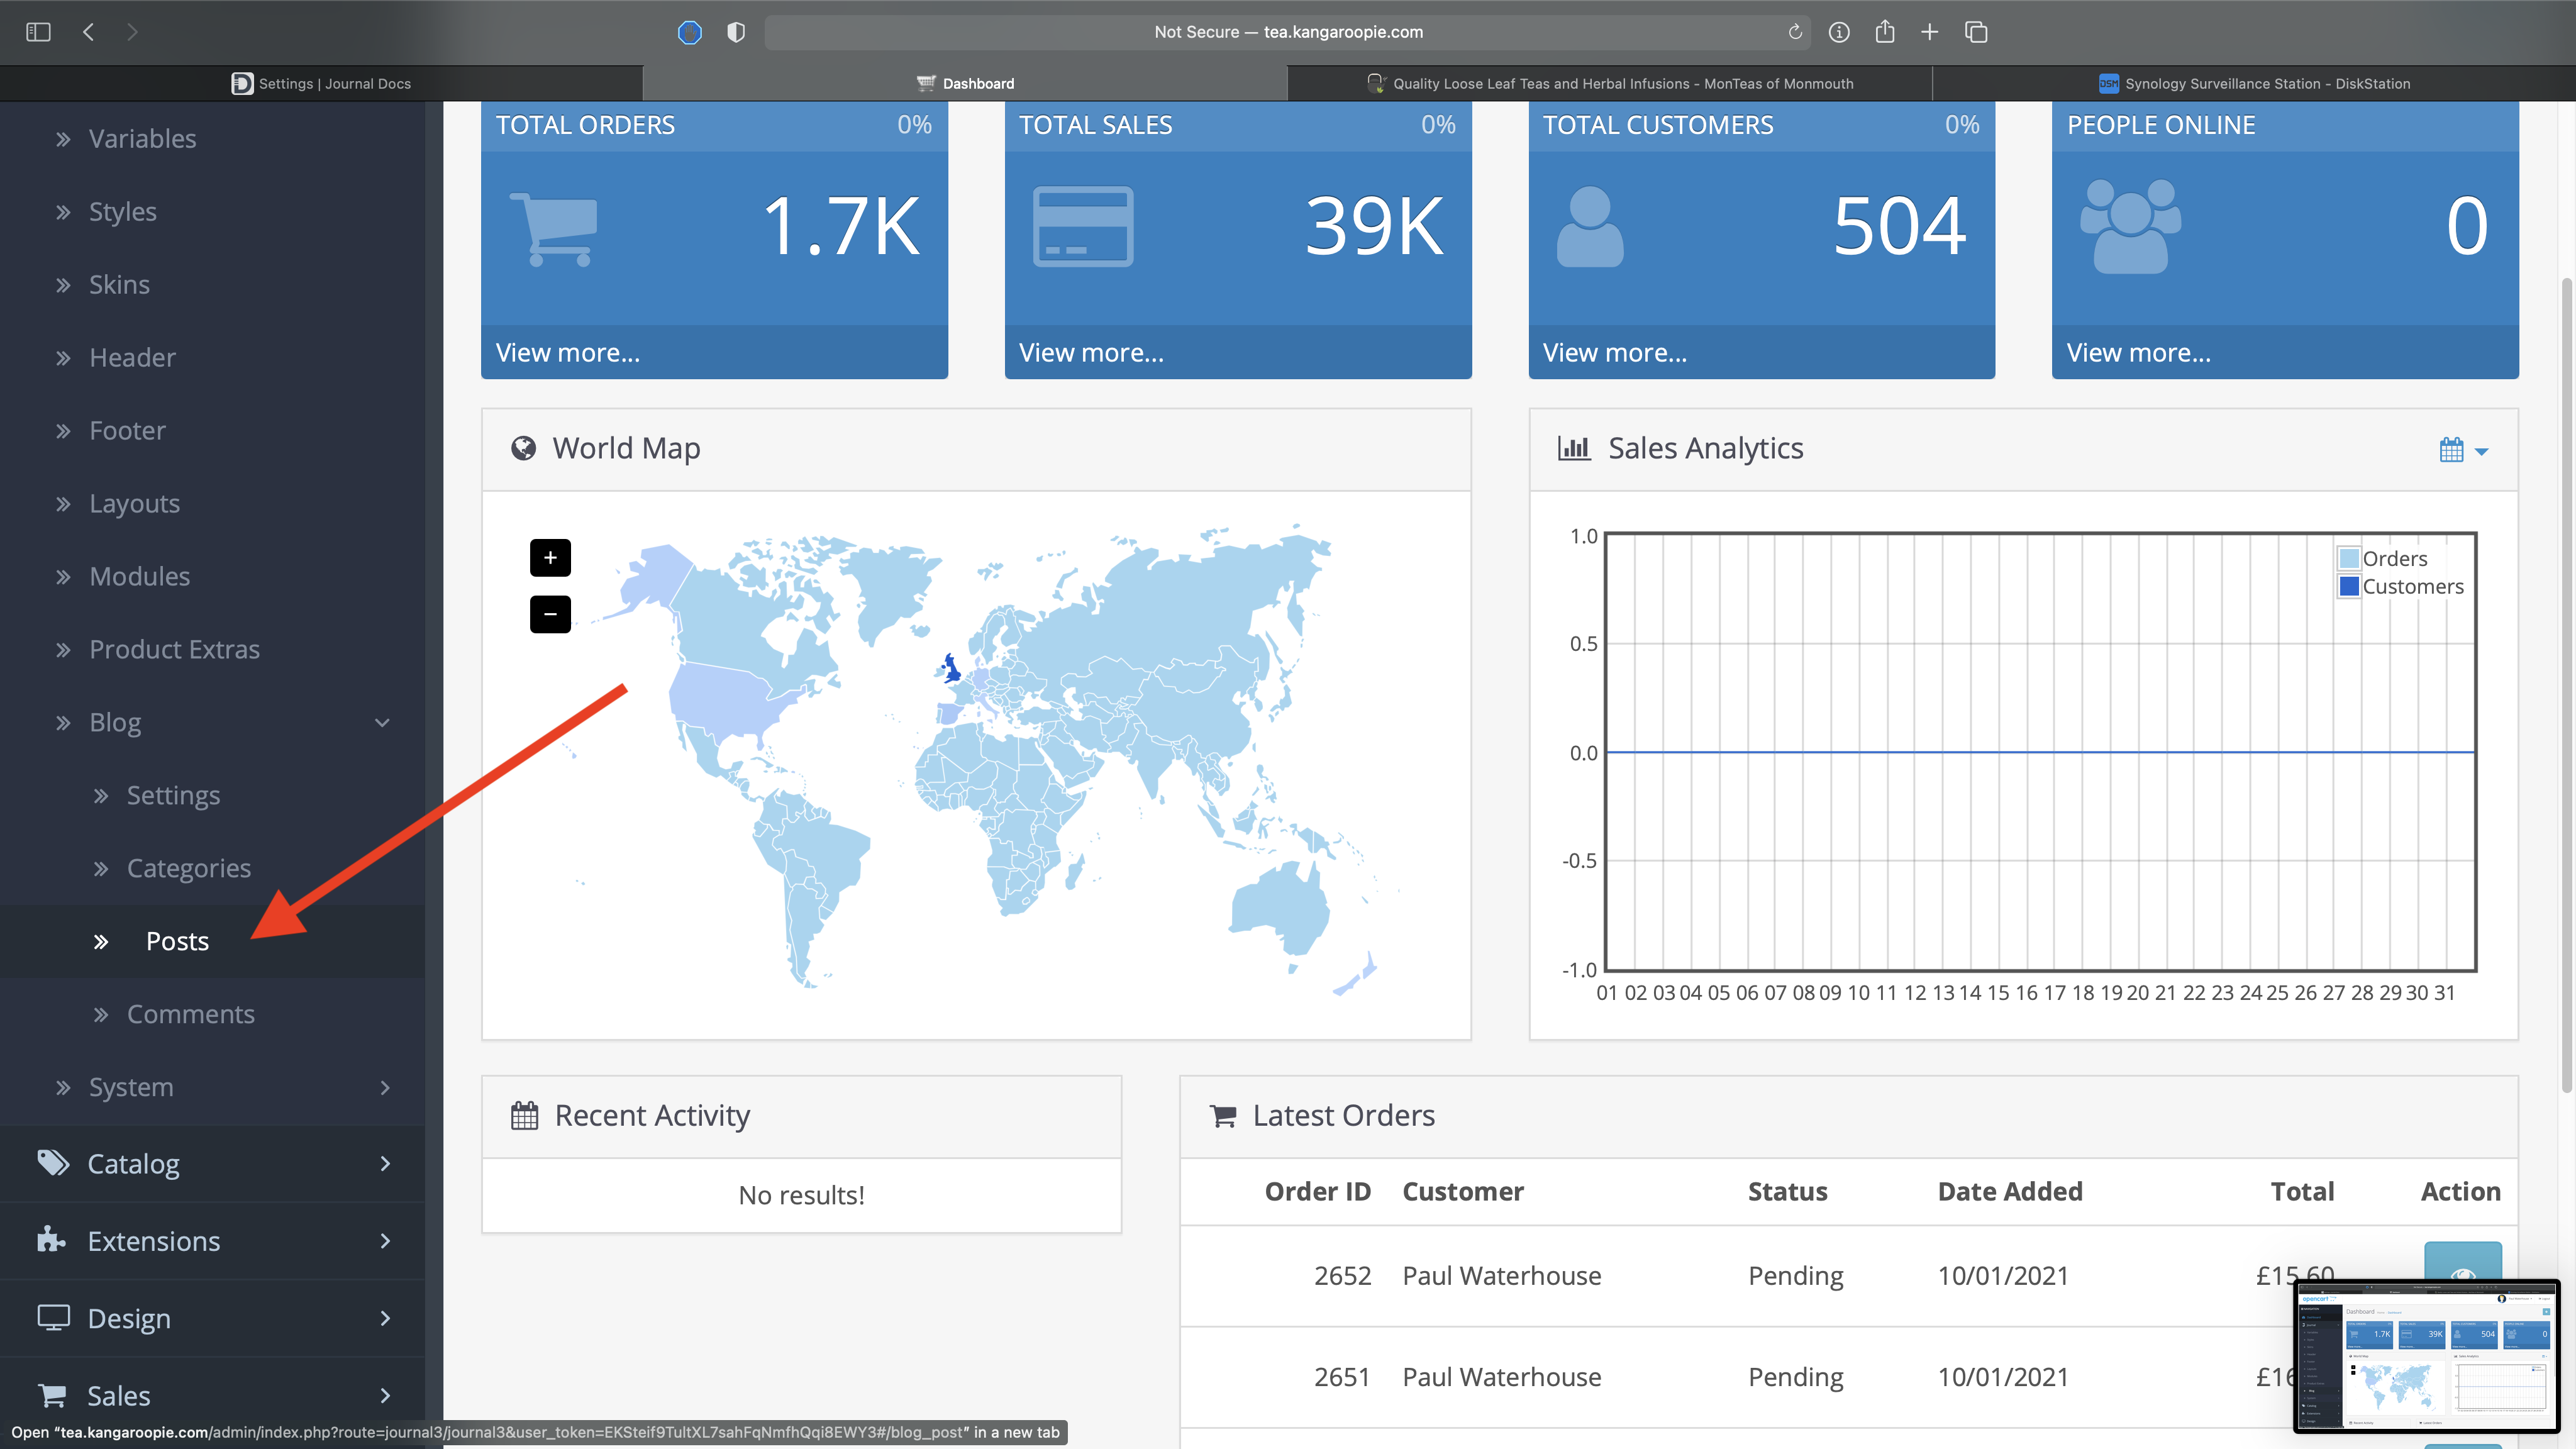
2. Then click on Posts
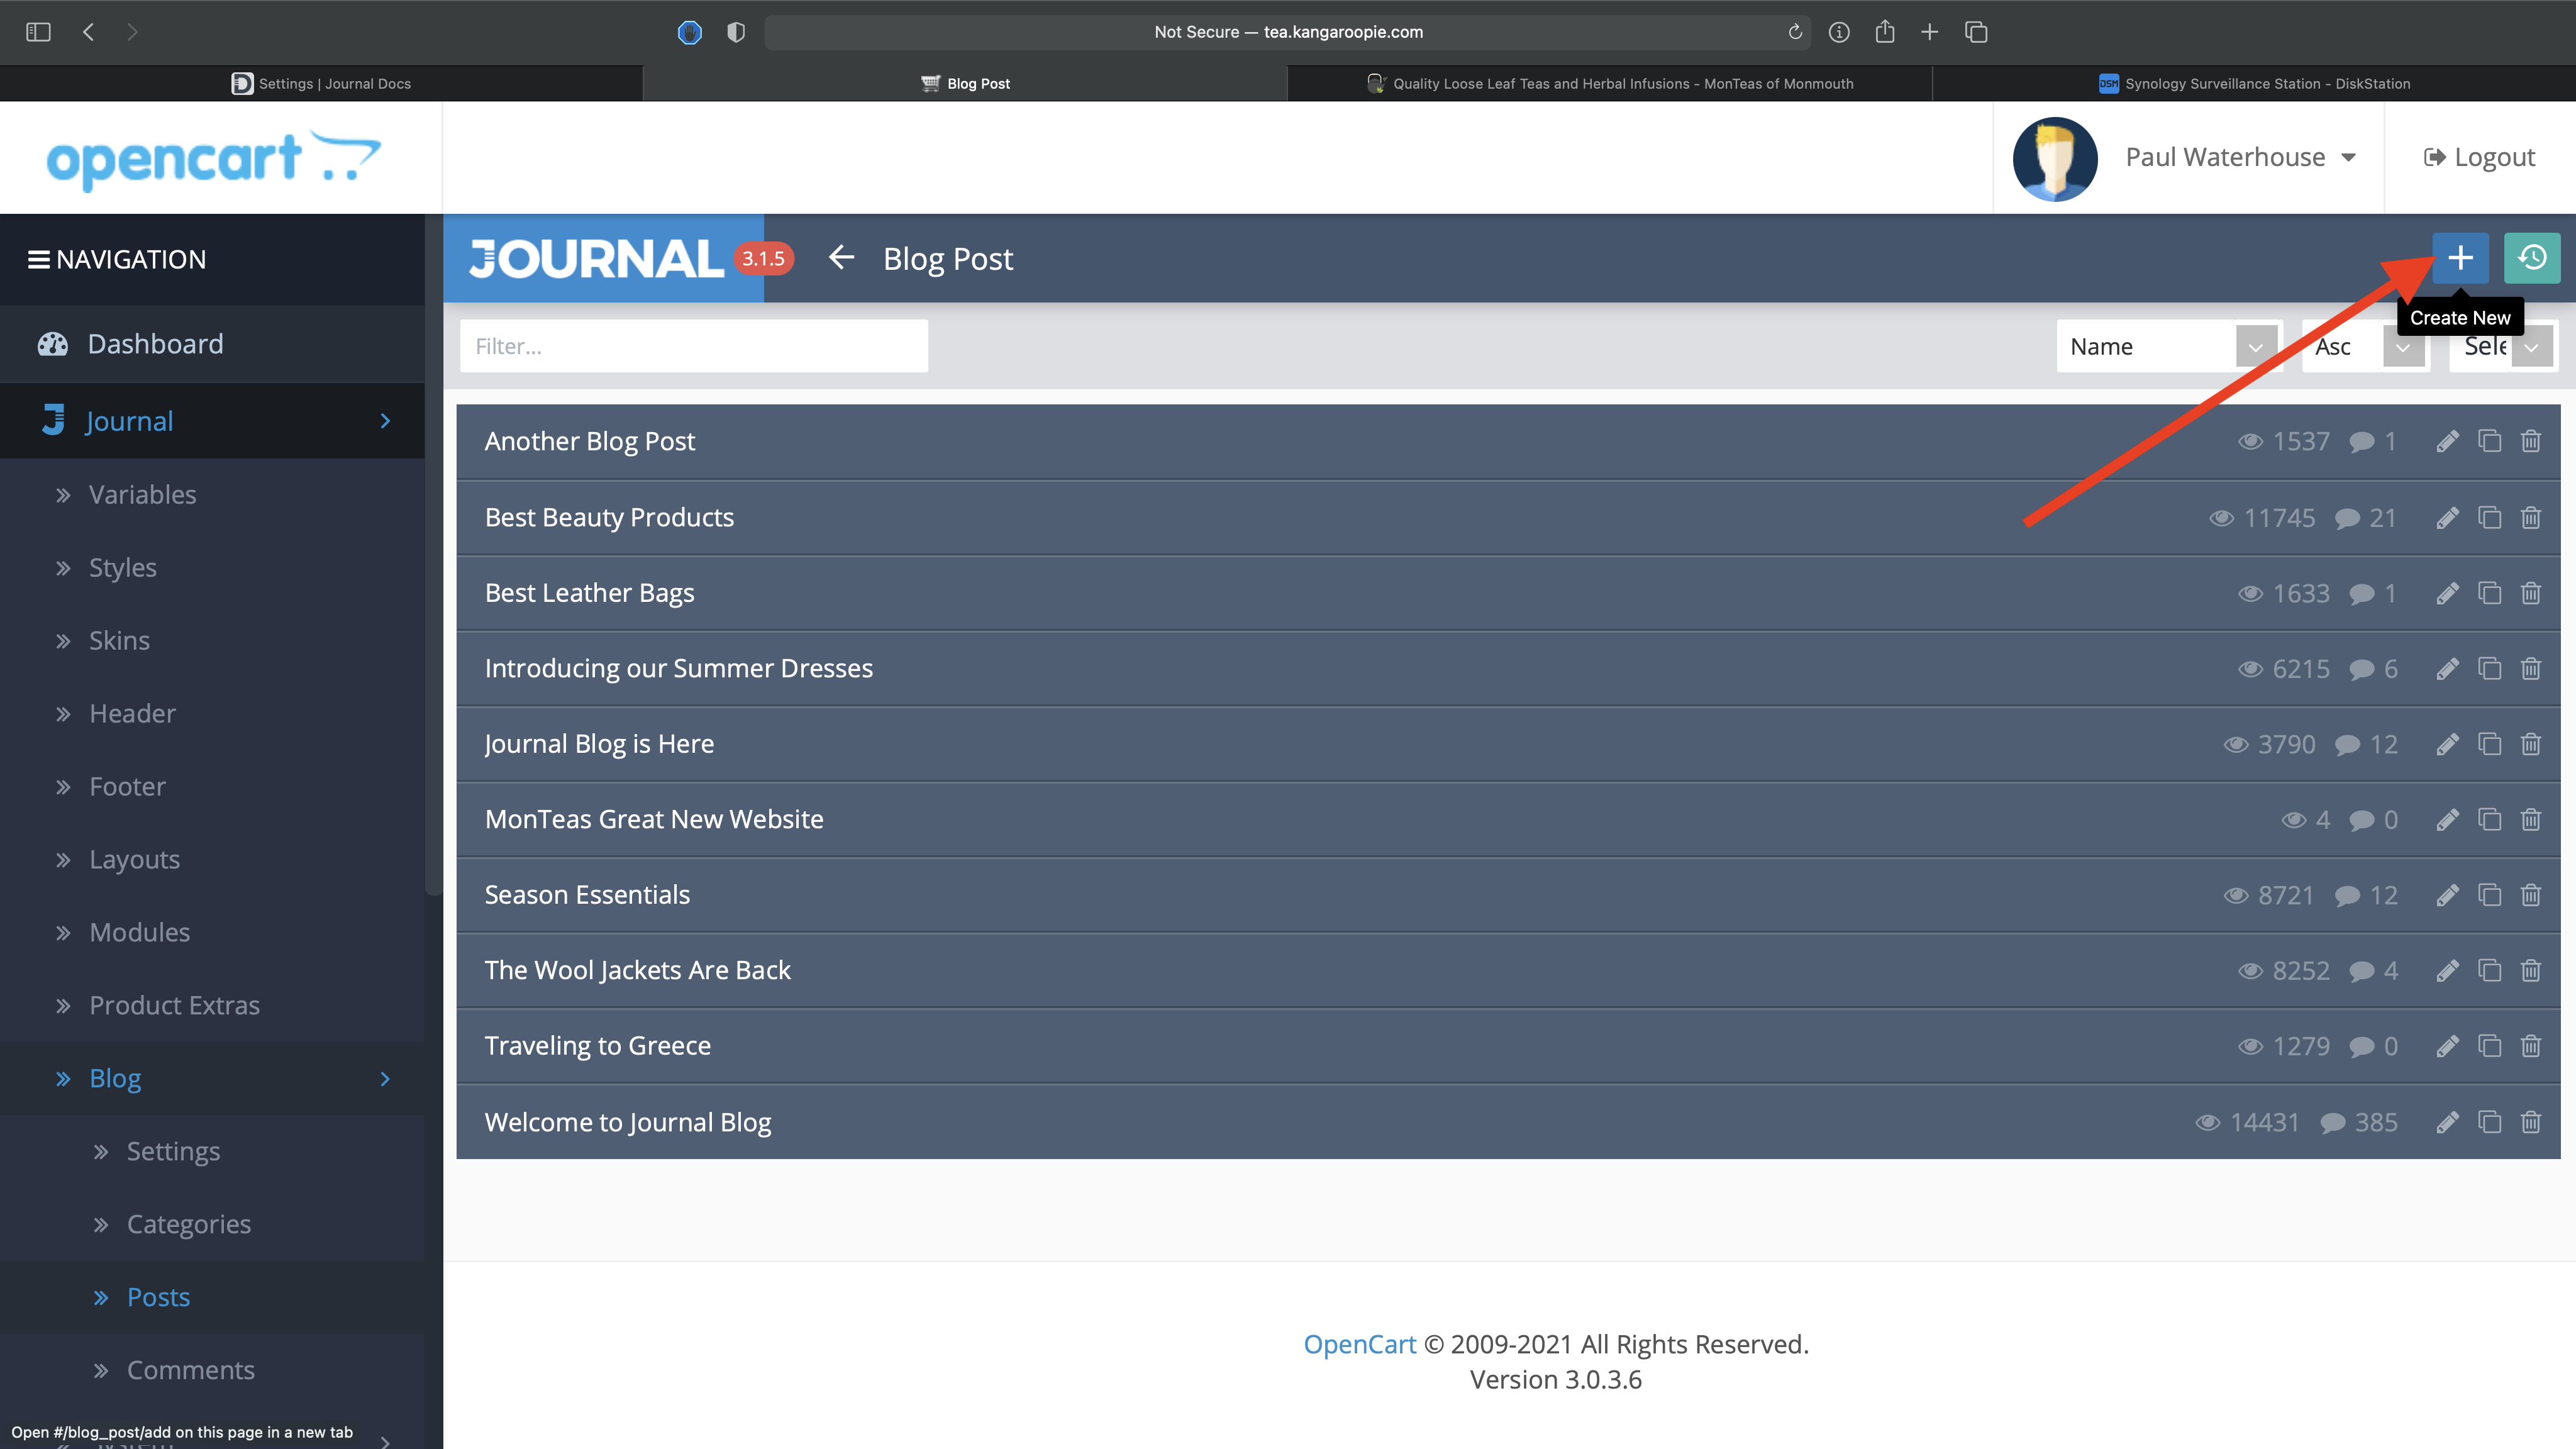
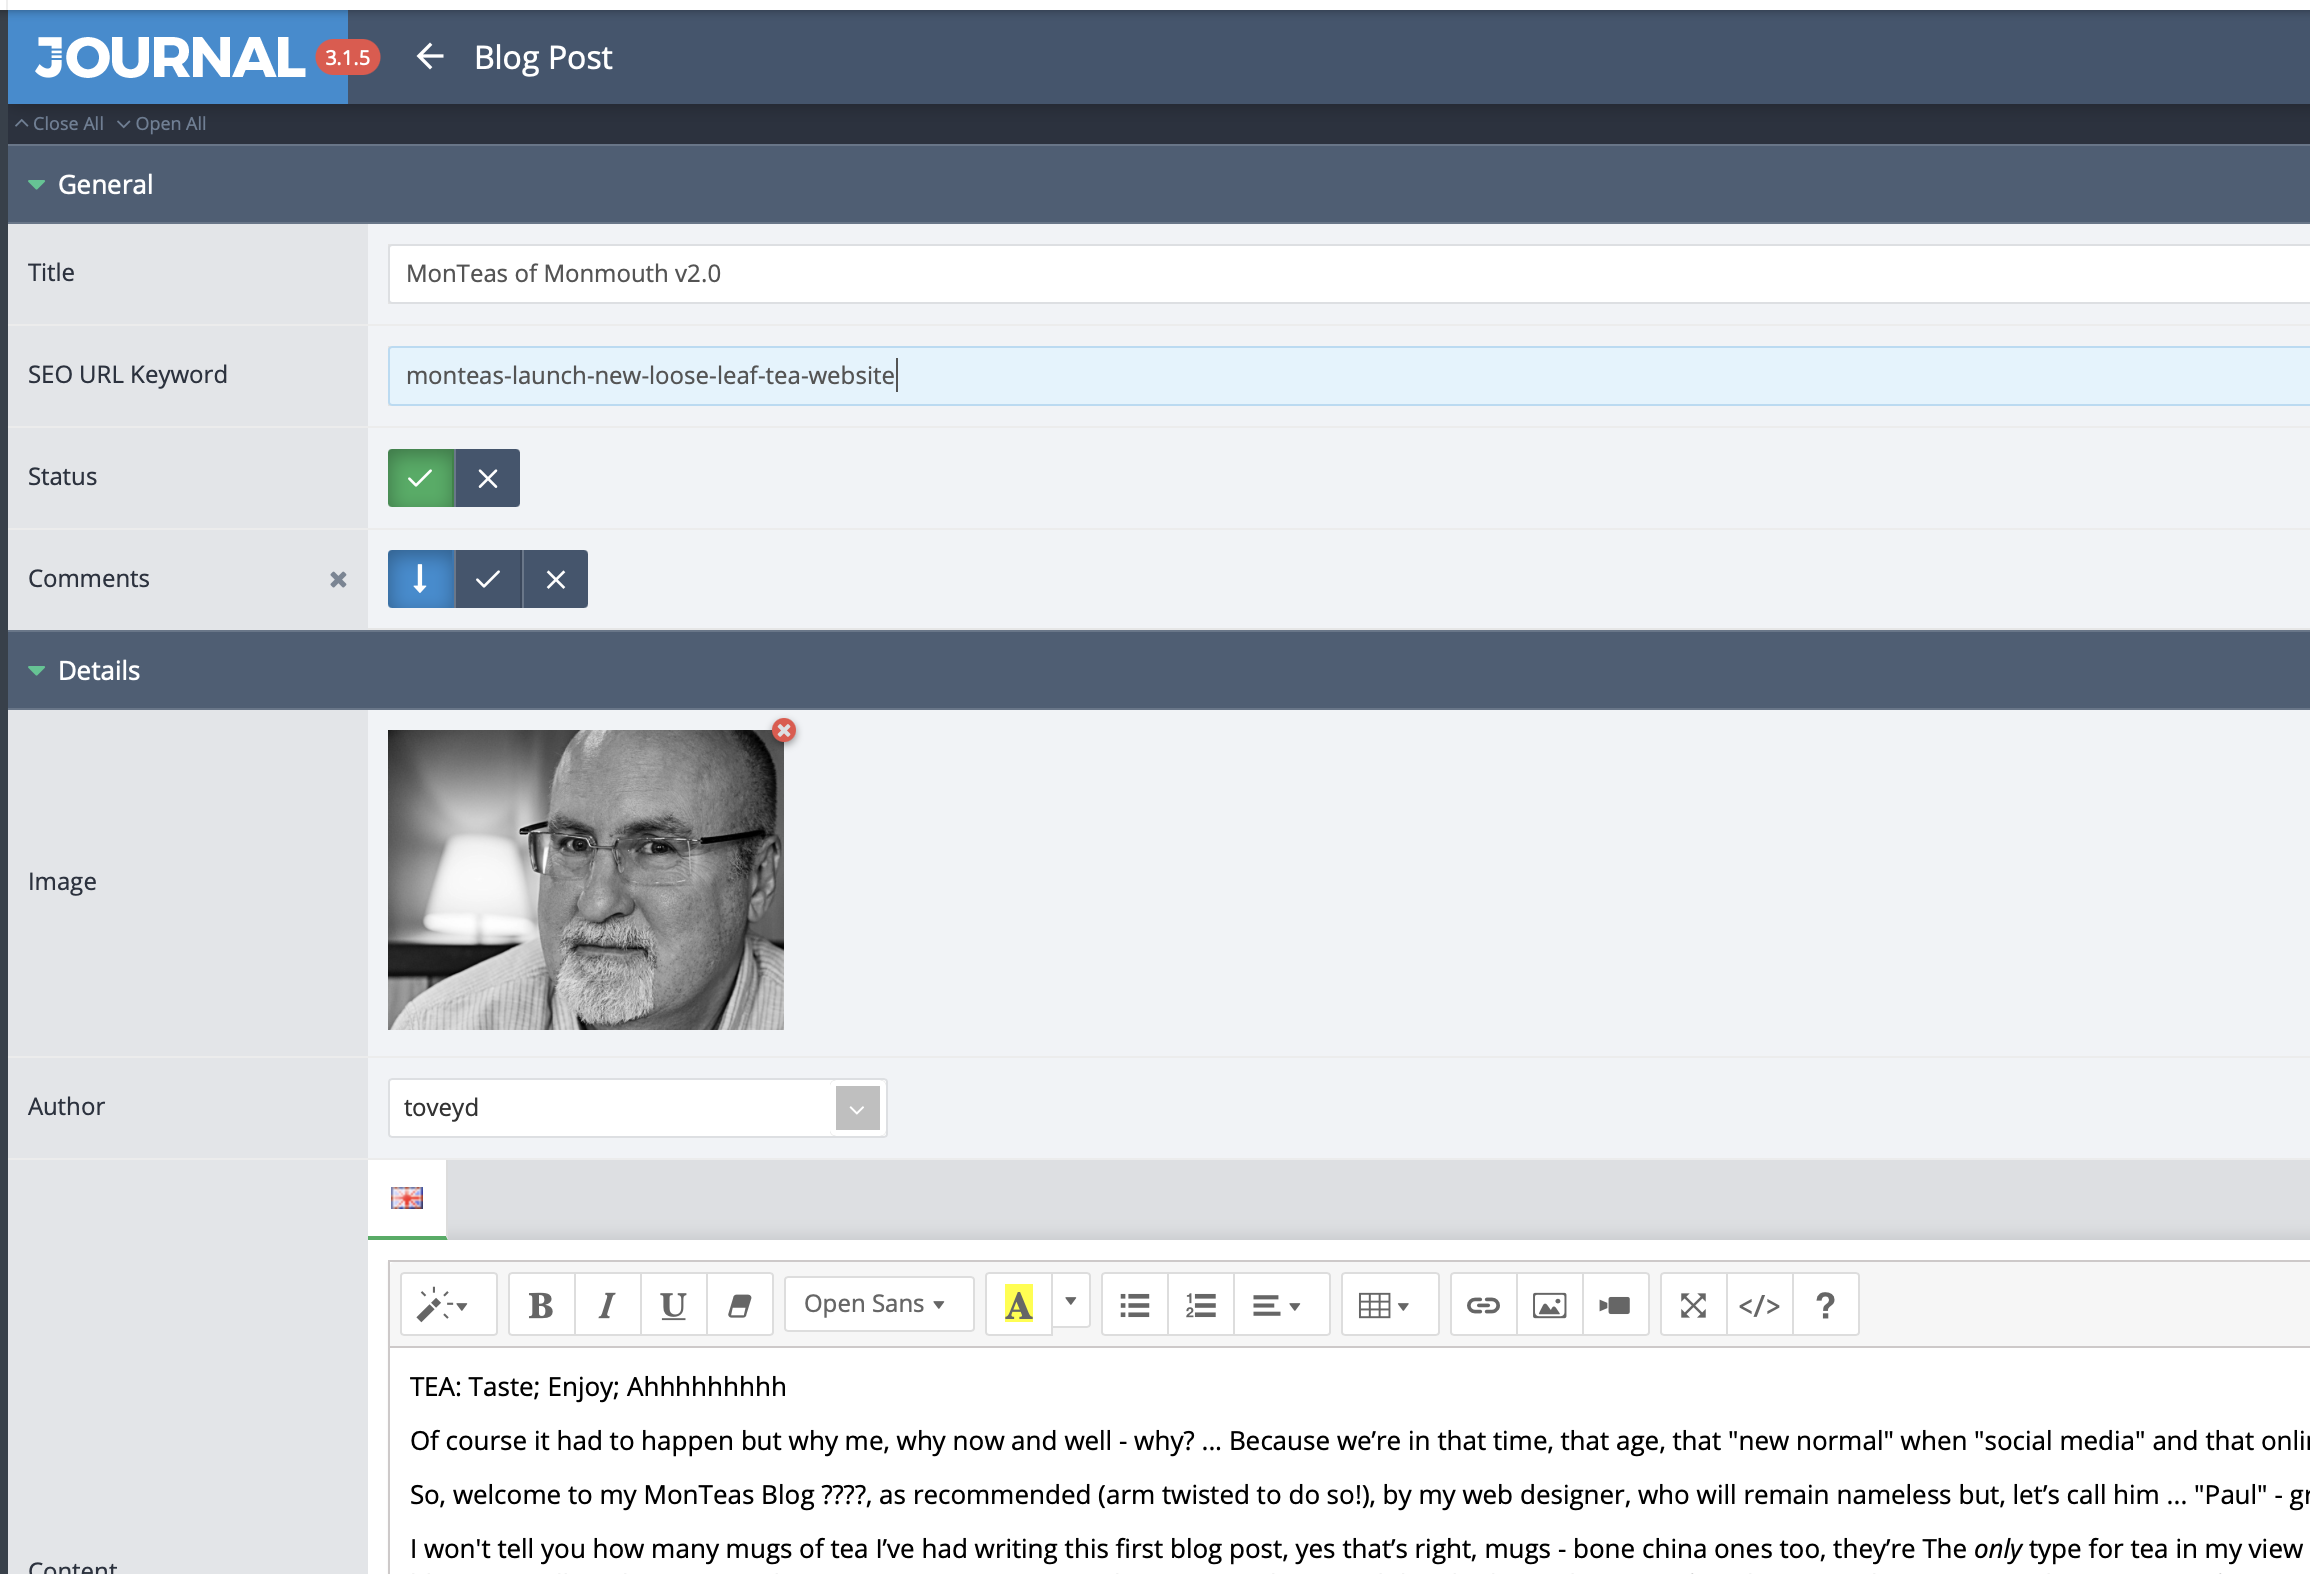
3. Click the + button in the top-right corner to create a new post. If you want to edit an existing post click on it's title from the list. To delete an existing post click the bin icon on the right side of the post title, however, unless you're absolutely sure you want it gone for good it may be better to click on the post to edit it and disable the post by clicking on the X in the Status field
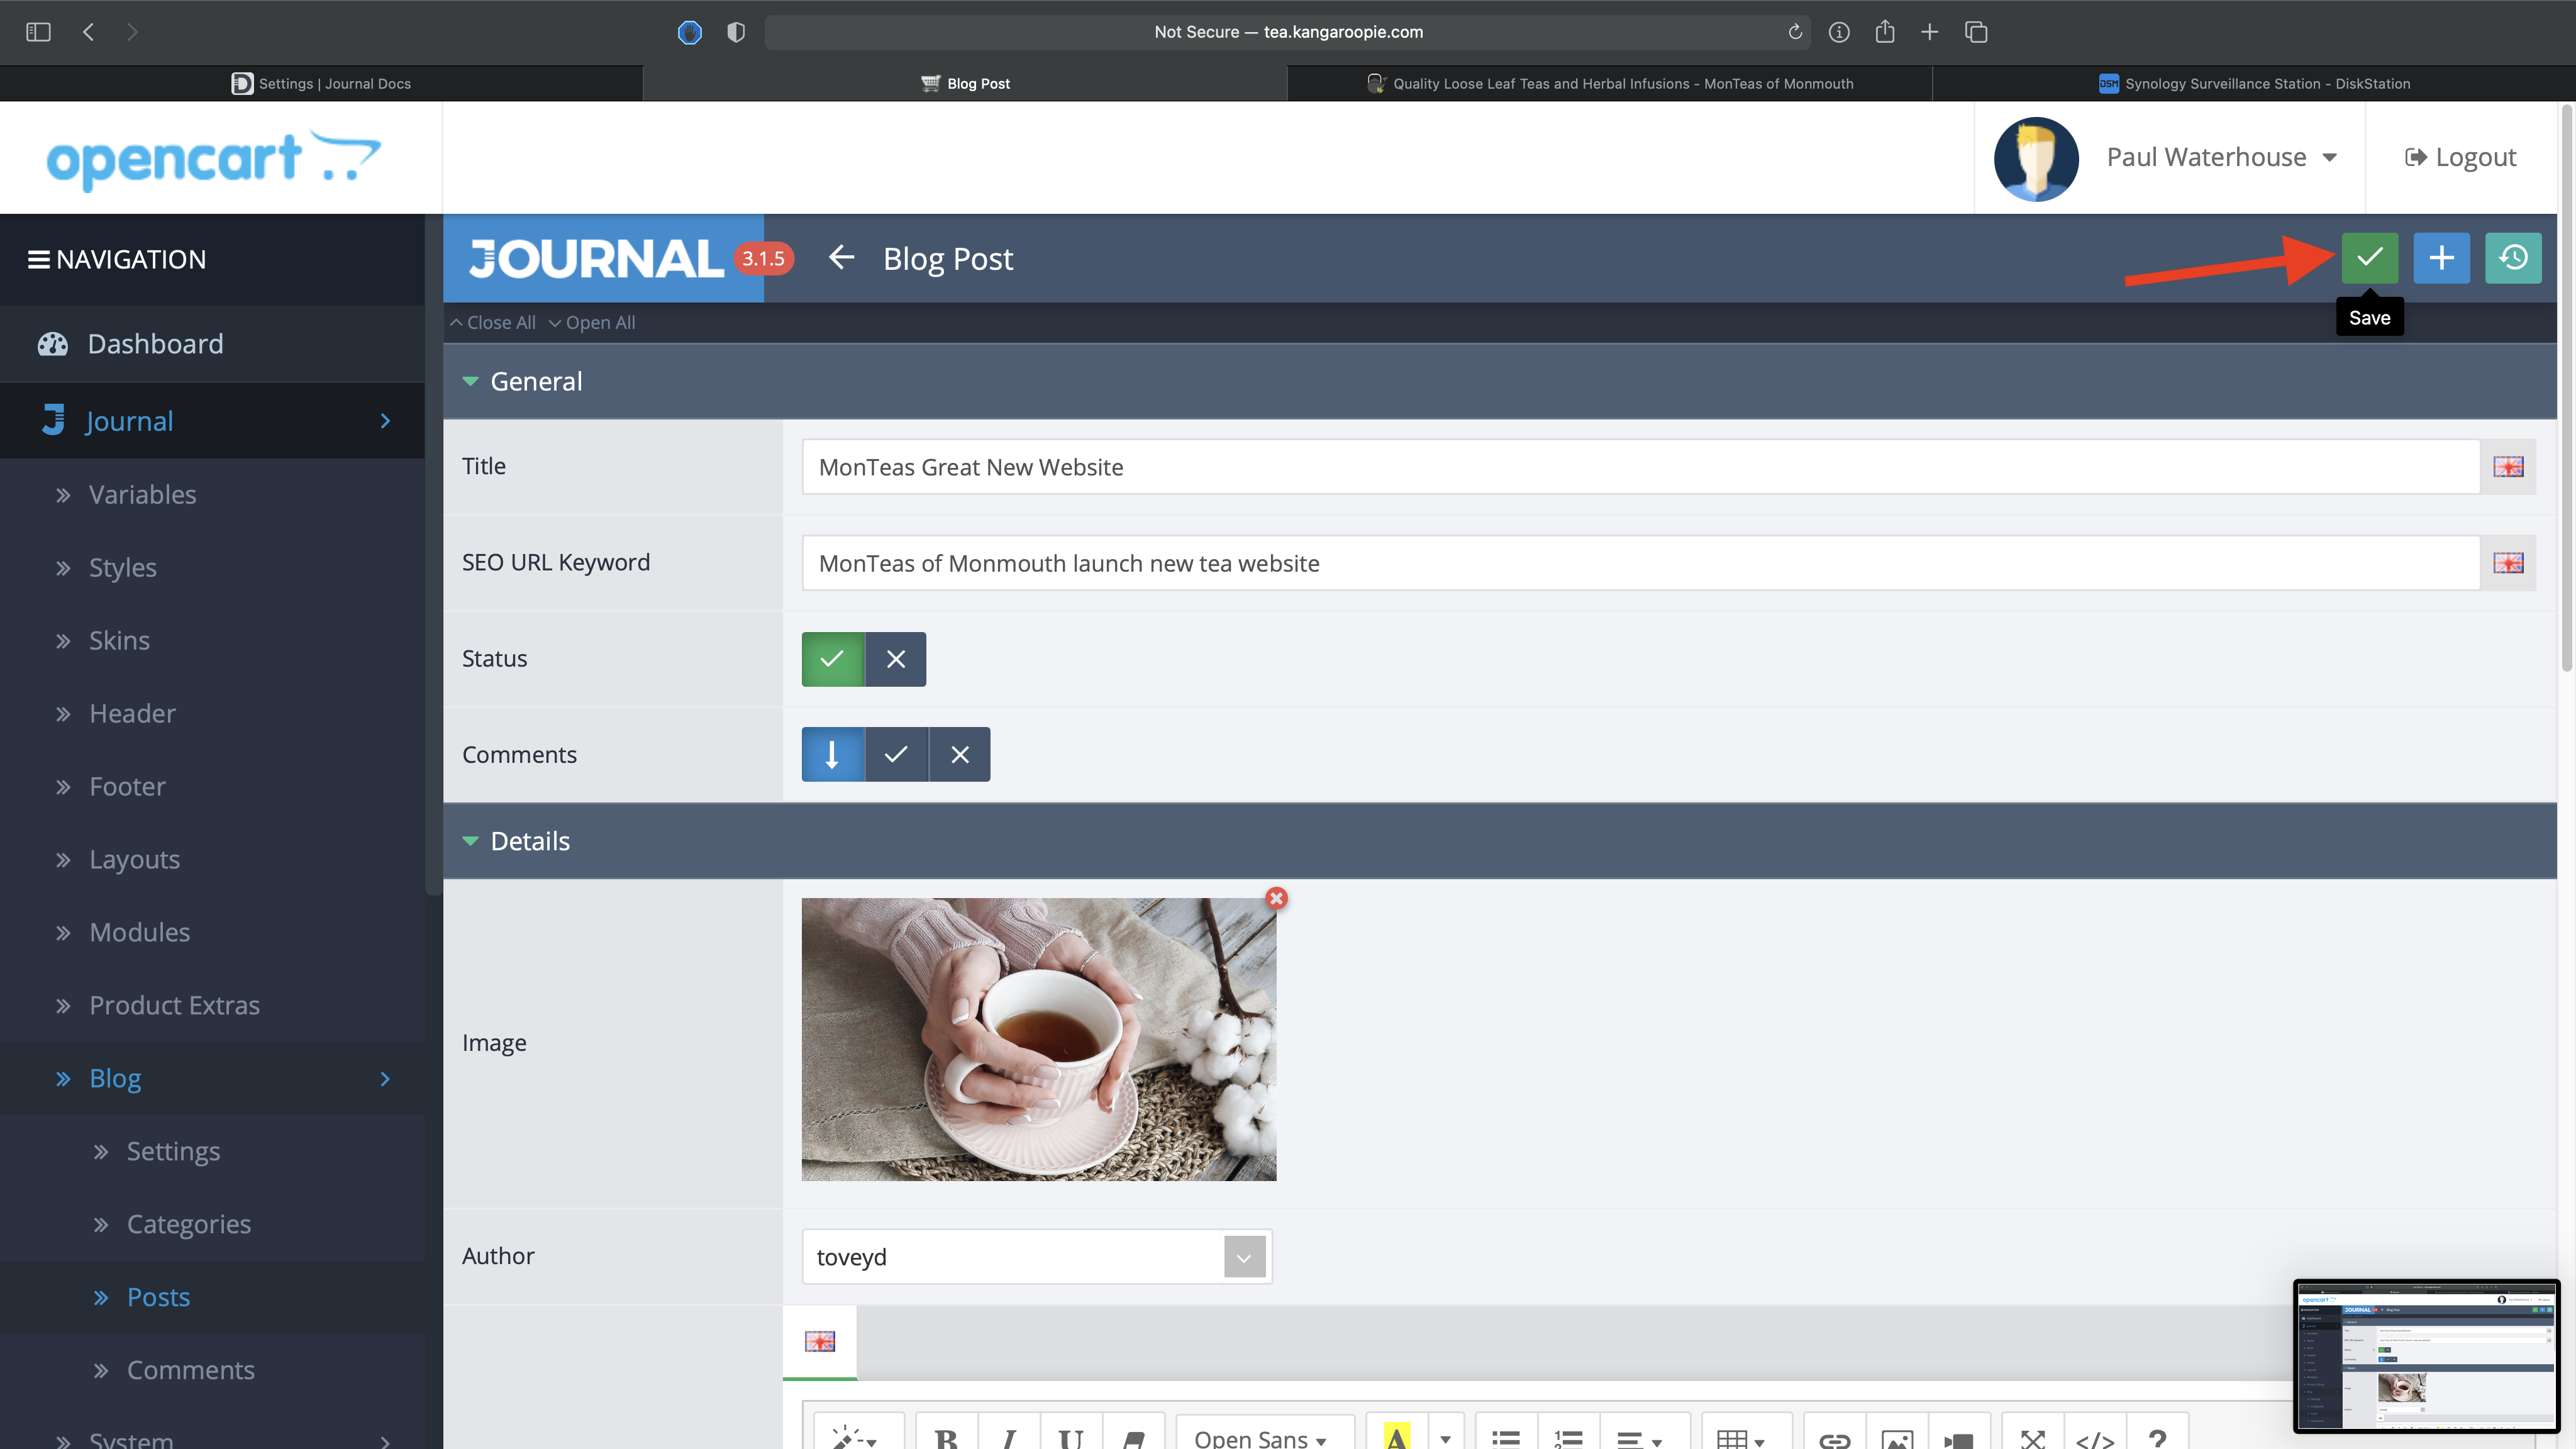
4. To create a new post just fill in the appropriate fields: Title, SEO Keyword, make sure the Status is a green tick rather than a red X. Click on the image field to bring up the image browser where you can either choose an existing image or upload a new image to the server. This image is the one that's seen on the home page and the blog index page. Set the Author to toveyd.
5. In the content window you can wax lyrical about all the latest and greatest things in the world of tea or dazzle the general public with your limitless knowledge on the subject :) If you want to embed images or videos in the post click on the icons toward the right side of the tool bar.
If you want to delay the publication of the article until a particular date or time you can select that date from the Date field, otherwise just leave it and the post will go live as soon as you've saved it.
Do take the time to fill in the SEO fields with relevant information. See my SEO guide if in doubt.

6. Click the Save button to share your thoughts and wisdom with the world.
Back to the Menu
Changing the Opening Hours
1. Click on Journal in the side menu, then click on Footer
2. From the list click on Footer
3. In the Opening Hours module click the pencil icon to edit
4. Click on the day that you want to edit on the left side, then edit the text in the Menu Title field
5. Click the Save button in the top-right corner
Back to the Menu
Amending Postage Rates etc.
1. From the Extensions Menu, choose Extensions
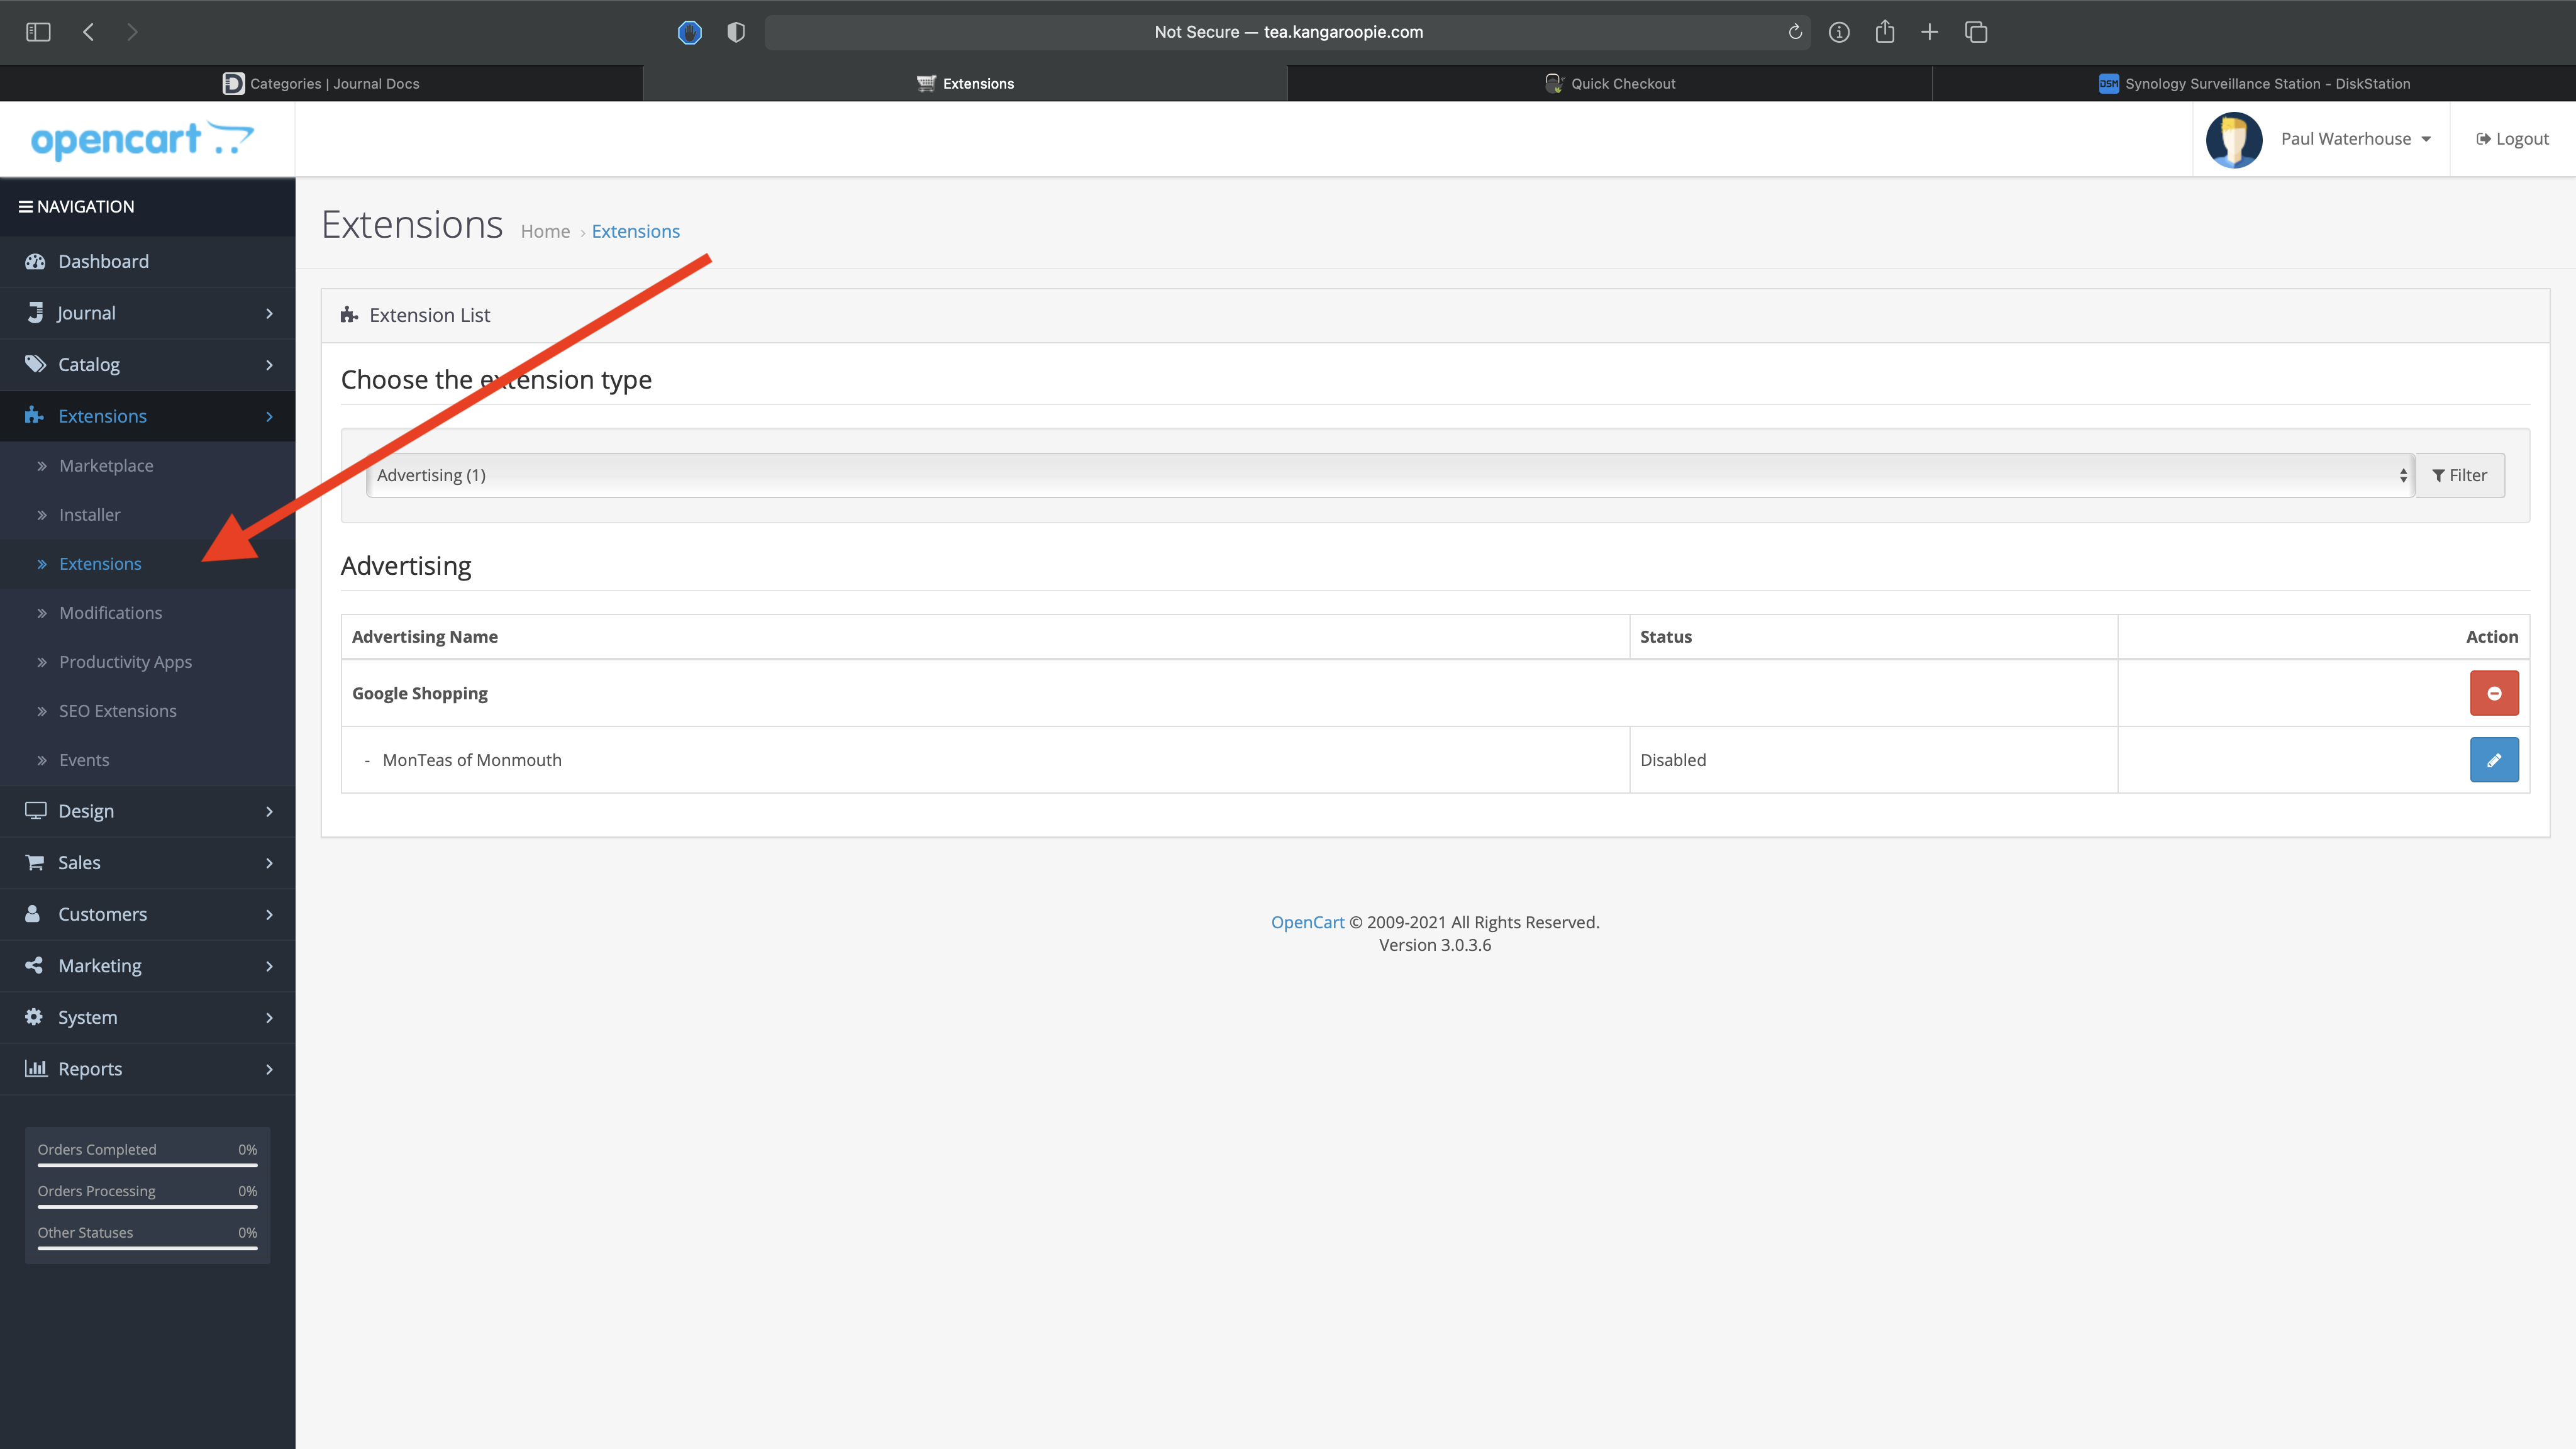
2. Then select Shipping from the drop-down menu
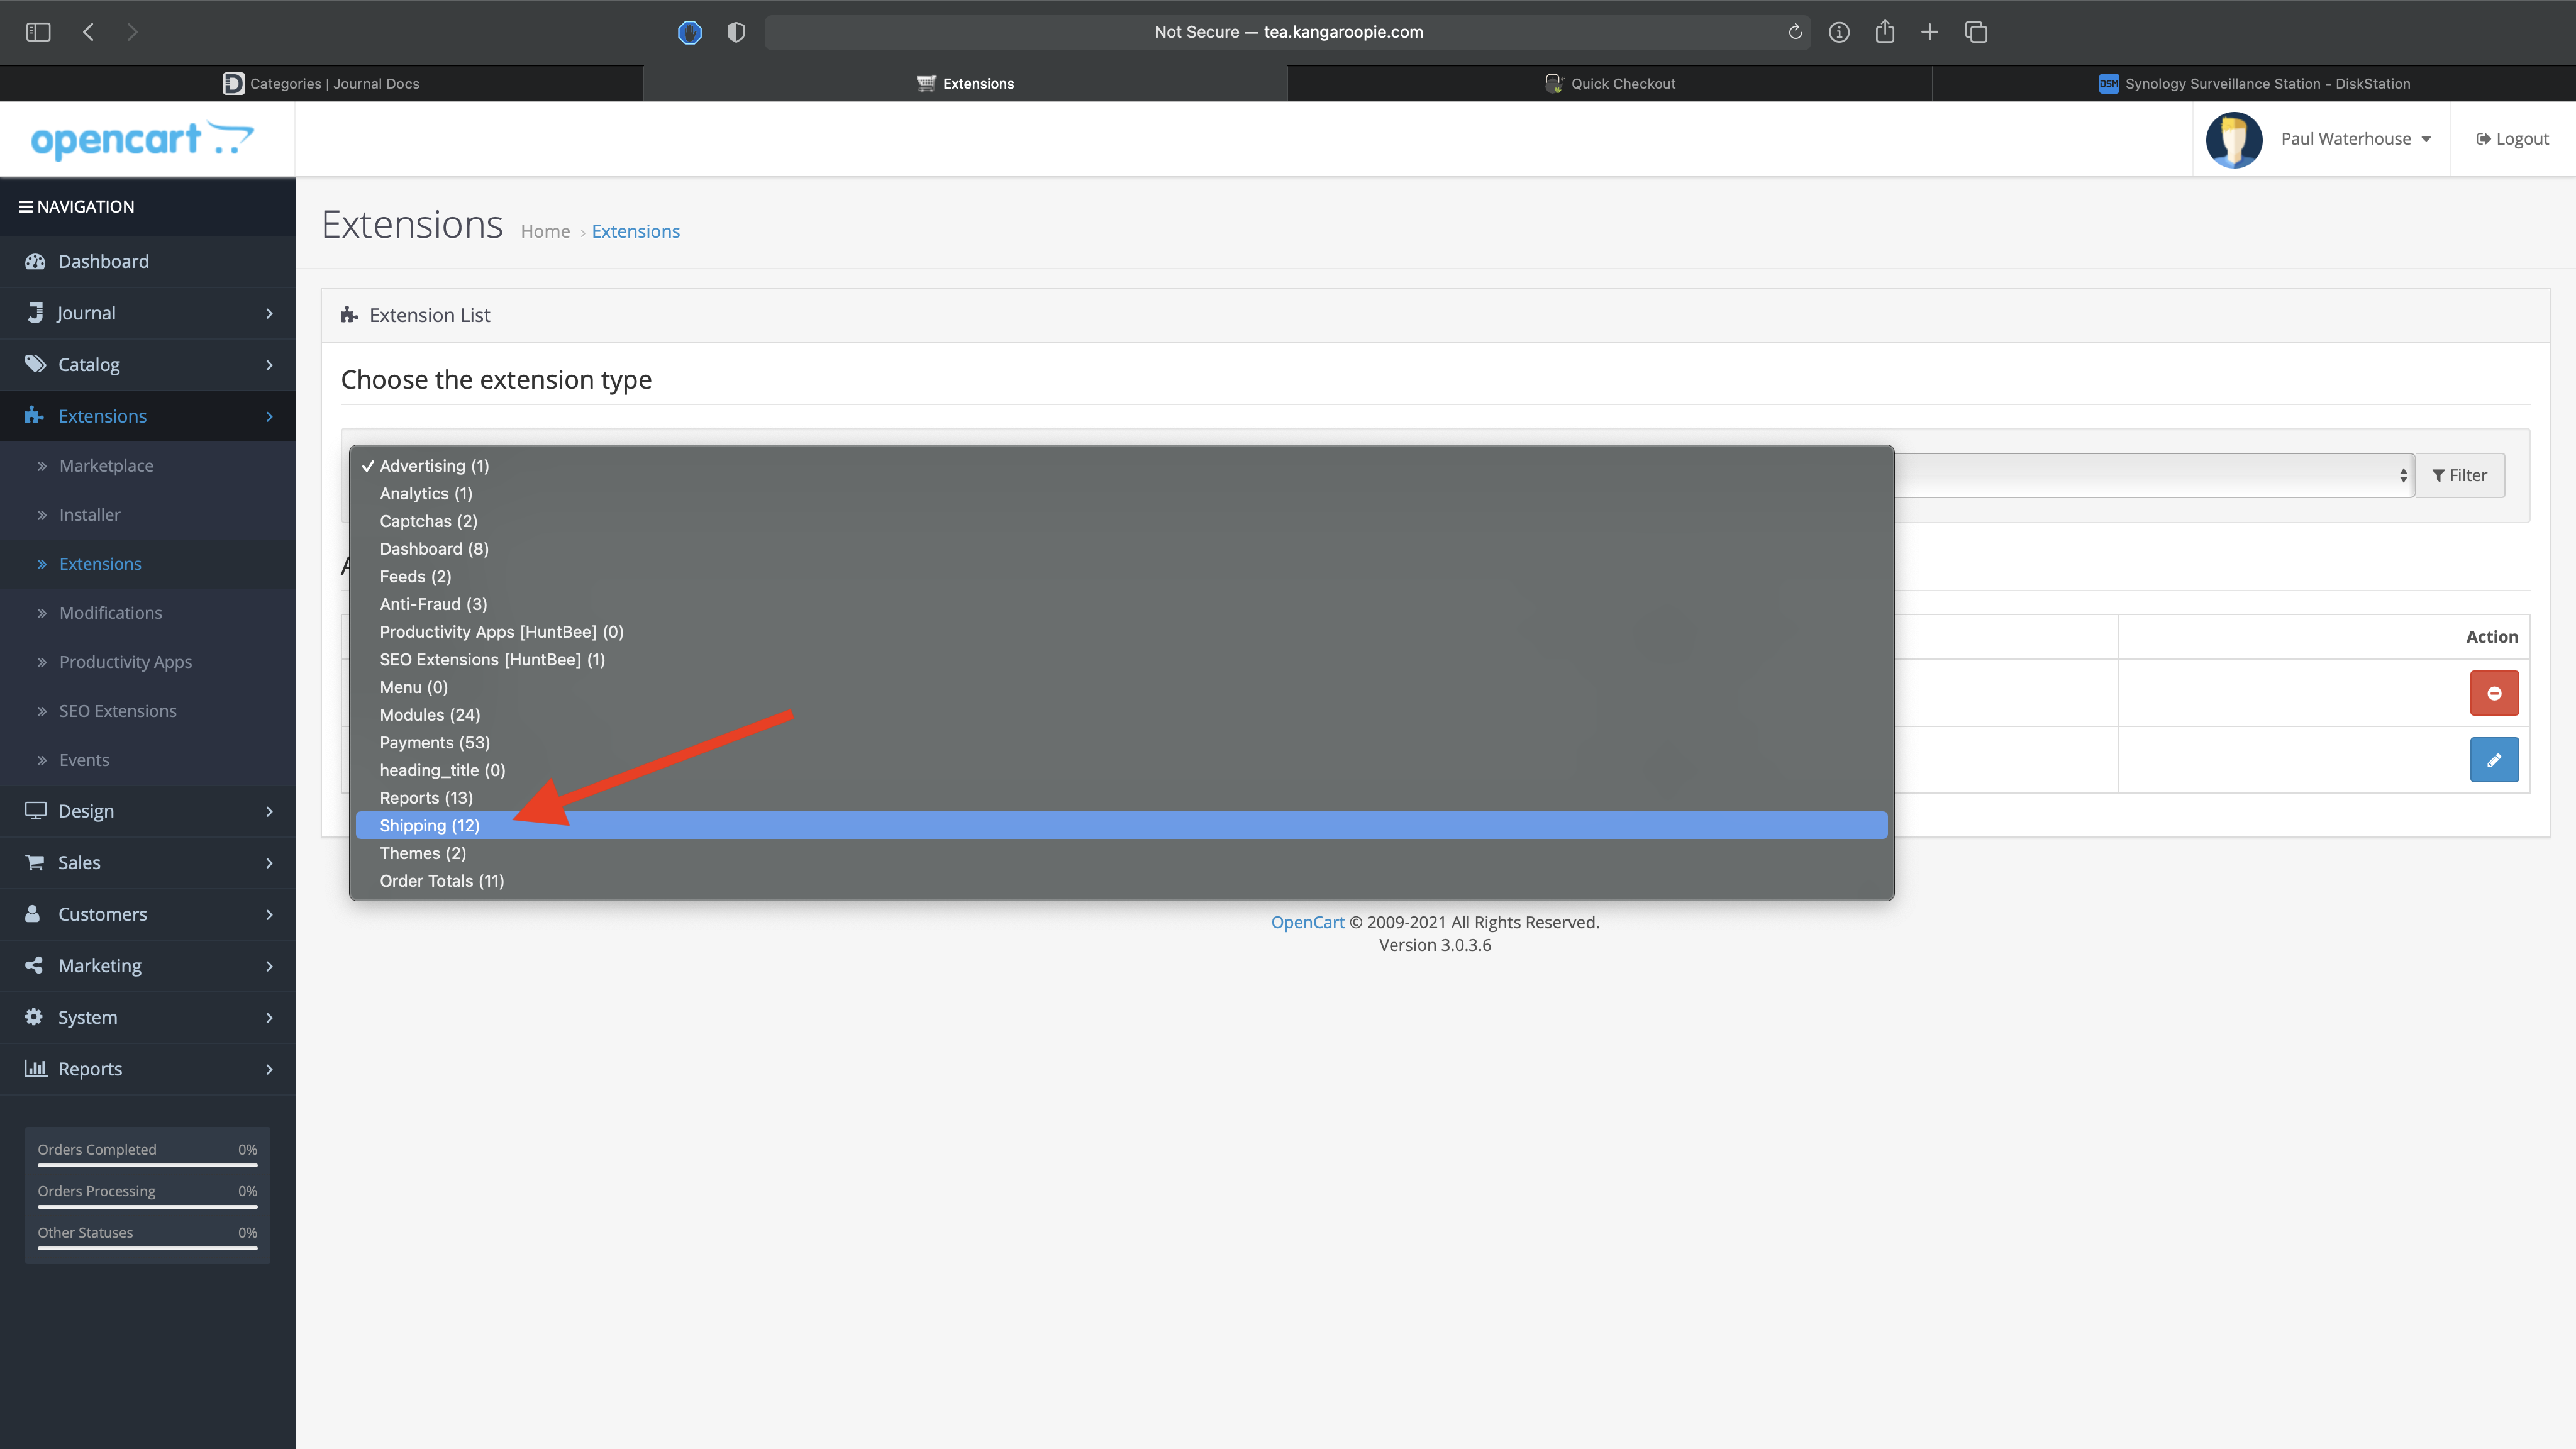
3. You'll then see a list of the delivery types. Click the edit button for whichever delivery method you want to edit
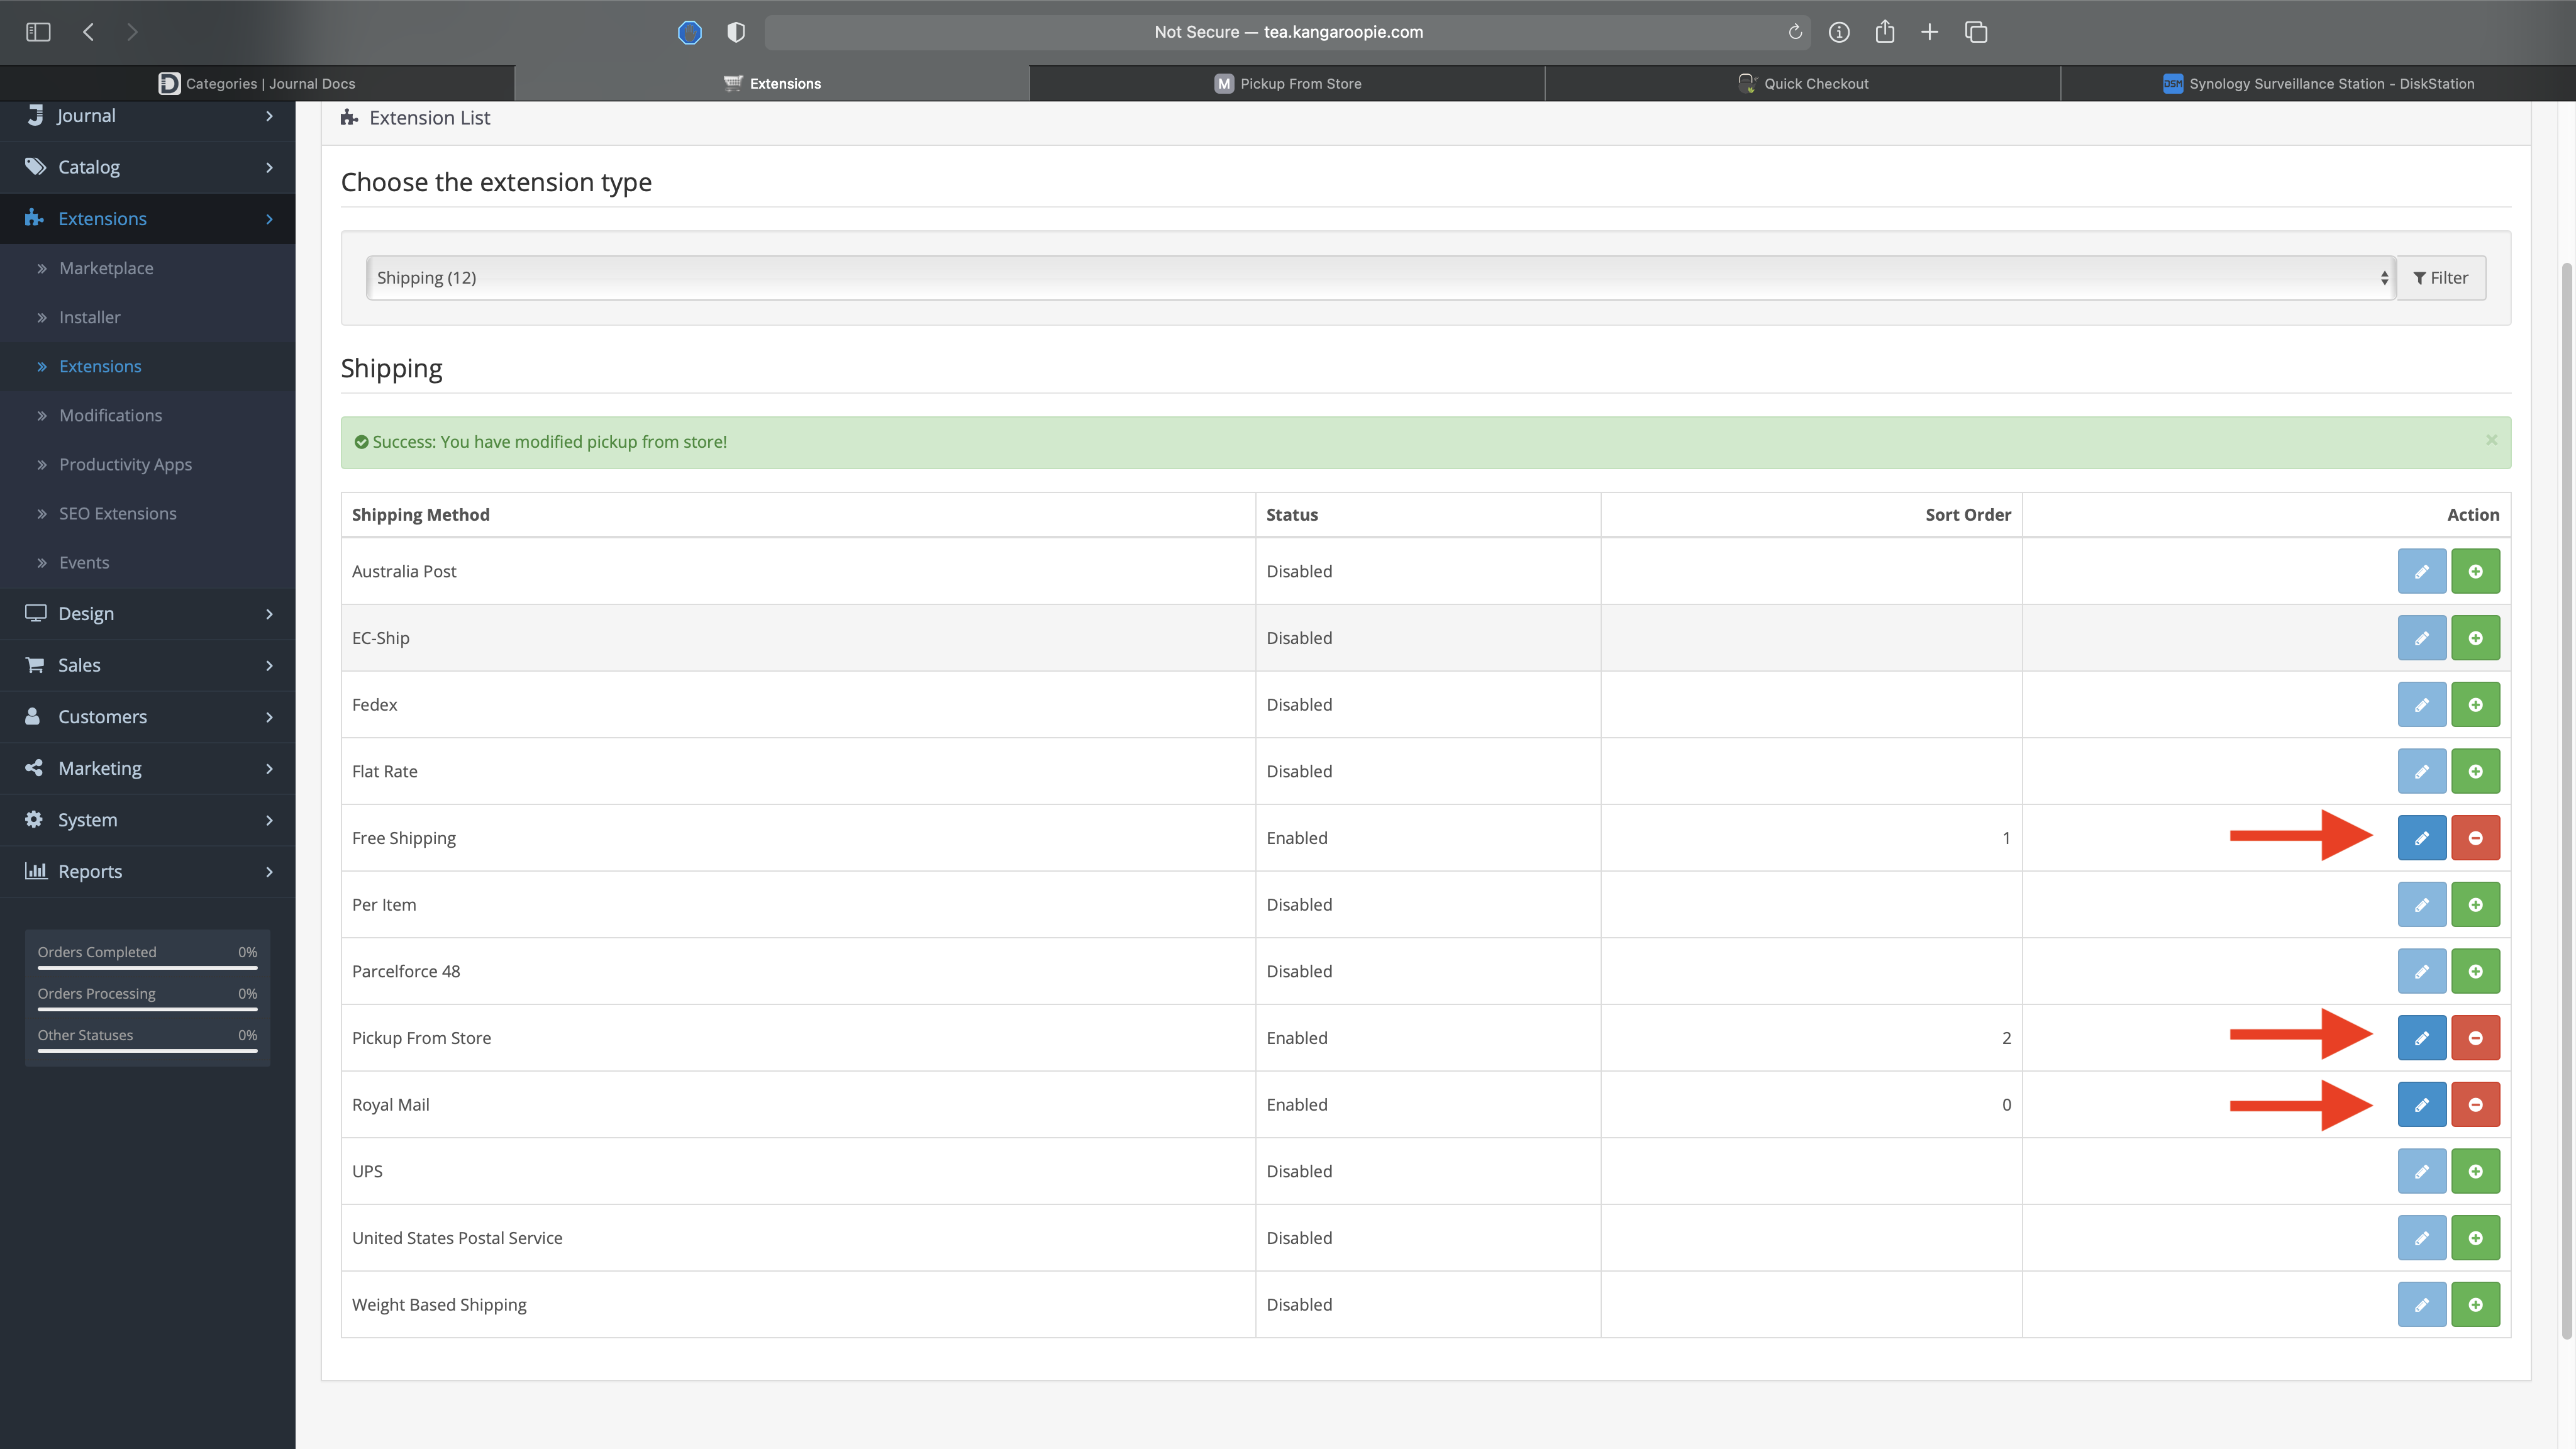
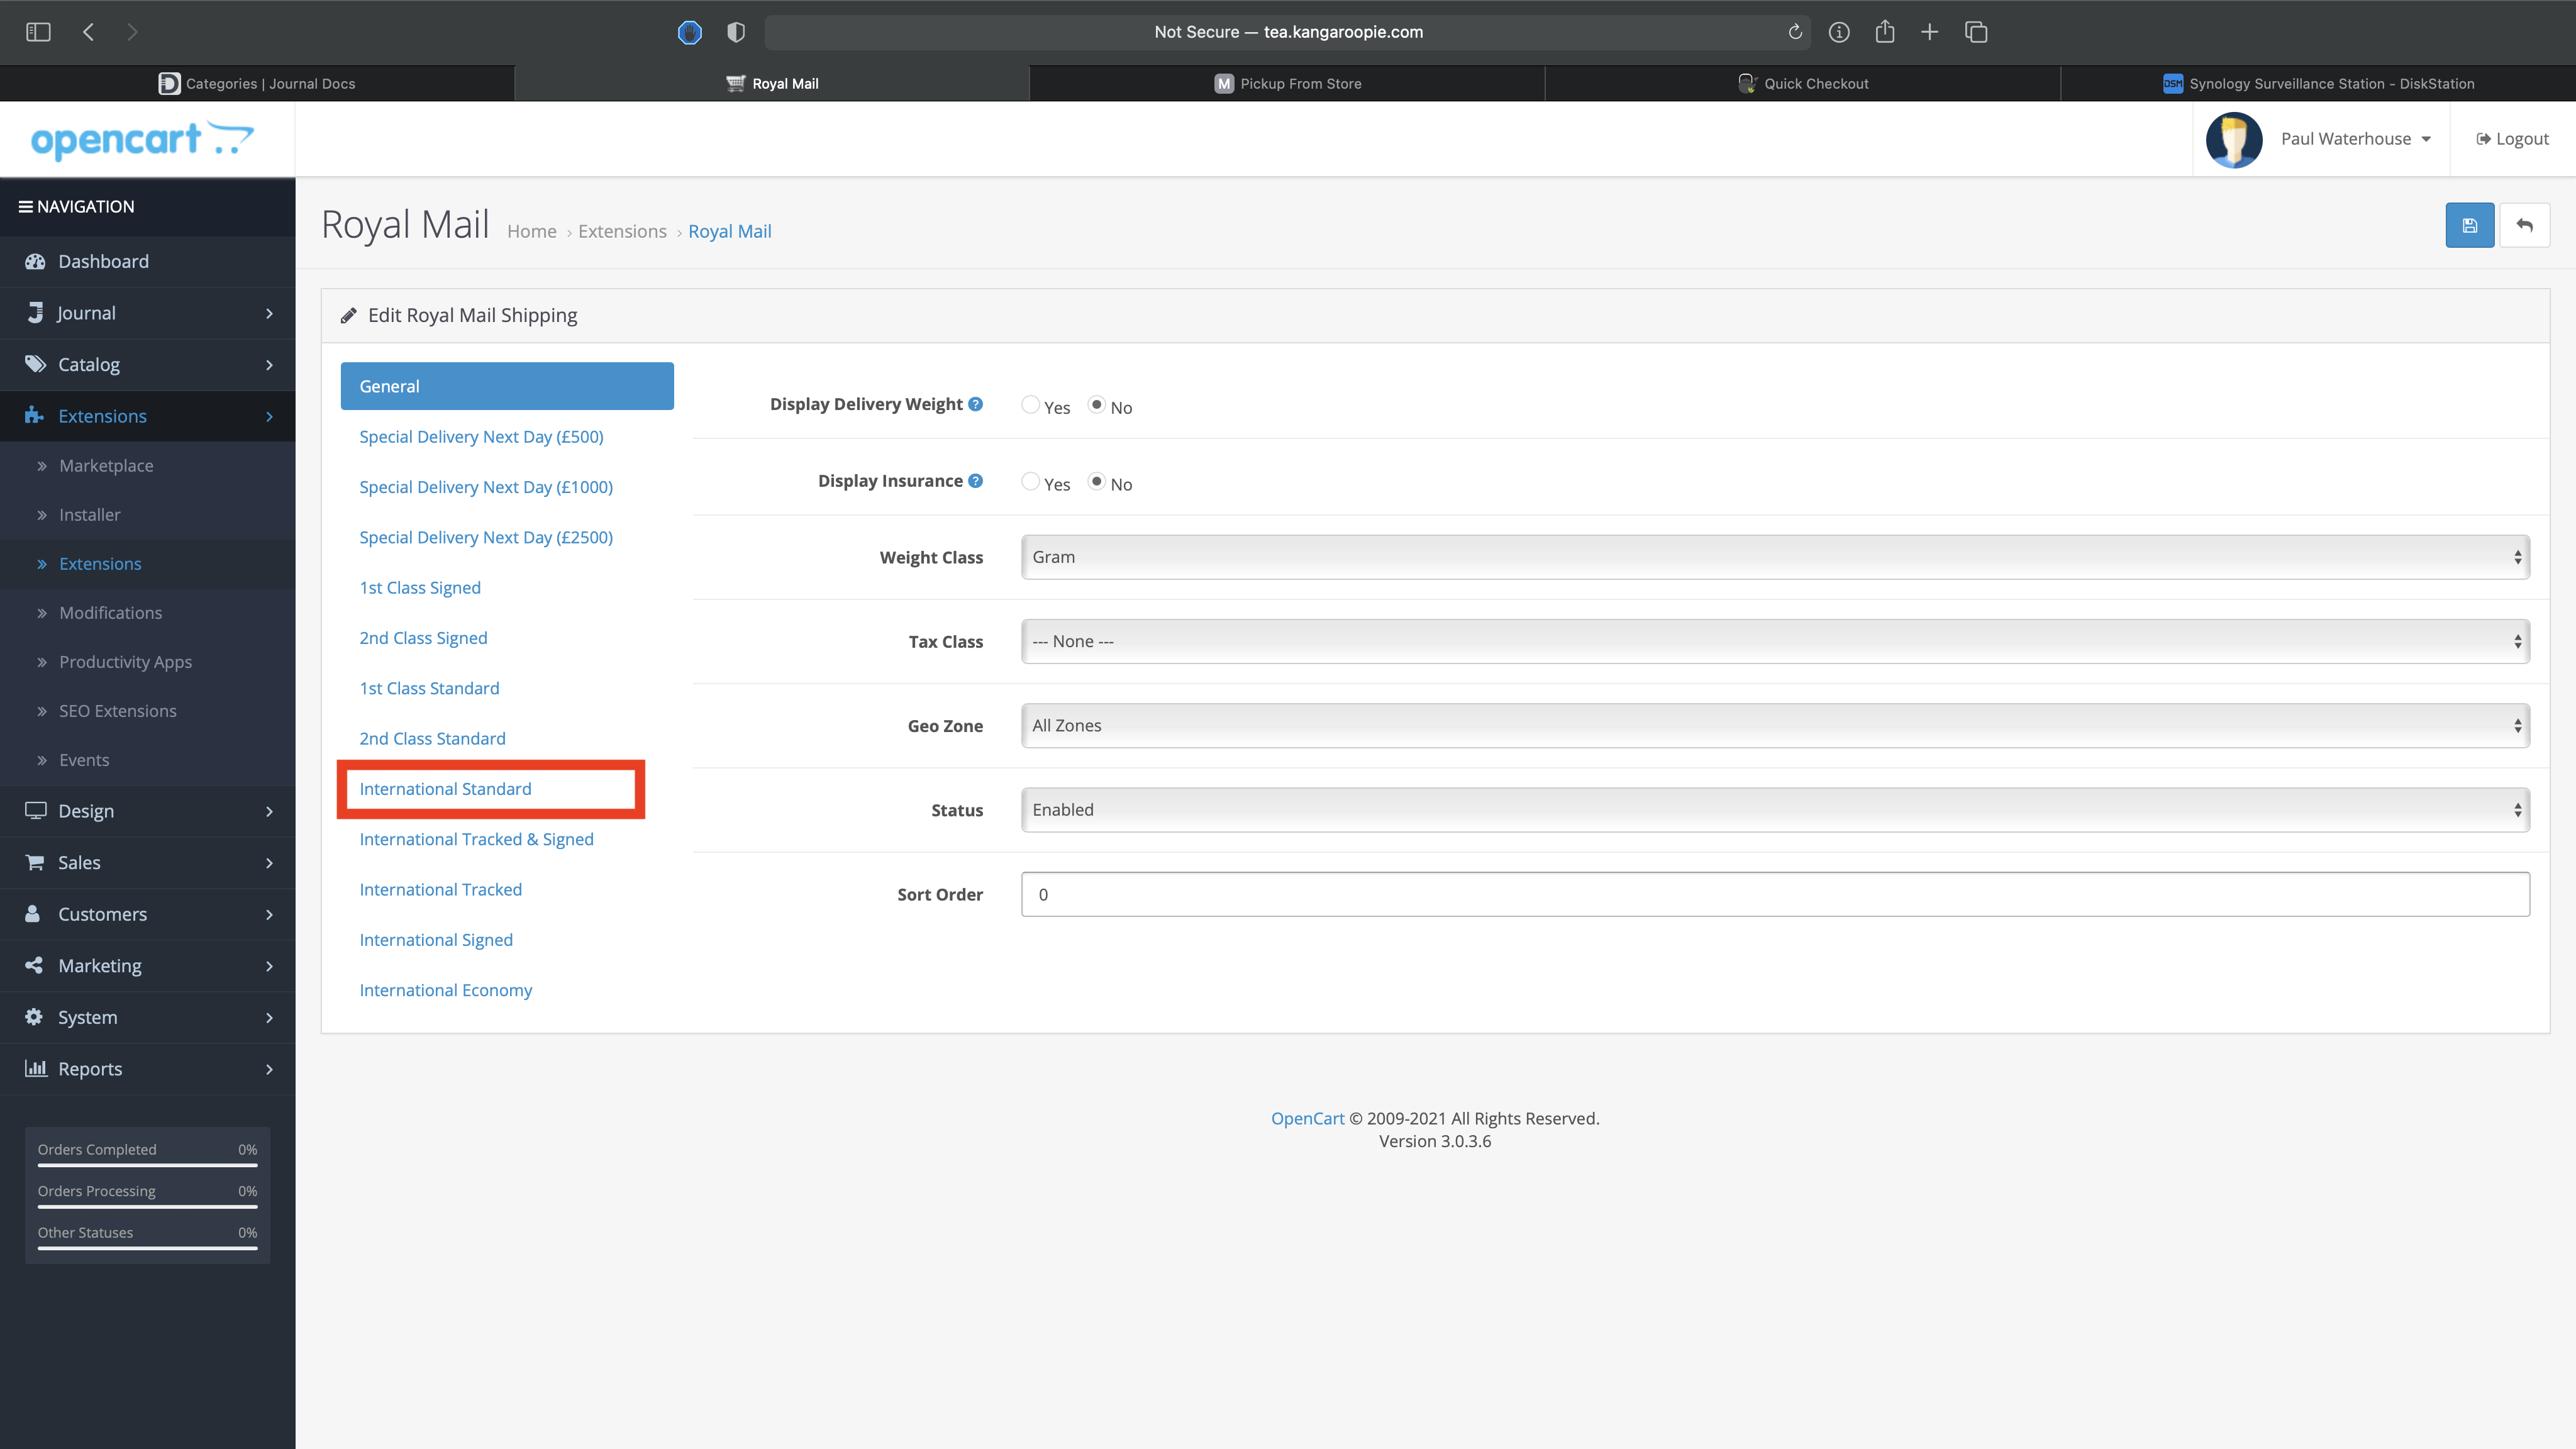
4. It should all look very familiar from here as it's all similar to the previous OpenCart version. The only difference I can see is that Airmail is now called Internal Standard
Back to the Menu
Editing Order Email Templates
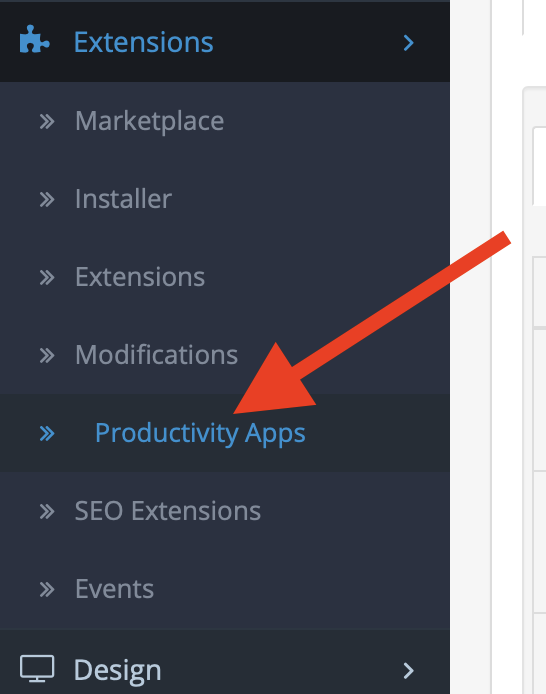
1. In the Admin click on Extensions > Productivity Apps
2. Then click the button to edit the order status email templates

3. Next click on the Templates tab
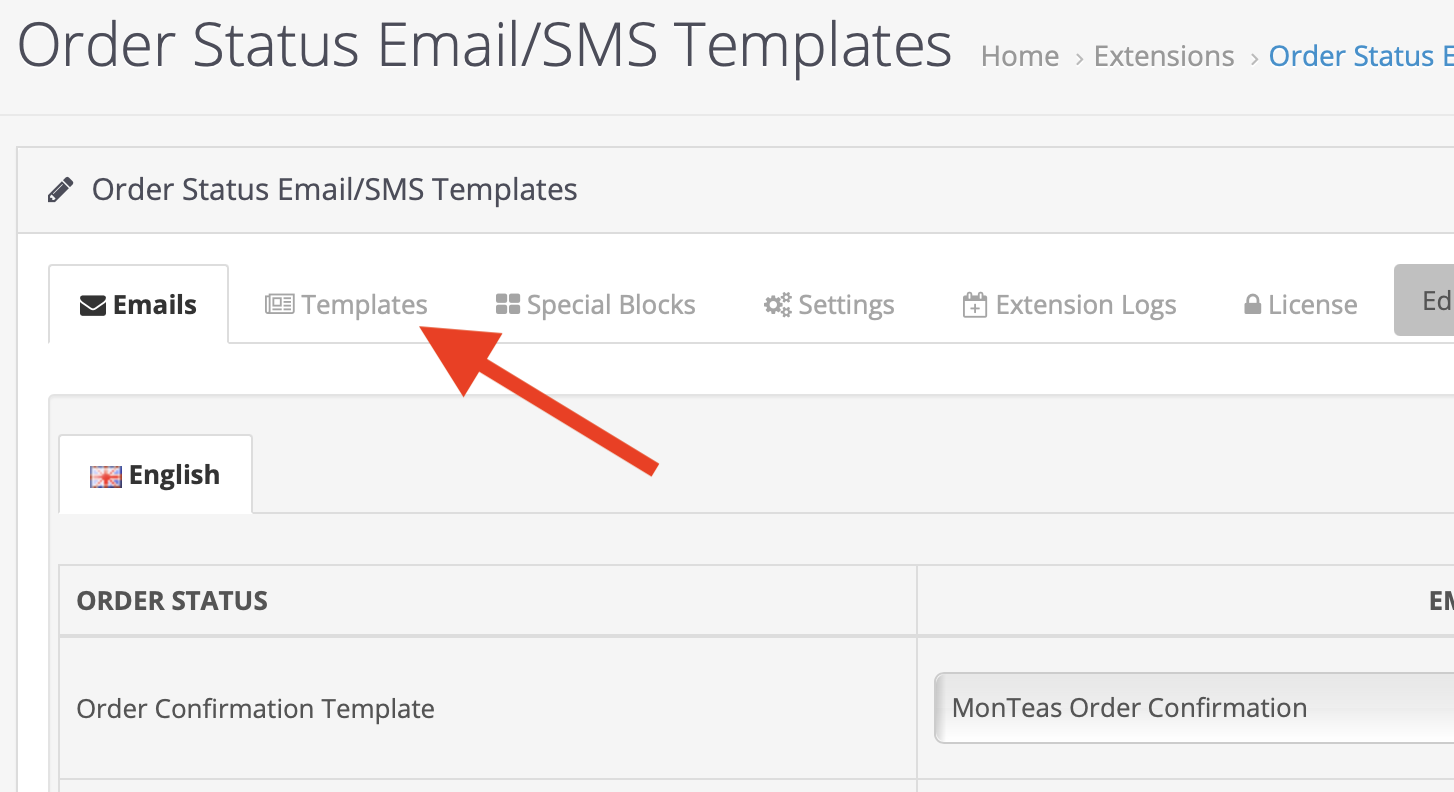
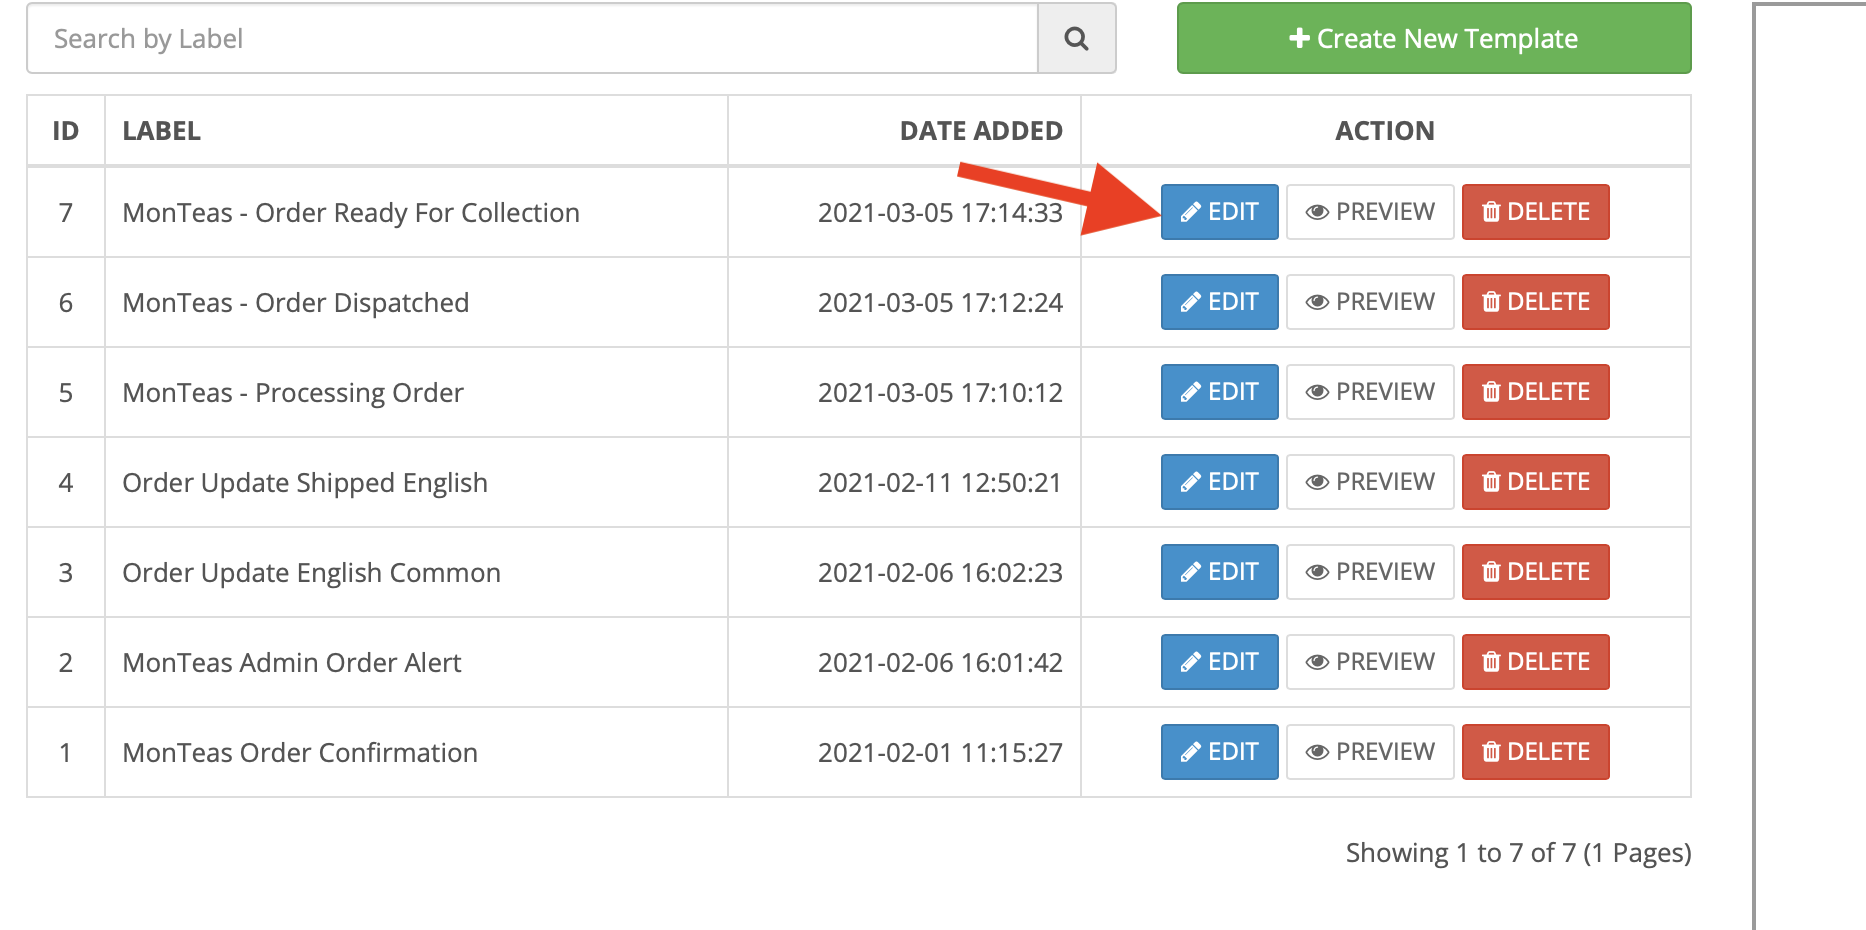
4. And then click the edit button of the template that you wish to edit, in this case “Order Ready for Collection”
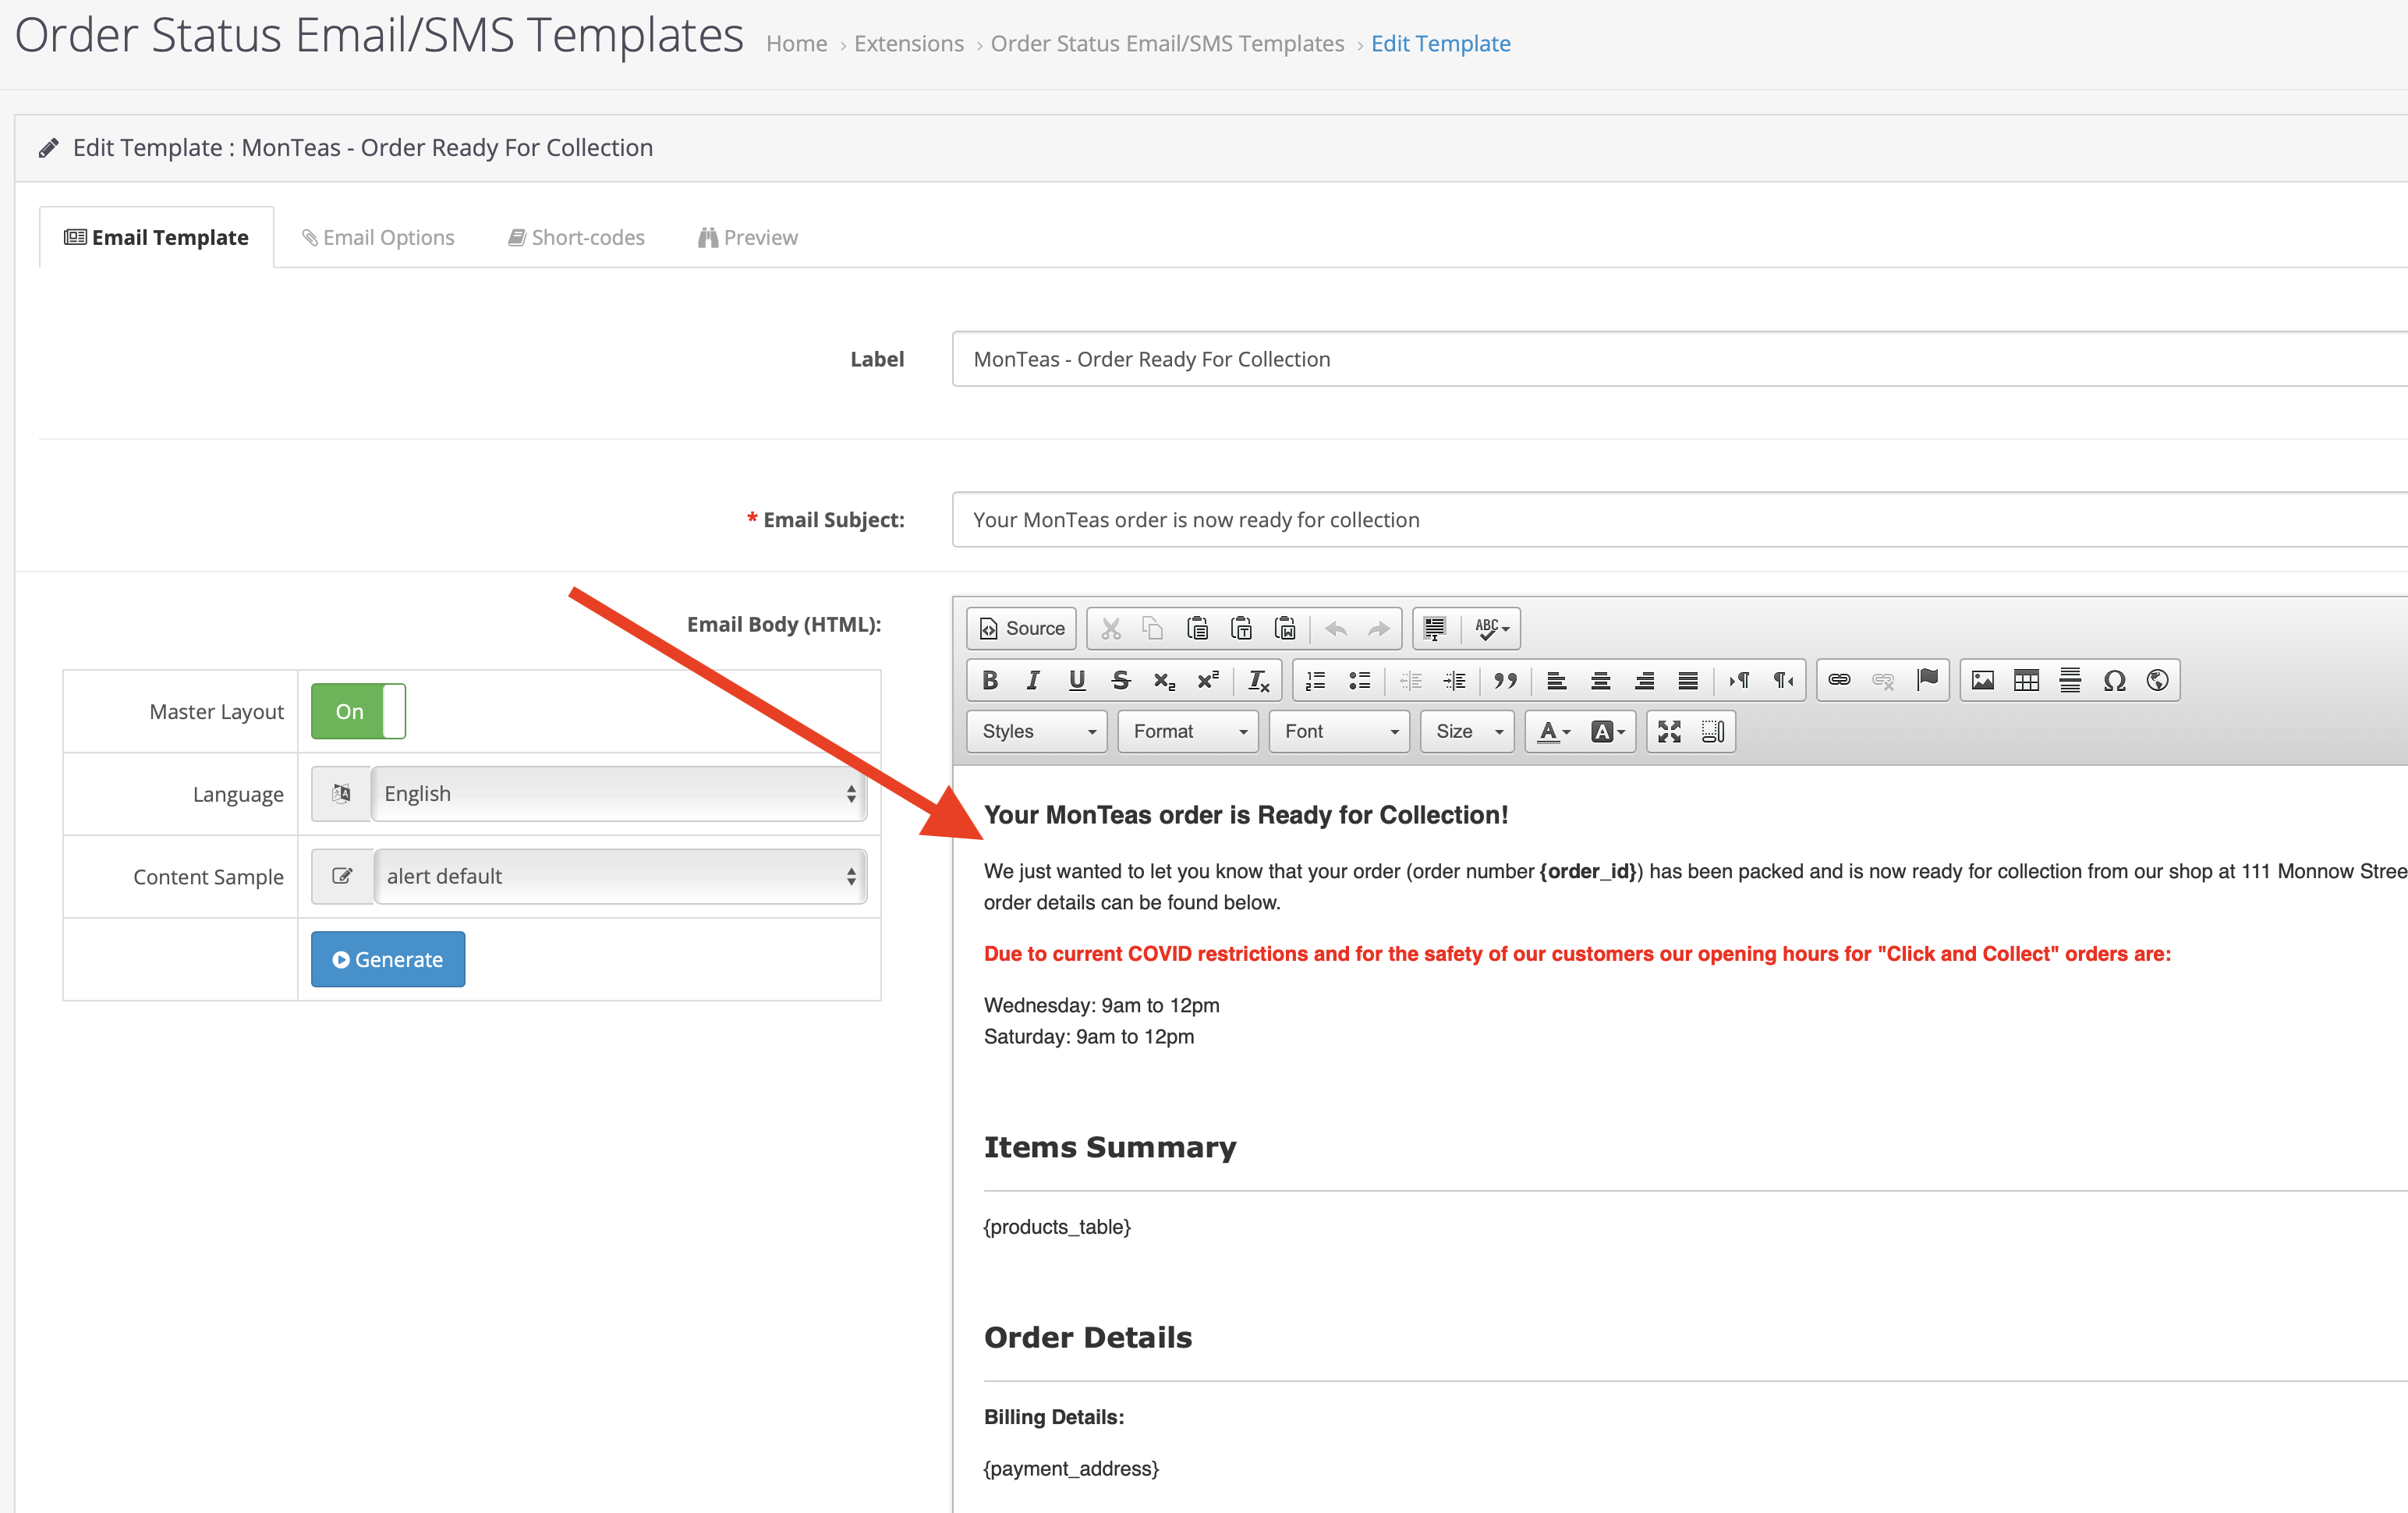
5. The main text of the email is in the text editor section, edit as you like but try not to change the fonts etc too much or it’ll end up looking like a dog's dinner”
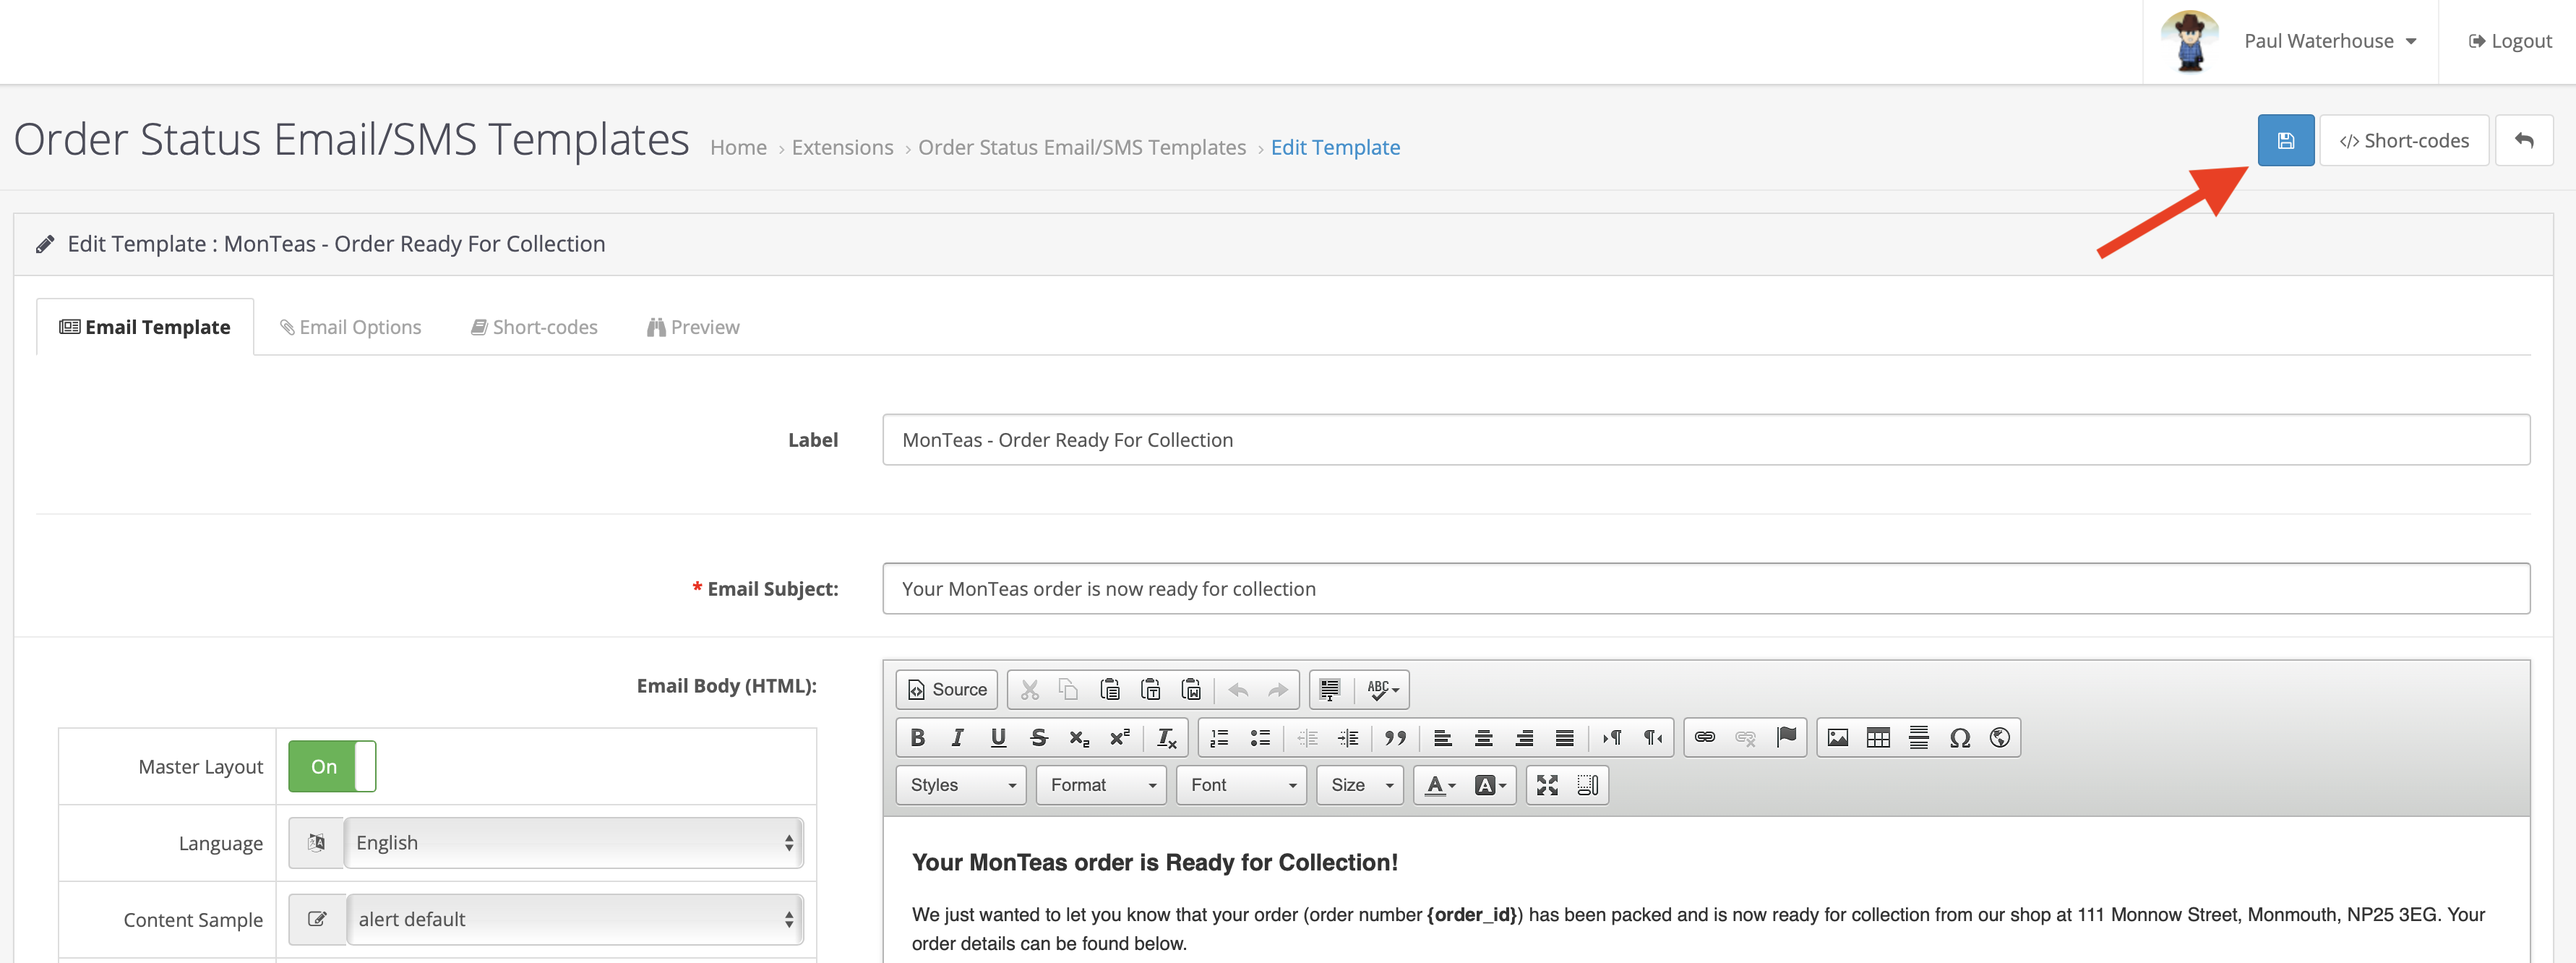
6. And then when you’ve made the changes click the Save button
Back to the Menu